1. الإعداد والتجميع
This section guides you through the initial setup and assembly of your iScooter DX5 Electric Scooter. Ensure all components are present and undamaged before proceeding.
1.1 فتح العلبة وتحديد المكونات
Carefully remove all items from the packaging. Lay them out and identify each component using the provided parts list in your physical manual. Keep the packaging for future transport or storage.

Image: All components of the iScooter DX5 Electric Scooter laid out on the floor, ready for assembly.
1.2 تركيب المقود
- Attach the handlebar stem to the fork using the provided bolts and Allen wrench. Ensure it is securely tightened.
- Connect the electrical cables from the handlebar to the main body. Secure any loose cables with zip ties.
Video: Detailed installation guide for the iScooter DX5 Adults Electric Scooter with Seat, demonstrating handlebar attachment, brake lever setup, and mirror installation.
1.3 Brake Lever and Mirror Installation
- Mount the brake levers onto the handlebar. Tighten the bolts using the appropriate tool.
- برغي الجزء الخلفيview mirrors into their designated slots on the handlebar. Adjust for optimal visibility.
1.4 تركيب المصابيح الأمامية
- Attach the headlight to the front fork using the provided screws.
- Connect the headlight's electrical cable to the corresponding connector.
1.5 Front Fender and Reflector Installation
- Secure the front fender to the fork using the provided hardware.
- Attach the reflectors to the sides of the front fork.
- Ensure the brake cable is routed correctly inside the fender stay.
1.6 Rear Shock Absorber Adjustment
Adjust the rear shock absorbers to your preferred stiffness using the provided wrench. Ensure both sides are adjusted evenly.
1.7 تركيب العجلات الأمامية
- Separate the brake pads to create enough space for the brake rotor.
- Tilt the wheel to help the brake rotor slide easily between the brake pads.
- Insert the axle through the front wheel and fork. Secure with the nuts.
1.8 Footrest Installation
- Attach the footrests to the side of the scooter frame using the provided screws.
- Ensure they are securely fastened and can fold/unfold smoothly.
1.9 تركيب المقعد
- Place the seat onto the designated mounting points on the rear rack.
- Secure the seat with the provided bolts and tighten them firmly.
1.10 Front Bag Installation
Attach the scooter bag to the front of the handlebar using the straps. Ensure it is securely fastened and does not obstruct steering or visibility.
2. تعليمات التشغيل
Familiarize yourself with the controls and features before your first ride.
2.1 Powering On/Off and NFC Unlock
- Ensure the battery disconnect switch (located on the side of the scooter) is in the 'ON' position.
- Tap the NFC smart card to the display to unlock and power on the scooter. The display will show 'READY'.
- To power off, tap the NFC card again or hold the power button.

الصورة: أكثر منview of the iScooter DX5 handlebar controls, including the NFC unlock area on the display.
2.2 أوضاع للسرعة
The iScooter DX5 features four speed modes, adjustable via the 'S' button on the handlebar:
- وضع الترس الأول: 15 MPH (Energy-saving mode)
- وضع الترس الثاني: 21 ميلاً في الساعة (التنقل الحضري، سرعة ثابتة)
- وضع الترس الثالث: 28 ميلاً في الساعة (قوة متوازنة، قيادة أسرع)
- وضع الترس الرابع: 35 ميلاً في الساعة (انطلاق توربو، بكامل الطاقة)

Image: The scooter's display showing the different speed modes and their corresponding maximum speeds.
2.3 Lighting and Horn
- المصباح الأمامي: Press the headlight switch to turn on/off the front LED light.
- إشارات الانعطاف: Use the turn signal button to indicate left or right turns.
- أضواء الفرامل: Integrated into the taillight, these automatically illuminate when braking.
- القرن: Press the horn button for an instant alert to pedestrians or traffic.

الصورة: عن قرب view of the iScooter DX5's front headlight, taillight, and integrated turn signals.
2.4 Anti-theft Alarm
The scooter is equipped with a built-in anti-theft alarm. Refer to your physical manual for specific instructions on activating and deactivating the alarm system.
3. الصيانة
تضمن الصيانة الدورية طول عمر جهاز iScooter DX5 الخاص بك وتشغيله بأمان.
3.1 العناية بالإطارات
- Regularly check tire pressure. Maintain recommended PSI for optimal performance and safety.
- افحص الإطارات بحثًا عن التآكل أو الثقوب أو التلف قبل كل رحلة.
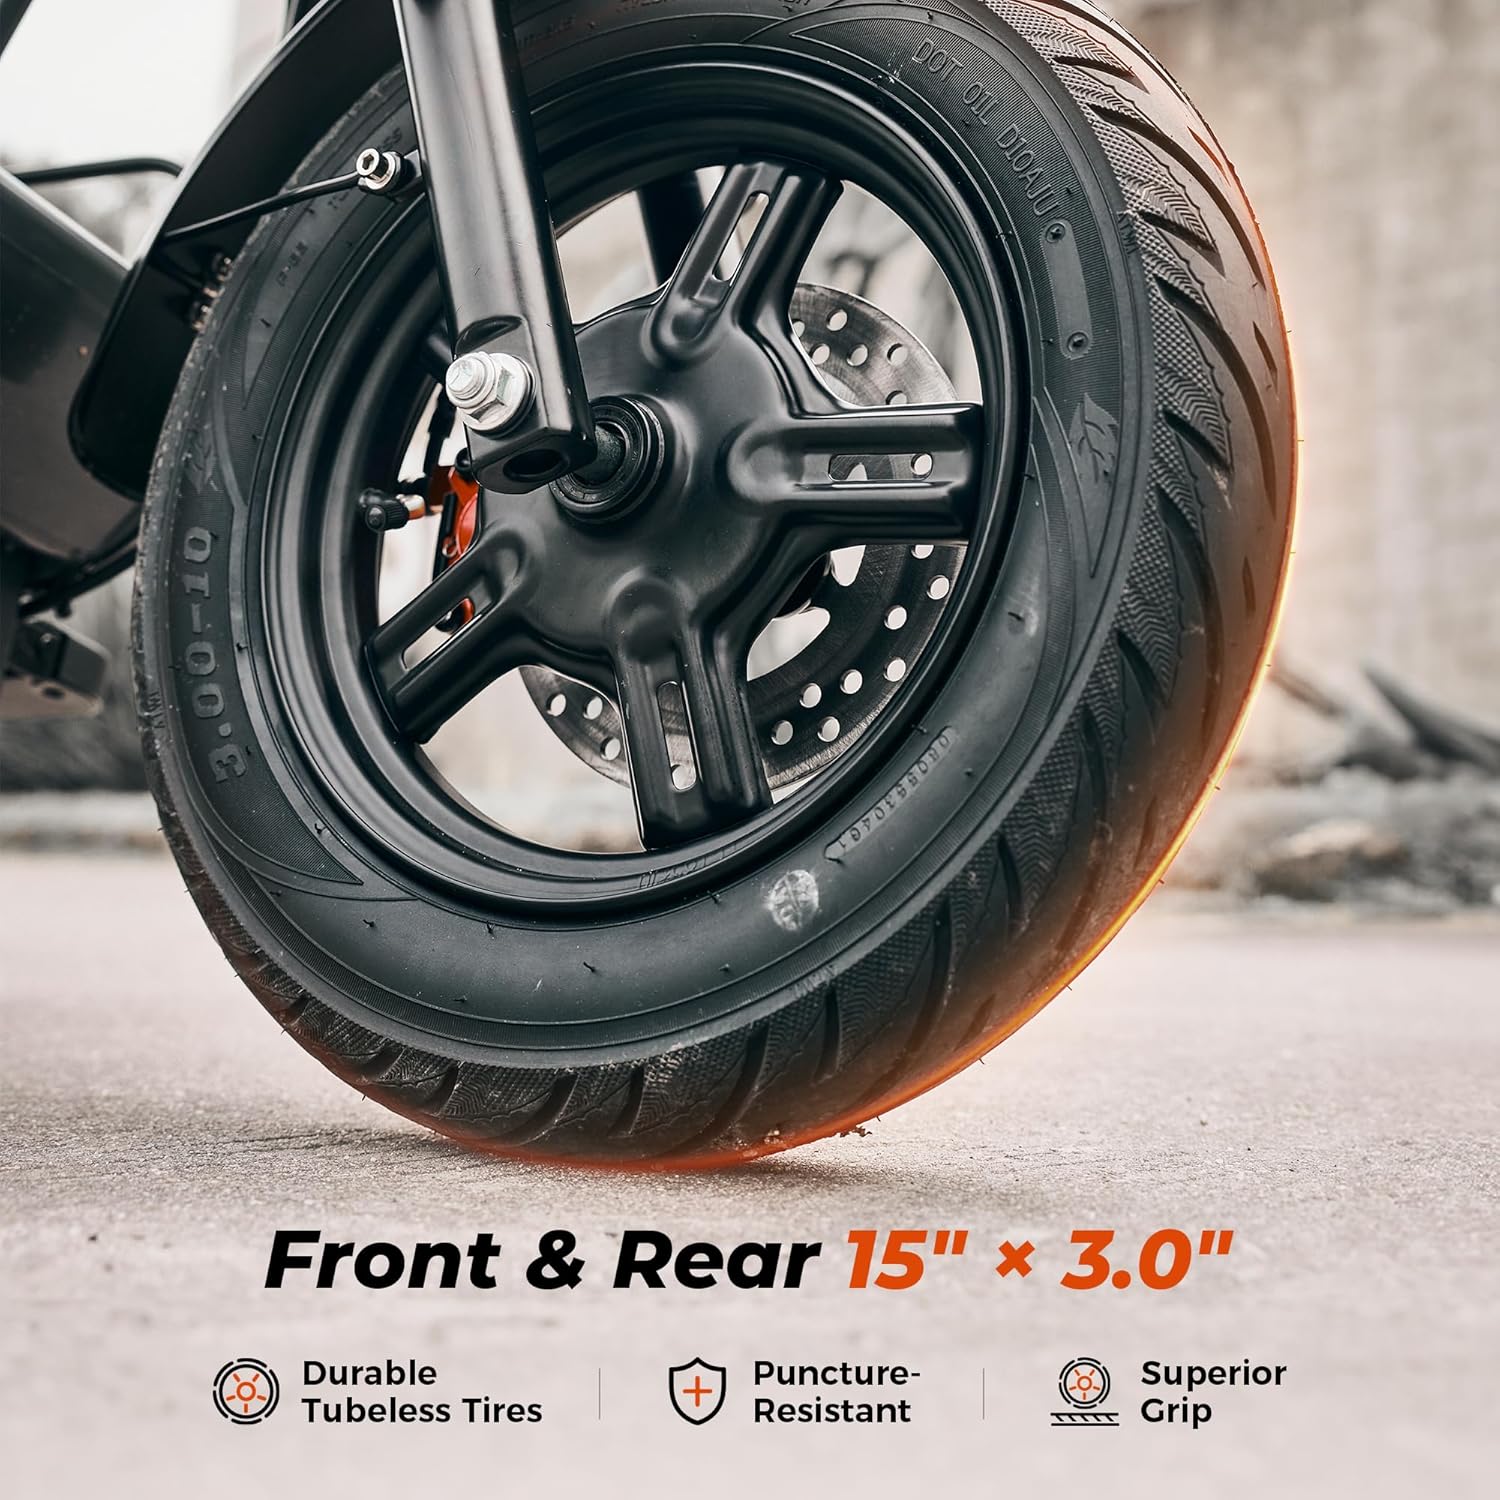
Image: Close-up of the iScooter DX5's durable 15-inch pneumatic tires, highlighting their tread and puncture resistance.
3.2 فحص نظام الفرامل
- Check brake levers for proper function and responsiveness.
- Inspect brake pads and rotors for wear. Replace if necessary.
- Ensure brake fluid levels are adequate for hydraulic disc brakes.

الصورة: مفصلة view of the iScooter DX5's dual hydraulic disc brakes, emphasizing their stopping power and design.
3.3 التنظيف والتخزين
- نظف السكوتر بانتظام باستخدام الإعلانamp cloth. Avoid high-pressure washing.
- قم بتخزين السكوتر في مكان جاف وبارد بعيدًا عن أشعة الشمس المباشرة ودرجات الحرارة القصوى.
3.4 العناية بالبطارية
- تجنب تفريغ البطارية بالكامل. اشحنها بانتظام، حتى لو لم تكن قيد الاستخدام لفترات طويلة.
- Use only the official iScooter charger.
4 عملية الشحن
Proper charging procedures are essential for battery health and safety.
4.1 عملية الشحن
- Ensure the scooter is powered off and the battery disconnect switch is in the 'OFF' position before charging.
- حدد موقع منفذ الشحن على جانب السكوتر.
- Connect the charger to a power outlet, then connect the charging cable to the scooter's charging port.
- يتحول ضوء مؤشر الشاحن عادةً إلى اللون الأحمر أثناء الشحن وإلى اللون الأخضر عند الشحن الكامل.
- افصل الشاحن بمجرد اكتمال الشحن.

Image: The iScooter DX5's 48V 15.6Ah battery, illustrating its capacity and charging time.
5. استكشاف الأخطاء وإصلاحها
This section provides solutions to common issues you might encounter with your iScooter DX5.
5.1 السكوتر لا يعمل
- Check if the battery disconnect switch is in the 'ON' position.
- تأكد من شحن البطارية. قم بتوصيل الشاحن وتحقق من ضوء المؤشر.
- Verify that the NFC card is correctly tapped to the display.
5.2 Reduced Range or Power
- Check tire pressure; underinflated tires can reduce efficiency.
- Ensure the battery is fully charged. Battery performance can decrease in cold weather.
- Riding conditions (e.g., uphill, heavy load, aggressive acceleration) can affect range.
5.3 Braking Issues
- افحص وسادات الفرامل للتأكد من عدم وجود تآكل، واستبدلها إذا لزم الأمر.
- Check brake fluid levels for hydraulic brakes.
- Ensure brake cables are properly adjusted and free from obstruction.
5.4 ضوضاء غير عادية
- Inspect all visible bolts and connections for tightness.
- Check for any foreign objects caught in the wheels or motor.
- إذا استمرت الضوضاء، فاتصل بدعم العملاء.
6. المواصفات
Detailed technical specifications for the iScooter DX5 Electric Scooter.
| ميزة | مواصفة |
|---|---|
| ماركة | ايسكوتر |
| اسم الموديل | دي اكس 5 |
| المحرك | 1500W (Peak) Brushless Motor |
| بطارية | بطارية ليثيوم 48 فولت 15.6 أمبير/ساعة (748.8 واط/ساعة) |
| السرعة القصوى | 35 ميل في الساعة |
| أقصى مدى | 38-45 Miles (depending on conditions) |
| الإطارات | إطارات دراجات نارية كهربائية تعمل بالهواء المضغوط مقاس 15 بوصة × 3.0 بوصة |
| الفرامل | مكابح قرصية هيدروليكية مزدوجة |
| تعليق | نظام تعليق هيدروليكي أمامي ونظام تعليق هوائي خلفي |
| الحد الأقصى لسعة التحميل | 330 رطل |
| أبعاد المنتج | 58.27 بوصة طول × 26.8 بوصة عرض × 55.1 بوصة ارتفاع |
| وزن العنصر | 100 رطل |
| تصنيف مقاومة الماء | IPX4 |
| المكونات المضمنة | Electric Scooter, Scooter Bag |
7. الضمان والدعم
Your iScooter DX5 Electric Scooter comes with a limited warranty. For specific details regarding warranty periods for different parts, please refer to the warranty information provided with your product packaging or contact iScooter customer support.
7.1 دعم العملاء
For any questions, technical assistance, or warranty claims, please contact iScooter Customer Support. You can typically find contact information on the manufacturer's webالموقع أو في وثائق المنتج الخاص بك.
بائع: مركز آي سكوتر
وصف الضمان: We offer a 360-day or 180-day warranty on different parts.


