1. المقدمة
This manual provides essential information for the safe installation, operation, and maintenance of your PowMr Hybrid Solar Inverter 12000W. Please read this manual thoroughly before installation and operation to ensure optimal performance and safety. Keep this manual for future reference.
2. معلومات السلامة
WARNING: This inverter generates high voltage. Installation and maintenance must be performed by qualified personnel only. Failure to follow these instructions may result in serious injury or death.
- لا تحاول تفكيك أو إصلاح العاكس بنفسك. اتصل بفنيي الصيانة المؤهلين.
- Ensure all wiring is correctly sized and installed according to local and national electrical codes.
- Disconnect all power sources (PV, battery, AC input) before performing any maintenance or wiring.
- Install the inverter in a well-ventilated, dry, and cool environment, away from flammable materials.
- تأكد من التأريض الصحيح للعاكس.
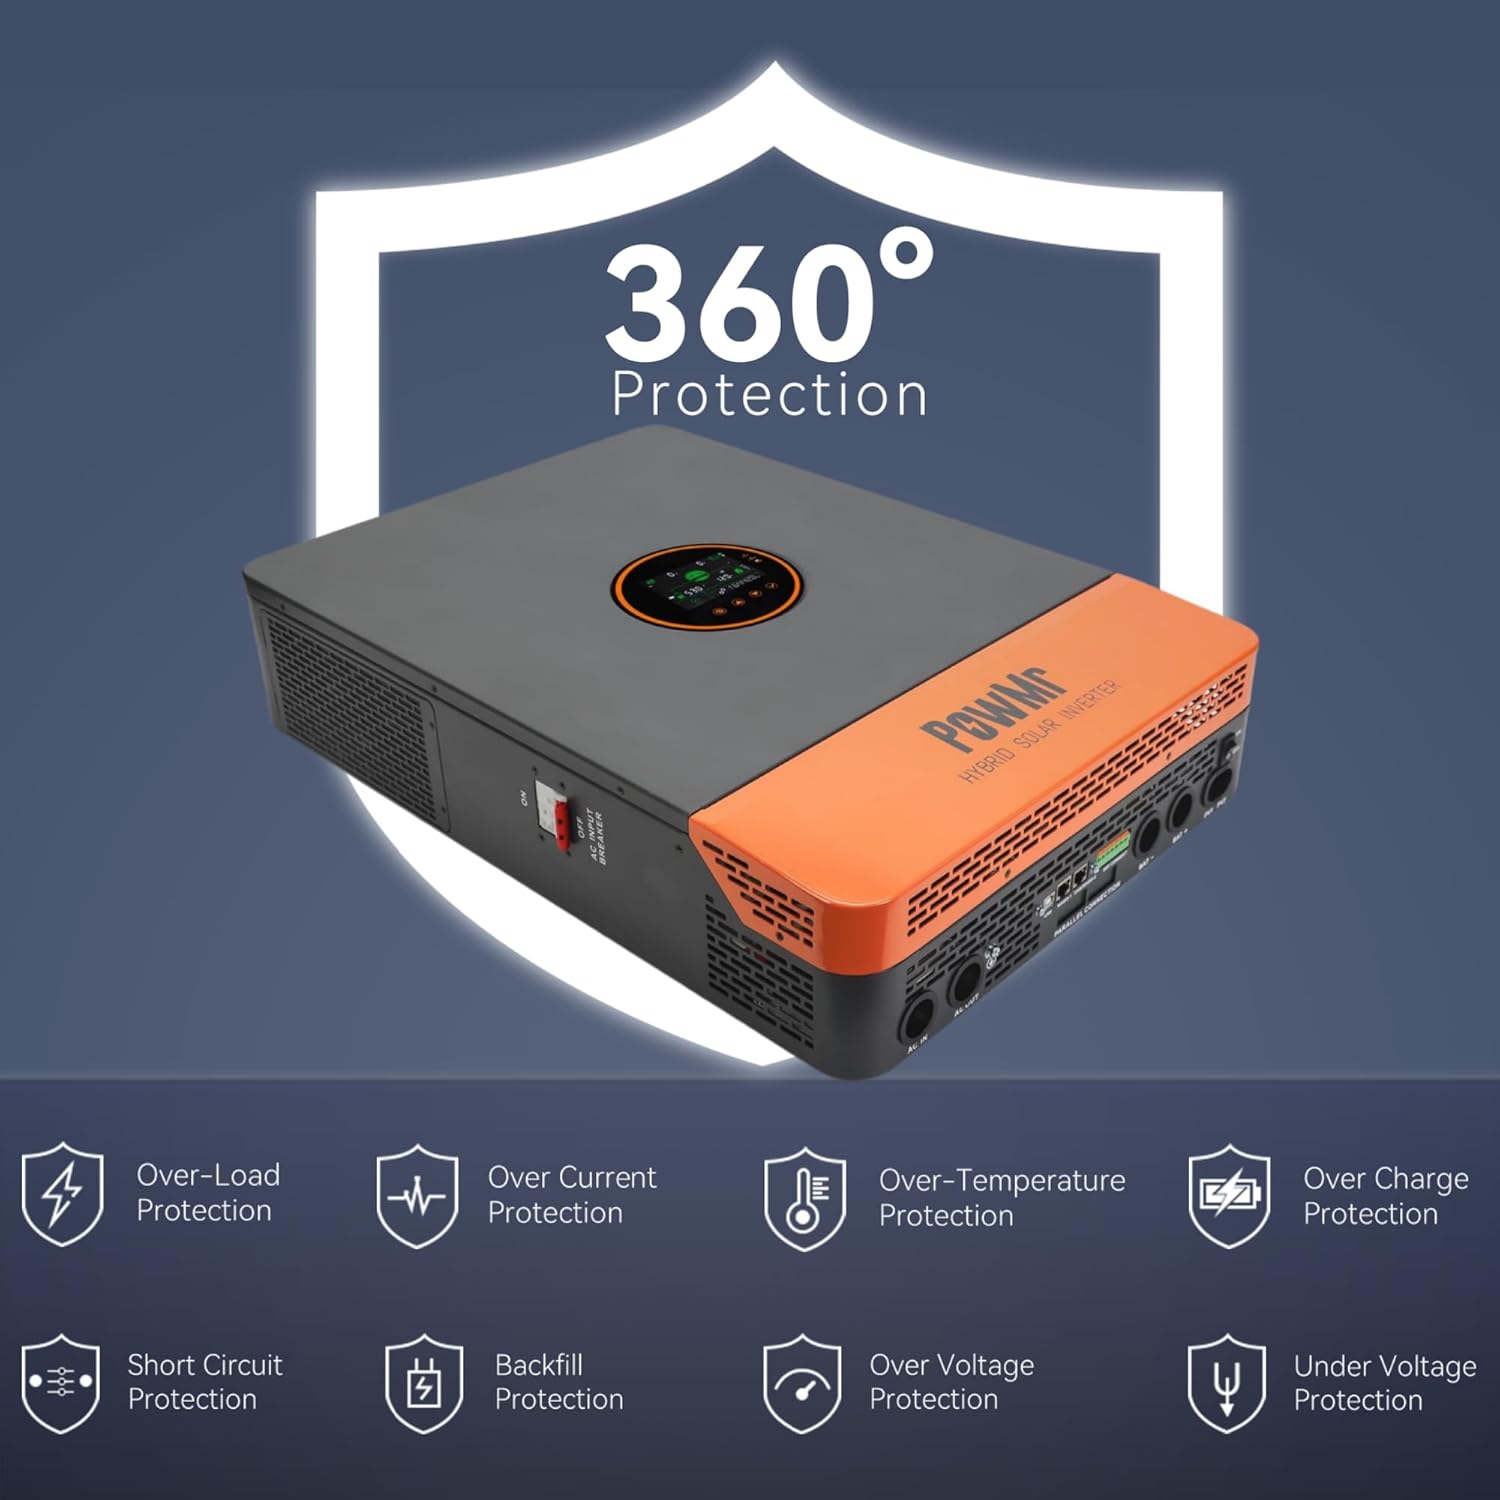
Figure 2.1: The inverter features comprehensive protection against over/under voltage, overload, short circuit, over-temperature, and anti-backfeed.
3. انتهى المنتجview
3.1 الميزات الرئيسية
- الإخراج: 12000W continuous (24000W peak), 120/240Vac split-phase output.
- المدخلات الكهروضوئية: Maximum 6600W PV input power, 500V DC maximum, 22A. PV starting voltage: ≥150V.
- MPPT Charger: Dual 100A MPPT chargers, max 200A charge current.
- توافق البطارية: Supports 48V Li-ion, Lead-Acid, and user-defined battery types.
- Battery-Less Mode: Capable of powering loads directly from PV/AC without a battery connected.
- التشغيل المتوازي: Supports up to 6 units in parallel for increased power output.
- يراقب: Large LCD display, dynamic flow diagrams, and optional WiFi for remote monitoring via mobile app.
- منافذ الاتصالات: RS485, CAN, USB interfaces for integration with battery BMS, generator ATS, and smart home systems.

الشكل 3.1: انتهىview of the 12KW Split-Phase Hybrid Solar Inverter's main features and capabilities.
3.2 Product Appearance and Components
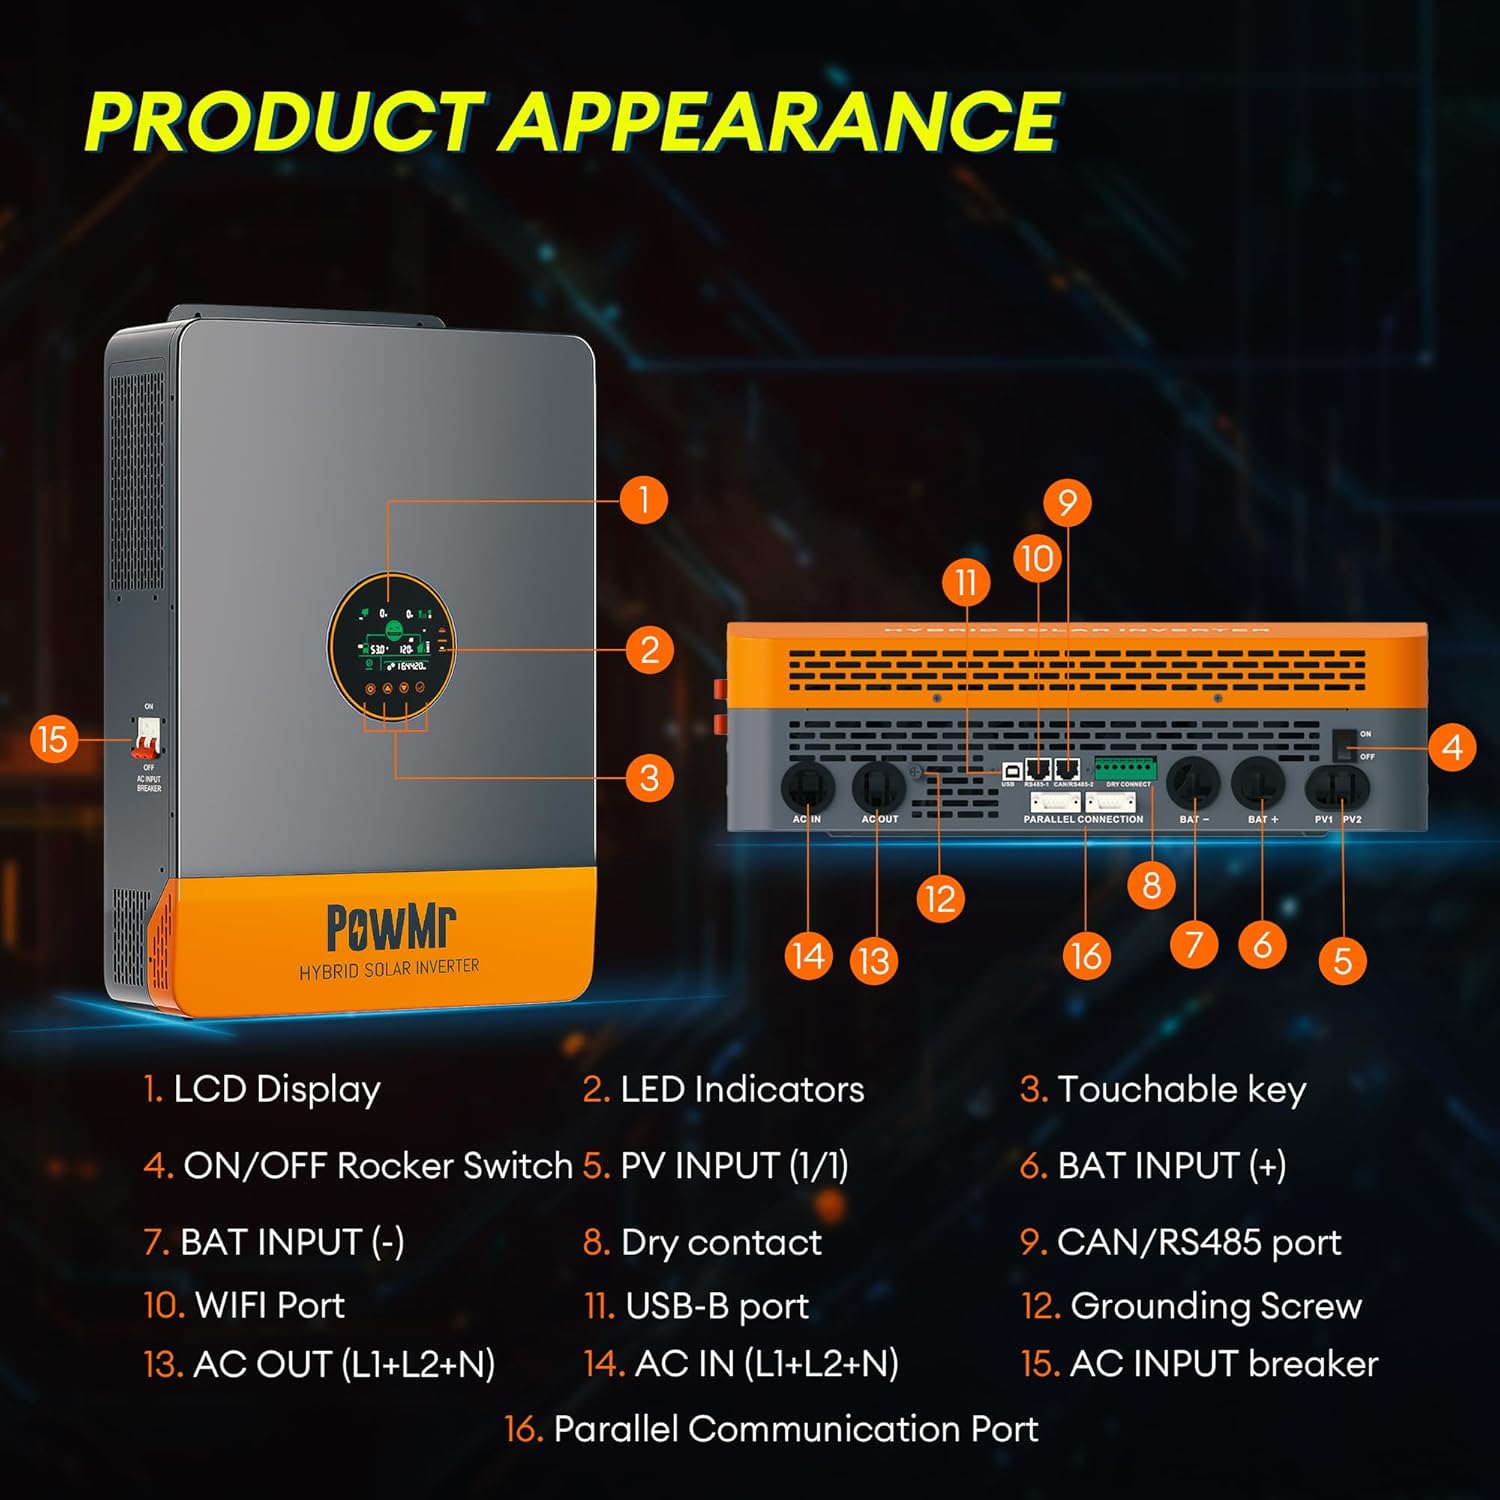
الشكل 3.2: الأمامي والجانبي view مكونات العاكس مع وضع علامات عليها.
- شاشة LCD
- مؤشرات LED
- Touchable Key
- ON / OFF الروك التبديل
- المدخلات الكهروضوئية (1/1)
- مدخلات الخفافيش (+)
- مدخلات الخفافيش (-)
- الاتصال الجاف
- CAN/RS485 Port
- منفذ واي فاي
- منفذ USB-B
- برغي التأريض
- AC OUT (L1+L2+N)
- AC IN (L1+L2+N)
- AC INPUT Breaker
- منفذ الاتصالات الموازية
4. الإعداد والتثبيت
4.1 فك العبوة والتفتيش
Upon receiving the inverter, carefully unpack it and inspect for any shipping damage. Ensure all components listed in the package contents are present:
- Solar inverter unit
- كابل اتصال متوازي
- 2 × battery terminal lugs
- 2 × مسامير M5
- دليل المستخدم
Note: WiFi module, batteries, adapters, solar/battery wires/cables are excluded and require additional purchase if needed.
4.2 تركيب العاكس
The inverter is designed for indoor (IP20) installation. Choose a mounting location that is:
- Vertical, on a solid surface capable of supporting the inverter's weight (approximately 27kg / 59.5lbs).
- جيدة التهوية للسماح بتبديد الحرارة.
- Protected from direct sunlight, moisture, and dust.
- يمكن الوصول إليها للأسلاك والصيانة.
4.3 توصيلات الأسلاك
يجب أن تتوافق جميع الأسلاك مع قوانين الكهرباء المحلية. استخدم مقاسات الأسلاك المناسبة لجميع التوصيلات.
- التأريض: قم بتوصيل برغي التأريض (12) بأرضية موثوقة.
- توصيل البطارية: Connect the 48V battery bank to the BAT INPUT (+) (6) and BAT INPUT (-) (7) terminals. Ensure correct polarity.
- المدخلات الكهروضوئية: Connect the solar panel array to the PV INPUT (1/1) (5) terminals. Observe correct polarity and ensure PV voltage is within specified limits (Max 500V DC, starting voltage ≥150V). Use 10AWG PV wire.
- مدخل التيار المتردد: Connect the utility grid or generator AC input to the AC IN (L1+L2+N) (14) terminals.
- خرج التيار المتردد: Connect your loads to the AC OUT (L1+L2+N) (13) terminals. The inverter provides 120/240Vac split-phase output.
- Parallel Communication (Optional): If installing multiple inverters in parallel, connect the Parallel Communication Port (16) between units using the provided cable.
- وصلات أخرى: Utilize RS485, CAN, USB, and dry contact ports (8, 9, 10, 11) for external communication and control as needed.

الشكل 4.1: مثالample of multiple inverters connected in parallel. Professional guidance is required for actual connections.
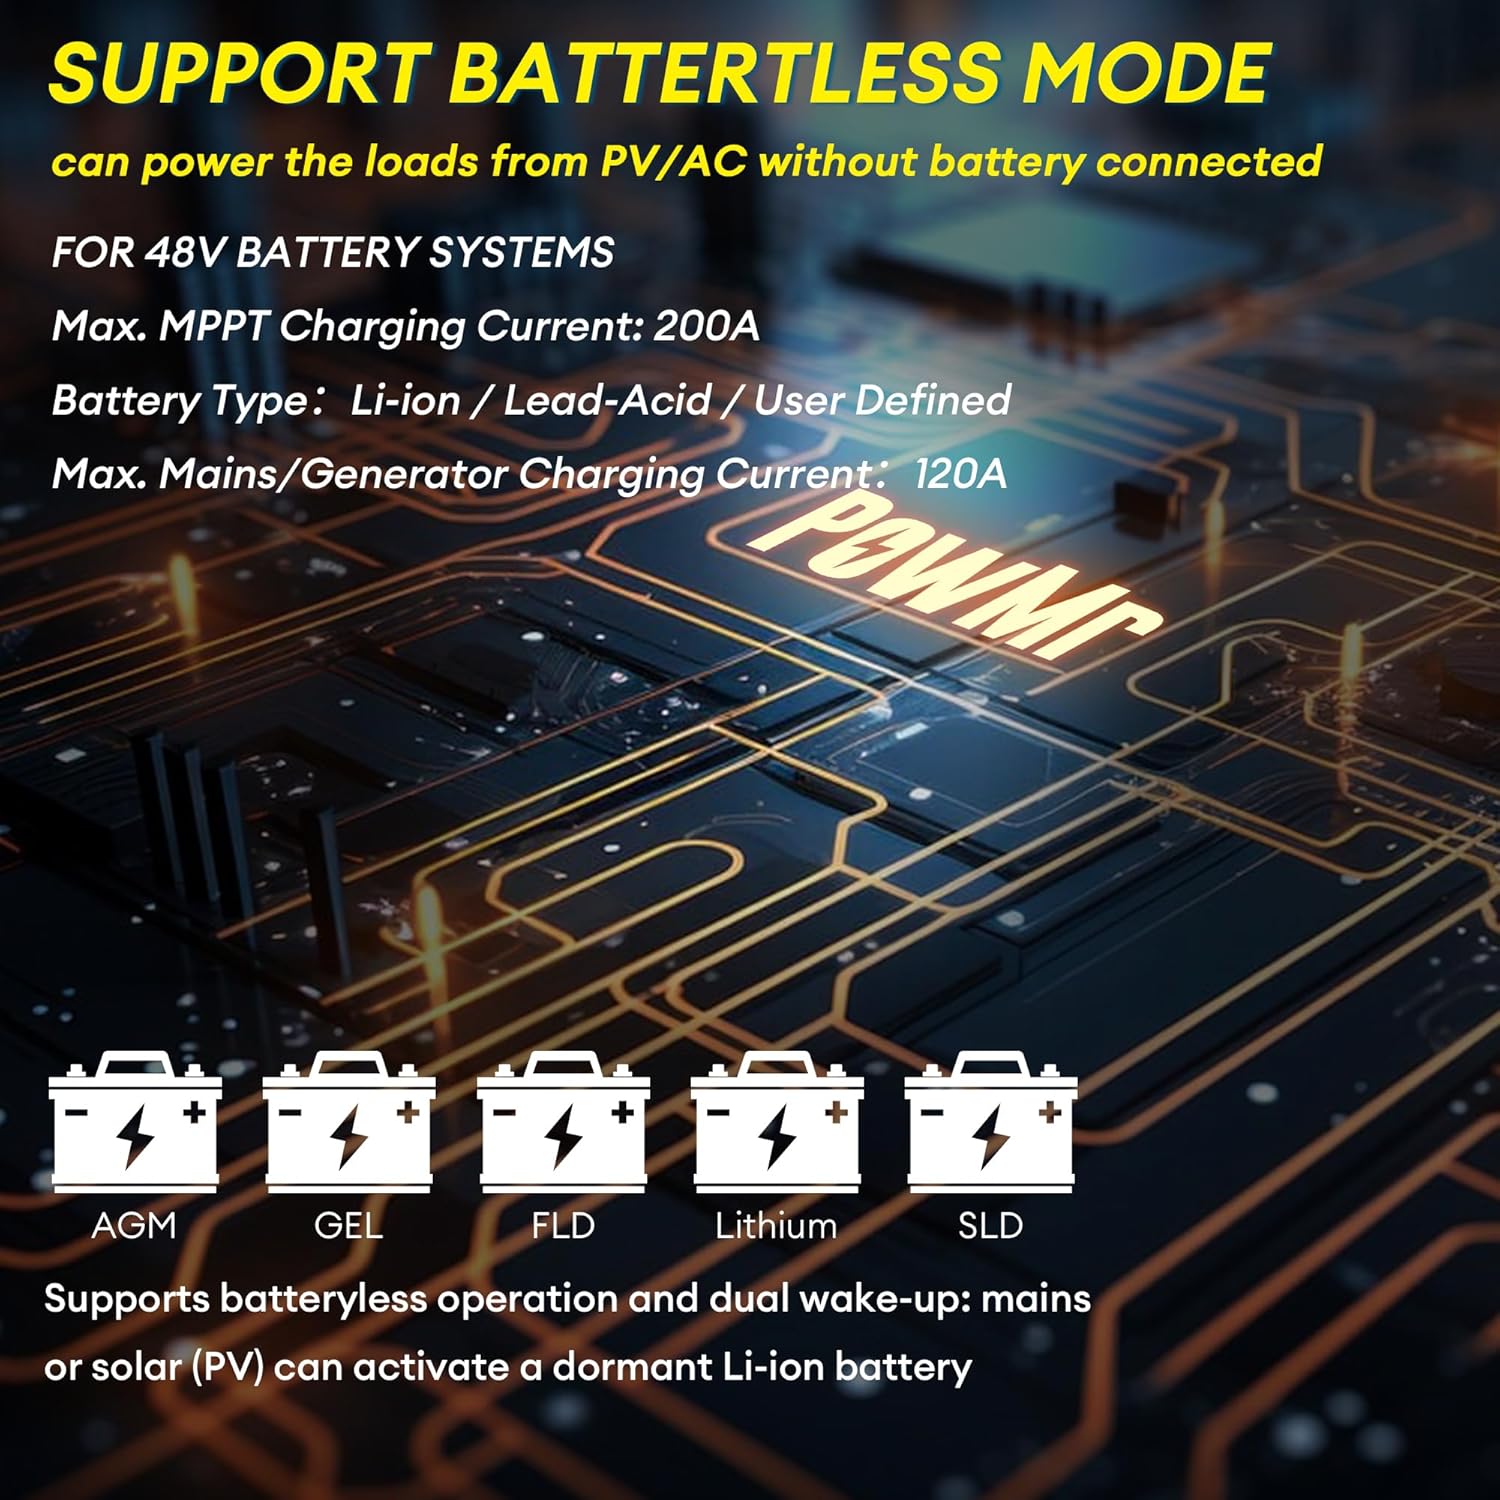
Figure 4.2: The inverter supports various 48V battery systems, including battery-less operation.
5. تعليمات التشغيل
5.1 تشغيل/إيقاف التشغيل
- تأكد من أن جميع توصيلات الأسلاك آمنة وصحيحة.
- Switch on the battery breaker, then the PV breaker.
- Flip the ON/OFF Rocker Switch (4) to the 'ON' position.
- Switch on the AC INPUT Breaker (15).
- To power off, reverse the sequence: AC INPUT Breaker off, ON/OFF Rocker Switch off, PV breaker off, battery breaker off.
5.2 شاشة LCD والإعدادات
The large LCD display (1) provides real-time energy visualization and system status. Use the touchable keys (3) to navigate menus and adjust settings. Refer to the detailed settings section in the full user manual for specific parameter configurations, including:
- Battery charging parameters (voltagه ، الحالي)
- إخراج المجلدtagهـ والتردد
- Operating modes (e.g., Solar First, Utility First, Battery First)
- Time-of-Use (TOU) control for smart charging/discharging
5.3 Battery-Less Mode
The inverter supports battery-less operation, allowing it to power loads directly from solar PV and/or AC input without a connected battery. This mode is useful for specific applications or during battery maintenance. Ensure proper configuration through the LCD settings.
6. الصيانة
تضمن الصيانة المنتظمة طول عمر وأداء العاكس الخاص بك على النحو الأمثل.
- تنظيف: نظّف بشكل دوري الجزء الخارجي من العاكس وفتحات التهوية لمنع تراكم الغبار، الذي قد يعيق التبريد. استخدم قطعة قماش جافة وناعمة.
- الاتصالات: افحص جميع التوصيلات الكهربائية سنوياً للتأكد من إحكامها وخلوها من علامات التآكل. أعد إحكامها إذا لزم الأمر.
- بيئة: تأكد من أن بيئة التثبيت تظل ضمن نطاقات درجة الحرارة والرطوبة المحددة.
- البرامج الثابتة: تحقق من الشركة المصنعة website for any available firmware updates. Firmware updates can improve performance and address known issues.
WARNING: Always disconnect all power sources before performing any cleaning or inspection.
7. استكشاف الأخطاء وإصلاحها
يُقدّم هذا القسم حلولاً للمشاكل الشائعة. أما بالنسبة للمشاكل غير المذكورة هنا، فيُرجى التواصل مع خدمة العملاء.
| مشكلة | السبب المحتمل | حل |
|---|---|---|
| العاكس لا يعمل | لا يوجد اتصال بالبطارية أو مستوى شحن البطارية منخفضtage; DC breaker off; ON/OFF switch off. | تحقق من توصيلات البطارية ومستوى الصوتtage; ensure DC breaker is on; turn ON/OFF switch to 'ON'. |
| لا يوجد مخرج تيار متردد | Overload; short circuit; AC output breaker tripped; inverter fault. | Reduce load; check for short circuits; reset AC output breaker; check LCD for error codes. |
| PV input not charging batteries | PV المجلدtage too low or too high; PV polarity reversed; PV breaker off; MPPT fault. | التحقق من حجم الطاقة الكهروضوئيةtage and polarity; ensure PV breaker is on; check LCD for PV error codes. |
| Unstable output in parallel mode | Incorrect parallel communication wiring; mismatched firmware versions; incompatible settings. | Ensure only one parallel communication cable is used between units. Verify all inverters have the same, latest firmware version. Check parallel settings on each inverter. Contact support if issues persist. |
| يعرض العاكس رمز خطأ | Internal fault; external condition (e.g., over-temperature, over-voltagهـ). | Refer to the full manual's error code section for specific meanings and solutions. Address environmental conditions if applicable. |
8. المواصفات
| المعلمة | قيمة |
|---|---|
| اسم الموديل | BI-POW-SunSmart 12KP |
| تصنيف انتاج الطاقة | 12000 واط (12 كيلو واط) |
| الطاقة القصوى | 24000 واط |
| تصنيف الناتج المجلدtage | 120/240Vac (Split-Phase/Single-Phase) |
| حجم البطاريةtage | 48 فولت |
| الحد الأقصى لطاقة الإدخال الكهروضوئية | 6600 واط |
| الحد الأقصى لحجم الإدخال الكهروضوئيtage | 500 فولت تيار مستمر |
| الحد الأقصى لتيار الإدخال الكهروضوئي | 22 أمبير |
| حجم بدء تشغيل PVtage | ≥150 فولت |
| تيار شحن MPPT | Dual 100A (Max 200A total) |
| Max. Mains/Generator Charging Current | 120 أمبير |
| منافذ الاتصالات | RS485, CAN, USB |
| الأبعاد (الطول×العرض×الارتفاع) | 24.41 × 17.52 × 5.12 بوصة (62 × 44.5 × 13 سم) |
| وزن | 59.5 رطل (27 كجم) |
| تصنيف الحماية | IP20 (الاستخدام الداخلي) |
9. الضمان والدعم
For warranty information, please refer to the documentation provided with your purchase or contact PowMr customer service. For technical support, troubleshooting assistance, or inquiries regarding parts and service, please visit the official PowMr webالموقع أو الاتصال بقنوات دعم العملاء الخاصة بهم.
الموارد المتاحة على الإنترنت:
- PowMr Store on Amazon: Visit PowMr Store


