1. المقدمة
This manual provides detailed instructions for the installation, operation, and maintenance of your ASRock B860M Live Mixer WiFi motherboard. Designed for content creators, this motherboard offers robust connectivity and reliable performance for demanding tasks. Please read this manual thoroughly before proceeding with installation or operation.

الشكل 1: الجبهة view of the ASRock B860M Live Mixer WiFi motherboard. This image highlights the CPU socket, RAM slots, and various heatsinks.
2. الميزات الرئيسية
The ASRock B860M Live Mixer WiFi motherboard is equipped with advanced features to support high-performance computing and content creation:
- Power Phase Design: Features a 10+1+1+1+1 power phase design with Dr.MOS for VCore+GT+SA, ensuring stable power delivery to the CPU.
- دعم ذاكرة DDR5: Supports 4 x DDR5 DIMMs in dual channel configuration, with speeds up to 8666+ (OC) MHz.
- مخرجات الرسومات: Multiple display options including 1 HDMI, 1 DisplayPort, and 1 Thunderbolt 4 Type-C port.
- جودة الصوت: Integrated Realtek ALC1220 7.1 CH HD Audio Codec with Nahimic Audio for immersive sound.
- Enhanced Capacitors: Utilizes exclusive 20K Capacitors with 1000uF capacitance for improved durability and stability.
- اتصال عالي السرعة: Includes WiFi 6E and 2.5G LAN for fast and reliable network connections.
الفيديو 1: انتهىview of ASRock Intel B860 Series Motherboards. This video highlights key features and design aspects of the B860 motherboard series, including power delivery and connectivity options.
3. الإعداد والتثبيت
اتبع هذه الخطوات لتثبيت اللوحة الأم ومكوناتها بشكل صحيح.
3.1 فك الصندوق والفحص
Carefully remove the motherboard and all accessories from the packaging. Inspect for any visible damage.
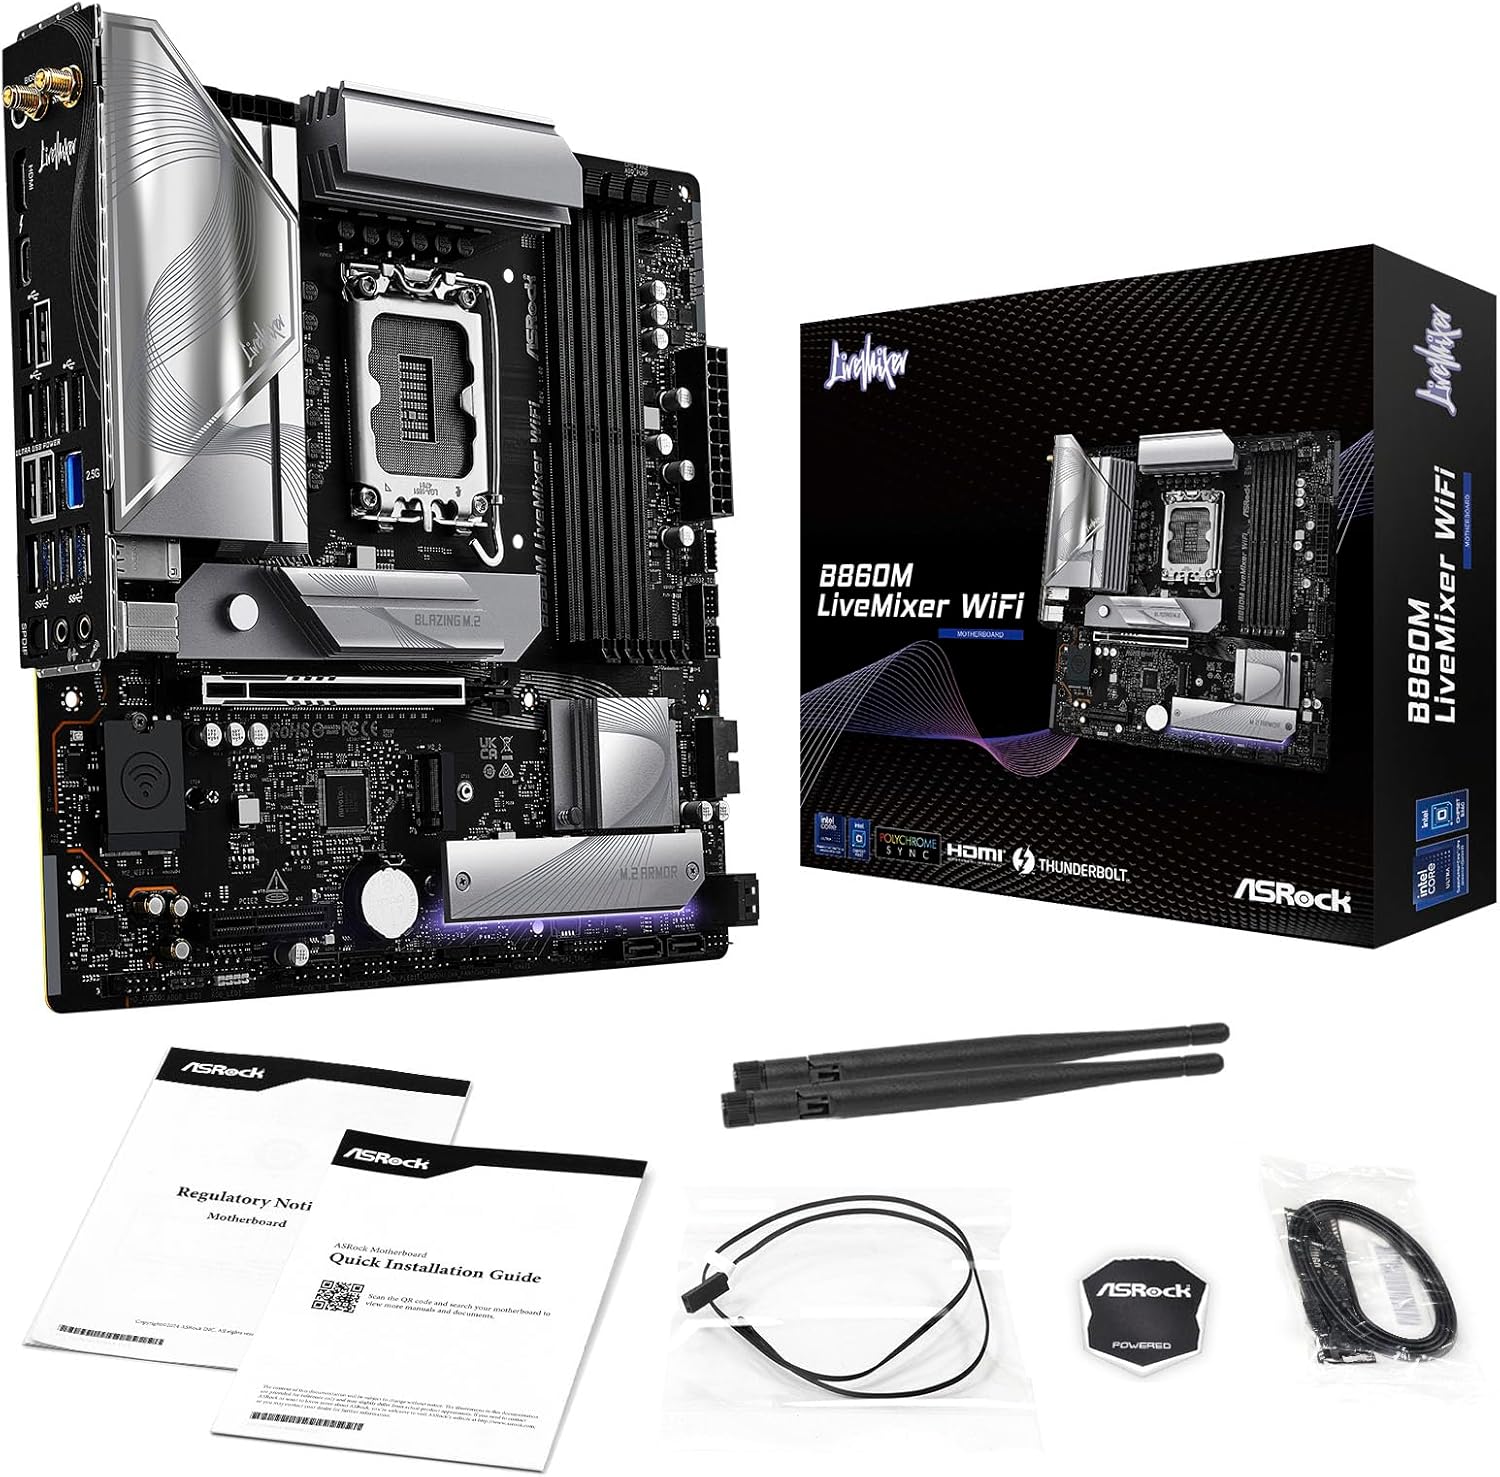
Figure 2: Contents of the ASRock B860M Live Mixer WiFi motherboard package. This image displays the motherboard, documentation, Wi-Fi antennas, and other accessories included.
3.2 CPU Installation (LGA1851)
- حدد موقع مقبس وحدة المعالجة المركزية LGA1851 على اللوحة الأم.
- افتح ذراع مقبس وحدة المعالجة المركزية وقم بإزالة الغطاء الواقي.
- Align your Intel Core Ultra processor with the socket, ensuring the notches on the CPU match the keys on the socket. Gently place the CPU into the socket without forcing it.
- أغلق ذراع مقبس وحدة المعالجة المركزية لتثبيت المعالج.
3.3 Memory (DDR5) Installation
- Locate the four DDR5 DIMM slots.
- افتح المشابك الموجودة في كلا طرفي فتحة DIMM.
- قم بمحاذاة وحدة الذاكرة مع الفتحة، مع التأكد من أن الشق الموجود على الوحدة يتطابق مع المفتاح الموجود في الفتحة.
- اضغط بقوة على كلا طرفي وحدة الذاكرة حتى تستقر المشابك في مكانها.
3.4 Storage Installation (M.2 and SATA)
The motherboard supports multiple M.2 slots and SATA3 6.0 Gb/s ports.
- M.2 SSD: Locate the M.2 slots (e.g., Blazing M.2, M.2 Armor). Insert the M.2 SSD into the slot at an angle, then push it down and secure it with the provided screw or tool-less mechanism.
- محركات SATA: Connect SATA data cables from your storage drives (HDDs/SSDs) to the SATA3 6.0 Gb/s ports on the motherboard. Connect power cables from your power supply to the drives.

الشكل 3: بزاوية view of the ASRock B860M Live Mixer WiFi motherboard, highlighting the M.2 slots and their heatsinks for high-speed storage.
3.5 Expansion Cards (PCIe 5.0)
Insert your graphics card or other PCIe expansion cards into the appropriate PCIe 5.0 slot. Ensure it is seated firmly and secured with a screw to your chassis.
3.6 توصيلات الطاقة
قم بتوصيل موصل الطاقة ATX ذو 24 سنًا وموصل طاقة وحدة المعالجة المركزية ذو 8 أسنان (أو 4+4 أسنان) من وحدة التزويد بالطاقة الخاصة بك بالمنافذ المقابلة على اللوحة الأم.
3.7 Rear I/O Connections
Connect your peripherals to the rear I/O panel. This includes USB devices, display cables (HDMI, DisplayPort, Thunderbolt 4 Type-C), Ethernet cable, and audio devices.

الشكل 4: مفصل view of the rear I/O panel on the ASRock B860M Live Mixer WiFi motherboard, showing various USB ports, display outputs, Ethernet, and audio jacks.
Video 2: Demonstrates the ultimate connectivity features for creators on ASRock motherboards, including Thunderbolt and high-speed networking.
4. تعليمات التشغيل
After successful installation, power on your system. The motherboard will perform a Power-On Self-Test (POST). You can access the BIOS/UEFI setup utility by pressing the يمسح or F2 key during POST.
4.1 إعداد BIOS/UEFI
The BIOS/UEFI interface allows you to configure system settings, including boot order, memory profiles (XMP), fan speeds, and overclocking options. Refer to the on-screen instructions within the BIOS for navigation and adjustments.
4.2 BIOS Update Procedure
Updating your BIOS can improve system stability, compatibility, and performance. ASRock provides tools like USB BIOS Flashback and Instant Flash for this purpose.
Video 3: A detailed tutorial on how to update the motherboard BIOS using ASRock's USB BIOS Flashback and Instant Flash methods. This is crucial for maintaining system compatibility and performance.
For detailed steps on using USB BIOS Flashback or Instant Flash, please refer to the video tutorial above or the dedicated section in the full user manual available on the ASRock support webموقع.
5. الصيانة
تضمن الصيانة الدورية طول عمر اللوحة الأم وأدائها الأمثل.
- إزالة الغبار: Periodically clean dust from inside your PC case, especially from heatsinks and fans, using compressed air.
- تحديثات BIOS: Keep your BIOS updated to the latest version to ensure compatibility with new hardware and software, and to benefit from performance improvements and bug fixes.
- تحديثات برنامج التشغيل: Install the latest drivers for your motherboard chipset, audio, network, and other components from the ASRock webموقع.
- إدارة الكابلات: Ensure proper cable management to maintain good airflow within the case, preventing overheating.
6. استكشاف الأخطاء وإصلاحها
إذا واجهت مشاكل، فضع في اعتبارك خطوات استكشاف الأخطاء وإصلاحها الشائعة التالية:
- لا يوجد طاقة: Check all power connections (24-pin ATX, 8-pin CPU, GPU power). Ensure your power supply is switched on.
- لا يوجد عرض: Verify that your monitor is connected to the correct graphics output port (motherboard or discrete GPU). Reseat your graphics card and RAM modules.
- عدم استقرار النظام/الأعطال: Check RAM seating and try running with one stick of RAM at a time. Ensure CPU cooler is properly installed. Update BIOS and drivers.
- مشاكل بدء التشغيل: Check boot order in BIOS/UEFI. Ensure your storage drive is detected.
- لم يتم اكتشاف الجهاز الطرفي: Try different USB ports. Install necessary drivers for the peripheral.
For more advanced troubleshooting, consult the full user manual or ASRock's online support resources.
7. المواصفات
| ميزة | التفاصيل |
|---|---|
| ماركة | آسروك |
| اسم الموديل | B860M LIVEMIXER WIFI |
| مقبس وحدة المعالجة المركزية | إل جي إيه 1851 |
| المعالجات المتوافقة | إنتل كور ألترا |
| نوع الشريحة | إنتل B860 |
| تقنية ذاكرة الوصول العشوائي (RAM) | دي دي ار 5 |
| سرعة ساعة الذاكرة | 8666 ميجاهرتز (OC) |
| سعة تخزين الذاكرة | حتى 256 جيجابايت |
| Graphics Output Options | 1 HDMI, 1 DisplayPort, 1 Thunderbolt 4 Type-C |
| ترميز الصوت | Realtek ALC1220 7.1 CH HD Audio Codec, Nahimic Audio |
| شبكة محلية | 2.5 جيجا لان |
| الاتصال اللاسلكي | واي فاي 6E |
| مرحلة الطاقة | 10+1+1+1+1 Power Phase, Dr.MOS for VCore+GT+SA |
| المكثفات | Exclusive 20K Cap with 1000uF Capacitance |
| عامل الشكل | مايكرو ATX |
| أبعاد الحزمة | 11.73 × 10.51 × 2.4 بوصة |
| وزن العنصر | 3.25 رطل |
8. الضمان والدعم
For warranty information, technical support, and driver downloads, please visit the official ASRock webموقع:
You can also find additional support and FAQs on the ASRock store page: متجر ASRock America
Protection plans are available for purchase separately to extend coverage for your product.


