مقدمة
Thank you for choosing the GOLOZA Digital Alarm Clock. This manual provides detailed instructions for setting up, operating, and maintaining your new alarm clock. Please read this manual thoroughly before use to ensure optimal performance and longevity of the device.

Image: The GOLOZA Digital Alarm Clock with its large red LED display showing 8:30. A smartphone is connected to the clock's USB port for charging, illustrating the charging feature.
محتويات الحزمة
يرجى التحقق من الحزمة للعناصر التالية:
- GOLOZA Digital Alarm Clock Unit
- محول الطاقة
- دليل المستخدم
مميزات المنتج
The GOLOZA Digital Alarm Clock is designed with user convenience and functionality in mind, offering several key features:
- 4 Levels Brightness & Night Mode: Customize display brightness with four levels, including an "Off" option. The thoughtful night mode automatically dims the display during a preset period (default: 7:00 pm – 7:00 am) to ensure undisturbed sleep.
- Dual Customizable Alarms & Workday Modes: Set two independent alarms with options for weekday, weekend, or custom day settings to fit various schedules.
- Progressive Rings & 9-Minute Snooze: The alarm volume gradually increases for a gentle wake-up. A large, easily reachable snooze button provides an additional 9 minutes of sleep.
- Reliable Memory Function: Equipped with a memory function that retains time and alarm settings during power outages when 2*AAA batteries (not included) are installed. The clock requires continuous power via the included adapter for operation.
- منفذ شحن USB: Features a built-in 5W USB port for convenient charging of mobile devices. Note that this is a standard charging port, not a fast-charging one.
- تشغيل سهل: Designed with top-mounted buttons for intuitive and easy control, making it suitable for users of all ages.
يثبت
1. توصيل الطاقة
Connect the provided power adapter to the DC IN port on the back of the alarm clock and then plug it into a standard wall outlet. The display will light up, indicating the clock is powered on.
2. تركيب البطارية الاحتياطية
For the memory function to work during power outages, install two (2) AAA batteries (not included) into the battery compartment located on the bottom of the clock. Ensure correct polarity (+/-) when inserting the batteries. These batteries only retain time and alarm settings and do not power the display or alarm sound.

الصورة: تفصيلية view of the GOLOZA Digital Alarm Clock's rear, highlighting the battery compartment for two AAA batteries and the power input, demonstrating how the memory function works when the clock is plugged in.
تعليمات التشغيل
1. ضبط الوقت
- Long press the "Time Set" button (usually indicated by a clock icon) on the top of the clock until the hour display starts flashing.
- استخدم زري "+" أو "-" لضبط الساعة.
- Press the "Time Set" button again to switch to minute adjustment. Use "+" or "-" to set the minutes.
- Press the "Time Set" button once more to confirm and exit time setting mode.
2. ضبط المنبهات (المنبه 1 والمنبه 2)
The clock supports two independent alarms (Alarm 1 and Alarm 2) with customizable settings for specific days.
- Slide the alarm switch (usually on the back or side) to "Customize" mode.
- Long press the "Alarm 1" button (or "Alarm 2" for the second alarm) until the hour display flashes.
- استخدم زري "+" أو "-" لضبط ساعة المنبه.
- Press the "Alarm 1" (or "Alarm 2") button again to switch to minute adjustment. Use "+" or "-" to set the minutes.
- Continue pressing the "Alarm 1" (or "Alarm 2") button to cycle through the days of the week (MON, TUE, WED, THU, FRI, SAT, SUN). For each day, press the "+" or "-" button to enable or disable the alarm for that specific day. You can select individual days, weekdays only, weekends only, or every day.
- Once all desired days are set, long press the "Alarm 1" (or "Alarm 2") button again to save the settings and exit.
Watch the video below for a visual guide on setting customized alarms:
Video: This video demonstrates the step-by-step process of setting a customized alarm on the GOLOZA Digital Alarm Clock, including setting the time and selecting specific days for the alarm to activate.

Image: A visual representation of the GOLOZA Digital Alarm Clock's display, illustrating the dual alarm icons and the customizable day selection for alarm activation, showing options for weekday, weekend, and specific days.
3. Brightness Adjustment & Night Mode
Press the "DIMMER" button on the top of the clock to cycle through the four brightness levels (100%, 75%, 50%, 25%) and an "OFF" option for the display.
The clock features an automatic night mode. By default, the display brightness will automatically dim to 25% between 7:00 PM and 7:00 AM. This setting cannot be manually adjusted.

Image: The GOLOZA Digital Alarm Clock display illustrating the four levels of brightness (100%, 75%, 50%, 25%) and an off option, demonstrating its adaptability to different lighting conditions.

Image: The GOLOZA Digital Alarm Clock on a bedside table in a dimly lit bedroom, showcasing its automatic dimming feature during night mode (7:00 PM - 7:00 AM) for comfortable viewعمل.
4. وظيفة الغفوة
When the alarm sounds, press the large "SNOOZE" button on the top of the clock to temporarily silence the alarm for 9 minutes. The alarm will sound again after the snooze period ends.

Image: The GOLOZA Digital Alarm Clock on a bedside table, with a focus on the prominent "SNOOZE" button, indicating its easy accessibility for temporary alarm silencing.
5. تنسيق 12/24 ساعة
Press the "12/24H" button on the top of the clock to switch between 12-hour (with AM/PM indicator) and 24-hour time formats.
6. التوقيت الصيفي (DST)
To activate or deactivate Daylight Saving Time, press the "DST" button (usually combined with another function or a dedicated button). The display will adjust by one hour forward or backward accordingly.
7. منفذ شحن USB
The 5W USB port on the side of the clock can be used to charge small electronic devices like smartphones. Connect your device's USB charging cable to this port. Note that charging speed may vary depending on the device and cable.
صيانة
To maintain your GOLOZA Digital Alarm Clock, follow these guidelines:
- نظّف الساعة بقطعة قماش ناعمة وجافة. لا تستخدم المنظفات الكاشطة أو المذيبات.
- تجنب تعريض الساعة لدرجات حرارة قصوى أو لأشعة الشمس المباشرة أو الرطوبة العالية.
- لا تقم بتفكيك الساعة. سيؤدي ذلك إلى إلغاء الضمان.
استكشاف الأخطاء وإصلاحها
| مشكلة | السبب المحتمل / الحل |
|---|---|
| الشاشة فارغة أو لا تضيء. | Ensure the power adapter is securely plugged into both the clock and a working wall outlet. Check if the "DIMMER" setting is set to "OFF". |
| لا يصدر صوت الإنذار. | Verify that the alarm is enabled for the current day and time. Check the alarm volume setting if applicable (though this model has progressive rings, not explicit volume control). Ensure the clock is powered. |
| Time or alarm settings reset after power outage. | Ensure 2*AAA batteries are correctly installed in the battery compartment. These batteries provide backup for settings during power interruptions. |
| High-pitched noise from the unit. | This could indicate an internal component issue. Disconnect power and contact customer support for assistance. |
تحديد
| ميزة | التفاصيل |
|---|---|
| ماركة | جولوزا |
| رقم الموديل | جي إي 901 |
| لون | Red (Display) |
| نوع العرض | قاد |
| أبعاد المنتج | 6.4 بوصة عرض × 3.2 بوصة ارتفاع |
| وزن العنصر | 9.5 أونصات |
| مصدر الطاقة | كهرباء سلكية |
| النسخ الاحتياطي للبطارية | 2 x AAA batteries (not included) for memory function |
| منفذ شحن USB | 5W (Standard Charging) |
| منبه | Yes, Dual Alarms |
| مدة الغفوة | 9 دقائق |
| مستويات السطوع | 4 Levels + OFF |
| الوضع الليلي | Automatic Dimming (7:00 PM - 7:00 AM, 25% Brightness) |
الضمان والدعم
GOLOZA provides a ضمان لمدة 24 شهرًا بالنسبة لهذا المنتج، نضمن الجودة والموثوقية.
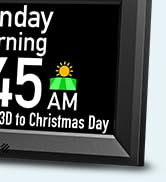
Image: A graphic indicating "GOLOZA SUPPORT" and "24 Months Warranty," along with instructions on how to contact for questions via Amazon: "Account -> Orders -> Order Detail -> Sold by: GOLOZA -> Ask a question."
For any questions, technical assistance, or warranty claims, please contact GOLOZA customer support through your Amazon order details:
- Go to your Amazon account.
- انتقل إلى "طلباتك".
- Find the order for your GOLOZA Digital Alarm Clock.
- Click on "Order Detail".
- Locate "Sold by: GOLOZA" and click on "Ask a question".
Our customer service team is available to assist you.

