1. انتهى المنتجview
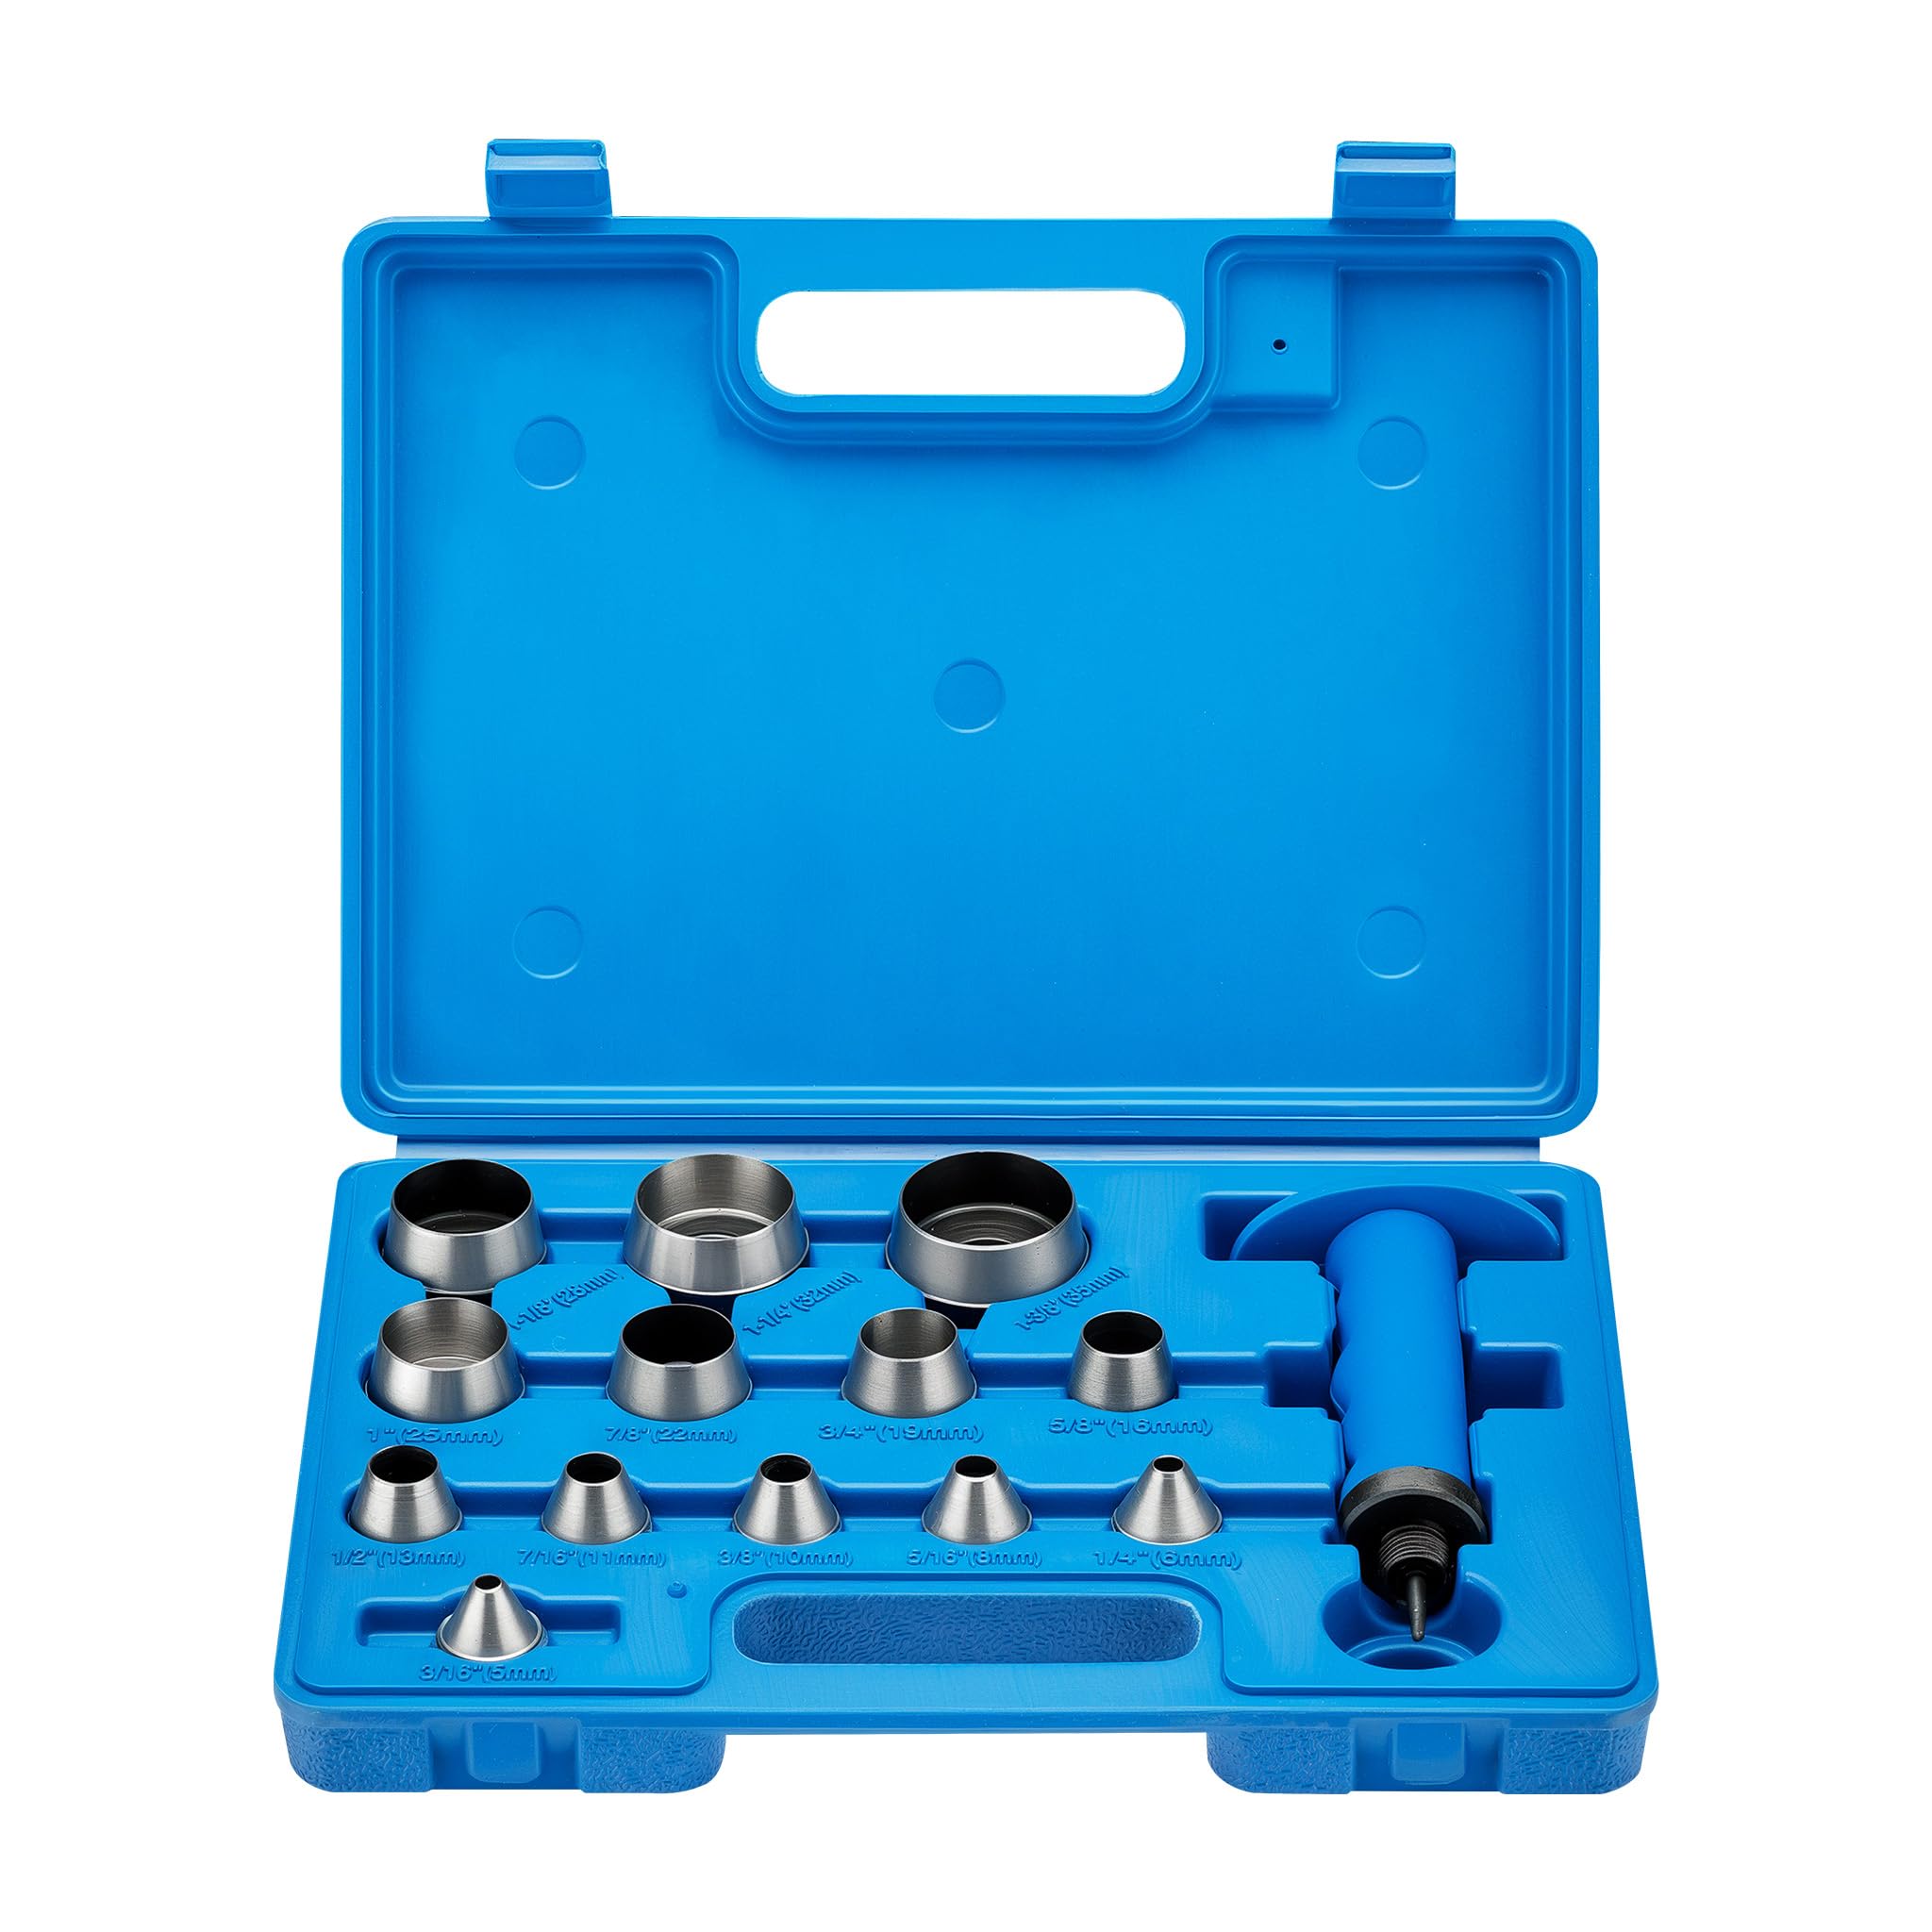
The Wiltec Punch Set (Model 65395) is a versatile tool designed for creating clean, precise holes in a variety of materials. This set includes 13 interchangeable hollow punches and an ergonomic handle, all conveniently stored in a durable carrying case. It is ideal for crafting, DIY projects, and professional applications requiring accurate material perforation.
Constructed from high-quality 45 carbon steel, the punches offer excellent wear resistance and a long service life, ensuring consistent, sharp cuts even after extensive use. The ergonomic handle provides comfortable and precise control, making punching tasks efficient and less strenuous.
1.1 تطبيقات متعددة الاستخدامات
This punch set is suitable for a wide range of materials, making it a valuable tool for various projects. Its interchangeable heads allow for quick adaptation to different material types and hole sizes.
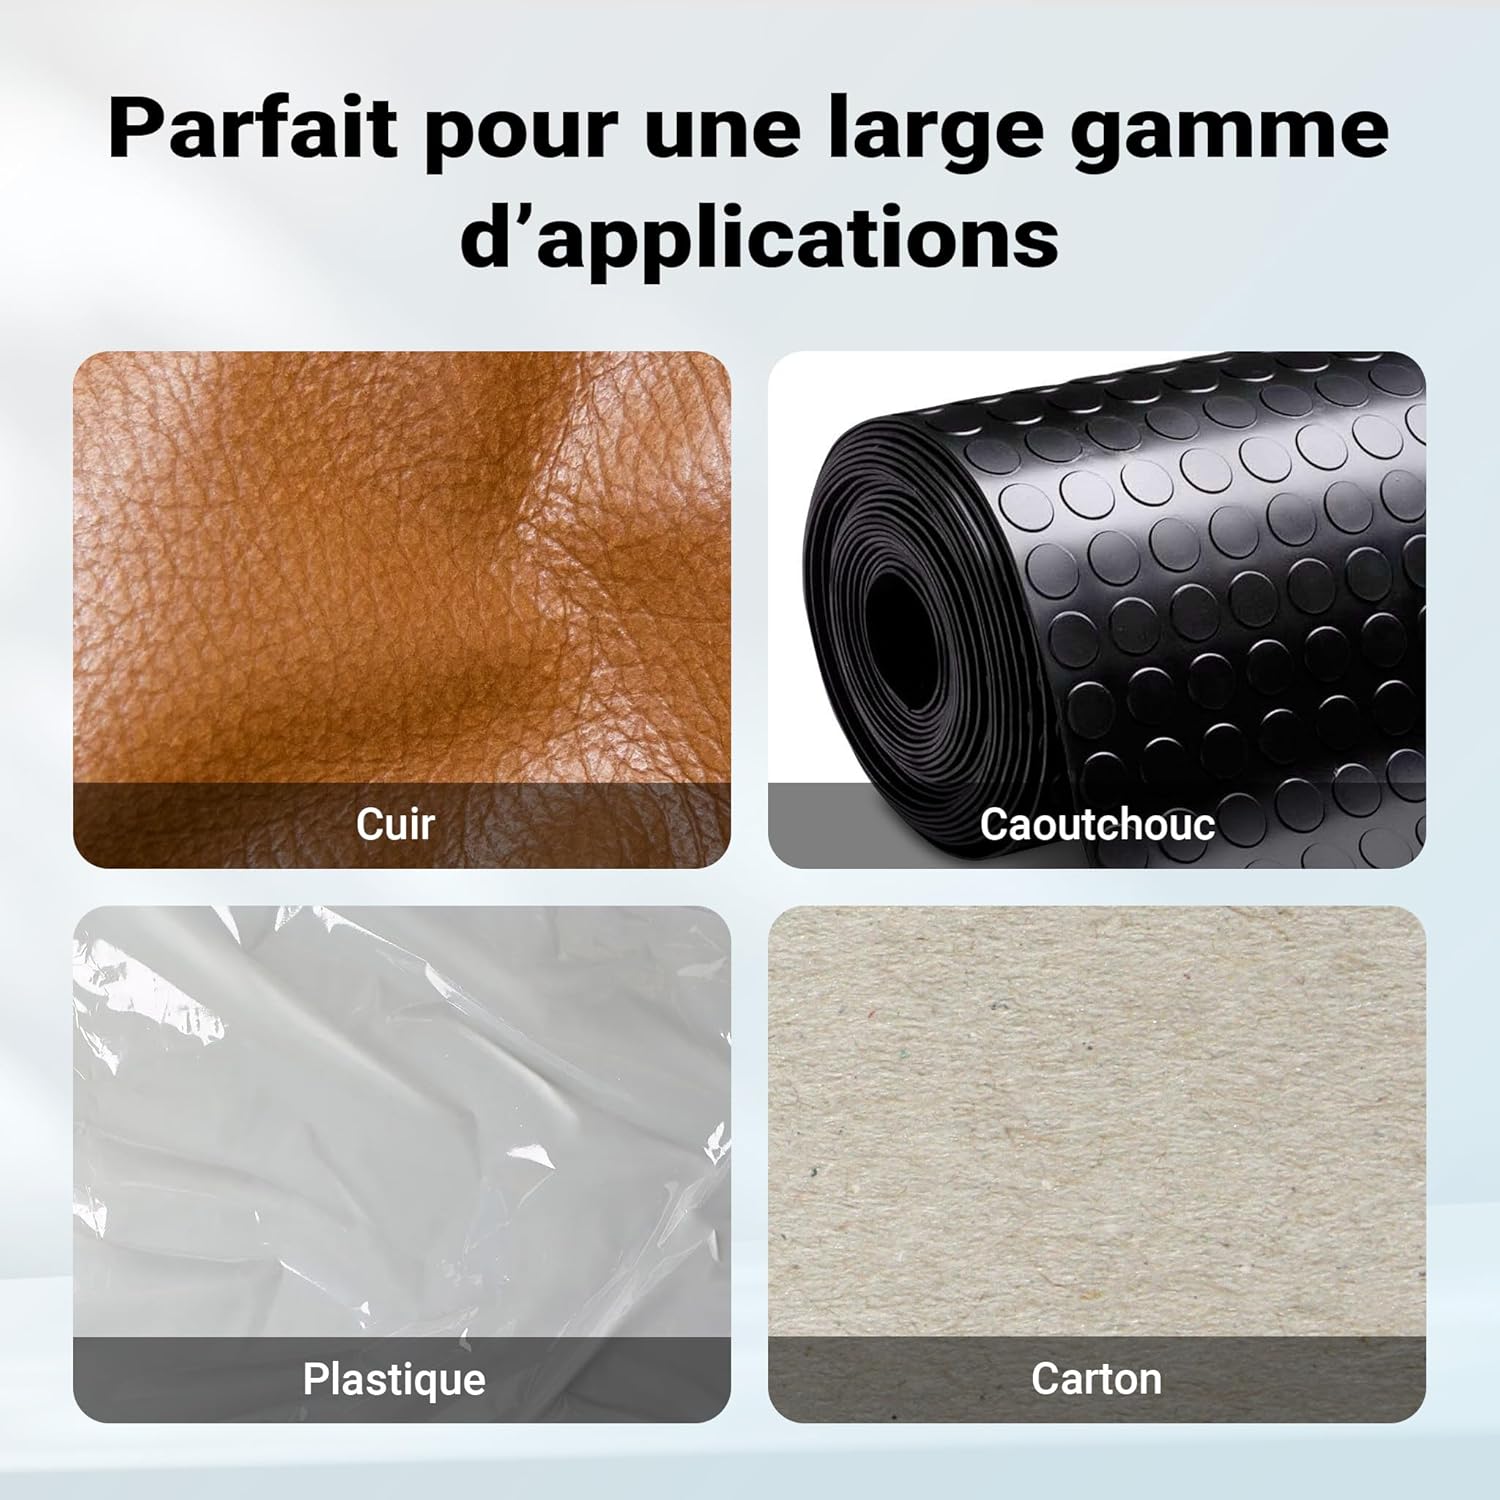
تشمل التطبيقات الشائعة ما يلي:
- Crafting leather goods and accessories.
- Cutting rubber gaskets or seals.
- Perforating plastic sheets for various purposes.
- Creating holes in paper or cardboard for crafts or organizational needs.
2. تعليمات السلامة
To ensure safe operation and prevent injury, please read and follow these safety guidelines:
- ارتداء حماية العين: ارتدِ دائمًا نظارات السلامة أو النظارات الواقية لحماية عينيك من الحطام المتطاير.
- استخدم على سطح مستقر: Always place the material on a stable, flat, and sacrificial cutting surface (e.g., a cutting mat, thick wood block) to prevent damage to your work surface and ensure clean cuts.
- حافظ على أصابعك نظيفة: Ensure your fingers and other body parts are clear of the punch head and the striking area when using a hammer.
- Use Appropriate Force: Apply sufficient but not excessive force when striking the punch. Excessive force can damage the tool or the material.
- فحص الأداة قبل الاستخدام: Before each use, check the punches and handle for any signs of damage or wear. Do not use damaged tools.
- تخزين آمن: Store the punch set in its carrying case, out of reach of children and away from moisture.
- تهوية: If working with materials that produce dust or fumes, ensure adequate ventilation.
3. محتويات العبوة
The Wiltec Punch Set (Model 65395) includes the following components:
- 1x Ergonomic Punch Handle
- 13x Interchangeable Hollow Punches (various sizes)
- 1x Durable Storage Case

3.1 Punch Sizes and Dimensions
The set includes punches in the following sizes, designed to meet diverse project requirements:
- 3/16 بوصة (5 مم)
- 1/4 بوصة (6 مم)
- 5/16 بوصة (8 مم)
- 3/8 بوصة (10 مم)
- 7/16 بوصة (11 مم)
- 1/2 بوصة (13 مم)
- 5/8 بوصة (16 مم)
- 3/4 بوصة (19 مم)
- 7/8 بوصة (22 مم)
- 1 بوصة (25 ملم)
- 1-1/8 بوصة (28 مم)
- 1-1/4 بوصة (32 مم)
- 1-3/8 بوصة (35 مم)

4. الإعداد
Before operating the punch set, follow these steps to prepare the tool:
- فك مكونات الحزمة: Carefully remove all components from the storage case.
- Select Punch Size: Choose the appropriate hollow punch head for your desired hole size.
- Attach Punch to Handle: Screw the selected punch head securely onto the threaded end of the ergonomic handle. Ensure it is tightened firmly to prevent wobbling during use.
- Prepare Work Surface: Place the material to be punched on a suitable, stable, and sacrificial cutting surface. This protects your workbench and helps achieve a clean cut.

The handle features a retractable center mandrel for precise positioning and an ergonomic grip for comfortable handling.
5. تعليمات التشغيل
Once the punch set is assembled and your work surface is prepared, follow these steps to punch holes:
- حدد موقع اللكمة: Hold the handle firmly and position the punch head precisely where you want to create the hole. The retractable center mandrel can assist with accurate placement.
- Strike with a Hammer: Using a mallet or hammer, strike the top of the punch handle with a firm, controlled blow. The force required will vary depending on the material thickness and density. For thicker or tougher materials, multiple strikes may be necessary.
- إزالة المواد المقطوعة: After punching, carefully lift the tool. The cut material slug should either remain inside the punch head or fall out. If it remains inside, gently tap the punch head to dislodge it.
- Create Rings (Optional): To create a ring, first punch a larger outer circle. Then, realign the punch tool to create a smaller inner circle, ensuring the center mandrel is positioned accurately.

6. الصيانة
Proper maintenance ensures the longevity and optimal performance of your Wiltec Punch Set:
- تنظيف: After each use, clean any material residue from the punch heads and the handle. A brush or cloth can be used. Ensure no debris remains in the cutting edges.
- تشحيم: Occasionally apply a light coat of rust-preventative oil to the metal punch heads, especially if storing for extended periods or in humid environments.
- تخزين: Always store the punch set in its dedicated carrying case. This protects the punches from damage, keeps them organized, and prevents loss. The case is designed for convenient transport and secure storage.
- تقتيش: Periodically inspect the punch heads for any signs of dullness or damage. While made from durable carbon steel, prolonged use on hard materials may eventually require sharpening or replacement of individual punches.

7. استكشاف الأخطاء وإصلاحها
If you encounter issues while using your Wiltec Punch Set, consider the following:
- Punch Not Cutting Cleanly:
- Ensure the punch head is securely attached to the handle.
- Verify that the material is placed on a firm, sacrificial cutting surface.
- Increase the force of your hammer strike, if appropriate for the material.
- Check the punch's cutting edge for dullness or damage.
- Punch Stuck in Material:
- Gently twist the handle while pulling upwards.
- If necessary, carefully tap the side of the punch head with a soft mallet to loosen it.
- Material Slipping During Punching:
- Ensure the material is held firmly in place or clamped if possible.
- Use the retractable center mandrel for initial precise positioning before striking.
8. المواصفات
| ميزة | التفاصيل |
|---|---|
| رقم الموديل | 65395 |
| الشركة المصنعة | ويلتيك |
| مادة | 45 Carbon Steel |
| أبعاد المنتج (العلبة) | 26 × 4 × 20 سم (الطول × العرض × الارتفاع) |
| وزن المنتج | 1.28 كيلوغرام |
| Punch Sizes Included | 3/16" (5mm), 1/4" (6mm), 5/16" (8mm), 3/8" (10mm), 7/16" (11mm), 1/2" (13mm), 5/8" (16mm), 3/4" (19mm), 7/8" (22mm), 1" (25mm), 1-1/8" (28mm), 1-1/4" (32mm), 1-3/8" (35mm) |
| مصدر الطاقة | Manual (Hand-powered) |
| بلد المنشأ | الصين |


