1. المقدمة
This manual provides comprehensive instructions for the installation, operation, maintenance, and troubleshooting of your PowMr M25A-12V/24V 25A MPPT Solar Charge Controller. This device is designed to efficiently manage power flow from your solar panels to your 12V or 24V battery system, supporting various battery types including lead-acid and lithium batteries.

Figure 1: PowMr M25A-12V/24V 25A MPPT Solar Charge Controller. This image shows the front view of the solar charge controller with its LCD screen and four control buttons.
2. تعليمات السلامة
- اقرأ جميع التعليمات بعناية قبل التثبيت والتشغيل.
- Ensure all power sources are disconnected before wiring to prevent electric shock.
- استخدم الأدوات المناسبة وارتدِ معدات الوقاية الشخصية أثناء التركيب.
- Install the controller in a well-ventilated, dry environment, away from flammable materials.
- Ensure correct polarity when connecting batteries and solar panels. Incorrect wiring can damage the controller and other components.
- لا تقم بتفكيك وحدة التحكم أو محاولة إصلاحها بنفسك. اتصل بفنيين مؤهلين للصيانة.
- The controller is designed for 12V/24V battery systems. Do not connect to other voltagالأنظمة الإلكترونية.

Figure 2: Intelligent Protection Features. This image illustrates the nine built-in electronic protections of the PowMr solar controller, including over-discharging, overcharging, overload, short circuit, reverse current, temperature compensation, and reverse polarity protection.
3. الإعداد والتثبيت
Follow these steps for proper installation of your solar charge controller. Adhering to the correct connection sequence is crucial for system safety and functionality.
3.1. التحضير
- لوحة الطاقة الشمسية: Ensure your solar panel's voltage and power output are compatible with the controller and battery system.
- بطارية: Use a compatible battery type (e.g., AGM, Gel, Flooded, Lithium) for your 12V or 24V system.
- الكابلات: Use appropriately sized cables to minimize power loss and prevent overheating. Ensure proper fusing for all connections.
3.2. تسلسل التوصيل
The correct wiring order is essential. Always connect the battery first, then the solar panels, and finally the load (if applicable).
- Connect the Battery to the Controller:
First, connect the positive (+) terminal of the battery to the battery positive (+) terminal on the charge controller. Then, connect the negative (-) terminal of the battery to the battery negative (-) terminal on the charge controller. Ensure correct polarity. The controller's display should illuminate, indicating a successful battery connection.
- Connect the Solar Panels to the Controller:
Connect the positive (+) lead from your solar panel array to the PV positive (+) terminal on the charge controller. Then, connect the negative (-) lead from your solar panel array to the PV negative (-) terminal on the charge controller. Ensure the solar panels are receiving sufficient sunlight for power generation.
- توصيل الحمل المستمر (اختياري):
If you are using the DC load output, connect the positive (+) lead of your DC load to the load positive (+) terminal on the charge controller, and the negative (-) lead to the load negative (-) terminal. Refer to the operating section for load control settings.
تسلسل قطع الاتصال: To disconnect the system, reverse the order: first disconnect the load, then the solar panels, and finally the battery.

Figure 3: Basic Wiring Diagram. This diagram illustrates the connection of the solar charge controller to solar panels and a battery bank, showing the flow of power.

Figure 4: Simplified 2-Step Connection. This image provides a simplified visual guide for connecting the battery first, then the solar panels, and finally showing the charging process.
4. التشغيل
The PowMr M25A-12V/24V controller features an intuitive LCD screen and four buttons for easy monitoring and configuration.
4.1. شاشة LCD والأزرار
The backlit LCD screen displays real-time system status, including PV input, battery voltage, charging current, and load status. The four buttons (PV, BAT/▲, DC/▼, SET/⚙) allow navigation and parameter adjustment.

Figure 5: Backlit LCD Screen. This image shows the controller's LCD display, indicating PV input, battery status, and load output, along with the control buttons.
4.2. إعدادات نوع البطارية
The controller supports various battery types. To set the battery type:
- اضغط لفترة طويلة على بات/▲ مفتاح للدخول إلى برنامج الإعدادات.
- استخدم بات/▲ و العاصمة/▼ مفاتيح للتنقل بين خيارات نوع البطارية.
- اضغط على مجموعة/⚙ اضغط على زر الحفظ والتأكيد لحفظ اختيارك.
Pre-set options include Sealed, Gel, Flooded, and Lithium (LFP). A "User customize" option is available for specific parameter adjustments.

Figure 6: Compatible Battery Types. This image displays the controller's compatibility with various battery types, including AGM, GEL, FLD (Flooded), LI (Lithium), and SLA (Sealed Lead-Acid).
4.3. تحميل أوضاع العمل
The controller offers multiple load work modes to manage your DC output:
- 00ساعة: Load Turn OFF (Load is always off).
- 24ساعة: Load always Turn ON (Load is continuously on).
- 01H ~ 23H: Time control (Set the duration for which the load remains ON).
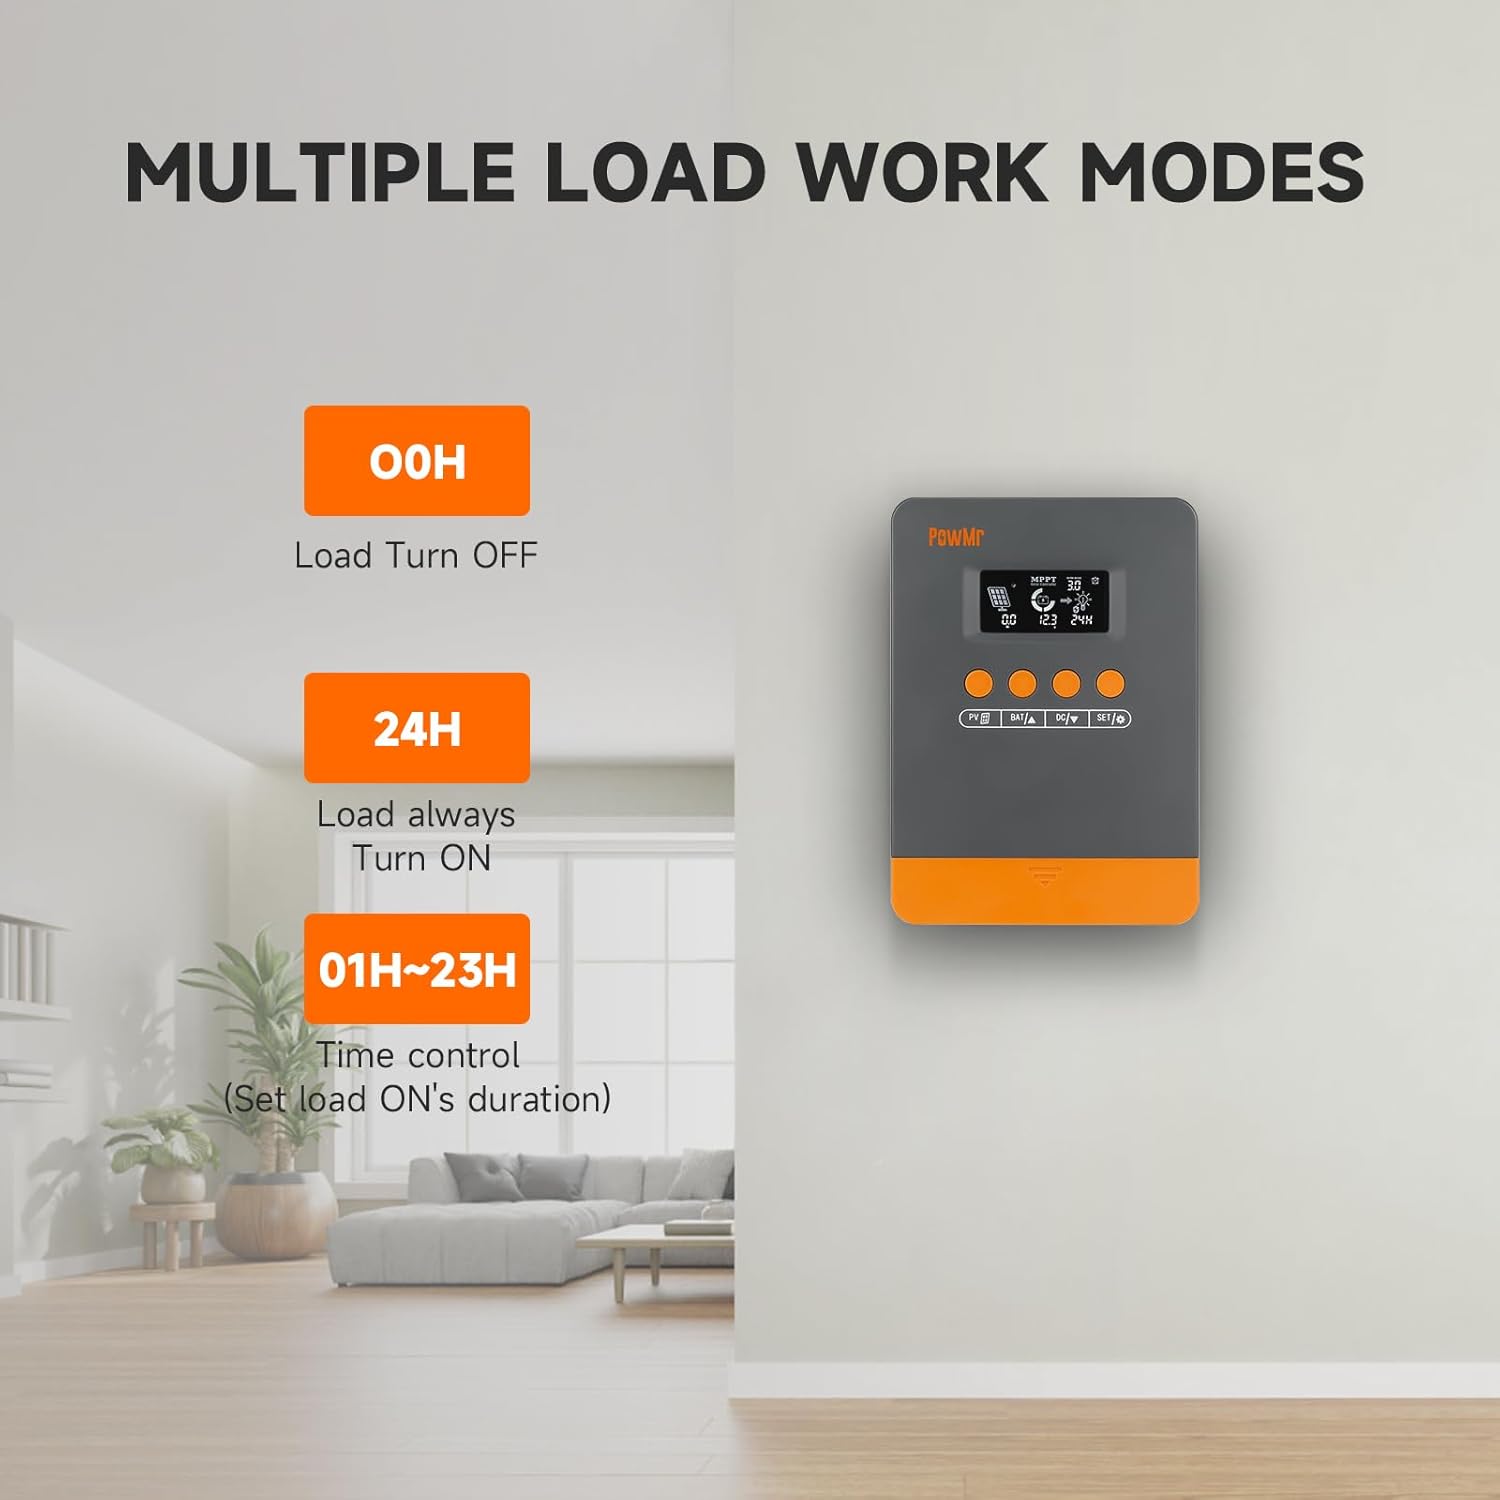
Figure 7: Load Work Modes. This image illustrates the different operational modes for the DC load output, including always off, always on, and time-controlled duration.
4.4. معايرة جهد البطاريةtage
إذا كان هناك تناقض بين حجم البطاريةtage monitored by the controller and a multimeter reading, you can calibrate the controller's voltage:
- اضغط لفترة طويلة على بات/▲ مفتاح للدخول إلى برنامج الإعدادات.
- استخدم بات/▲ و العاصمة/▼ مفاتيح لضبط القيمة.
- اضغط على مجموعة/⚙ مفتاح للحفظ والتأكيد.

الشكل 8: حجم البطاريةtage Calibration. This image shows the controller's display during the battery voltage calibration process, allowing users to adjust the displayed voltage to match an external measurement.
5. الصيانة
Regular maintenance ensures optimal performance and longevity of your solar charge controller and system.
- فحص الاتصالات: Periodically check all wiring connections for tightness and corrosion. Loose connections can lead to power loss or damage.
- تنظيف وحدة التحكم: Keep the controller clean and free from dust and debris. Use a dry cloth for cleaning. Ensure ventilation openings are not obstructed.
- فحص البطارية: Regularly inspect your batteries for signs of damage, leakage, or swelling. Ensure battery terminals are clean.
- تنظيف الألواح الشمسية: Clean solar panels periodically to remove dirt, dust, or snow that may reduce efficiency.
- مراقبة الأداء: Observe the controller's display for any unusual readings or error codes.
6. استكشاف الأخطاء وإصلاحها
This section provides guidance for common issues and their solutions. Refer to the LCD screen for specific error codes.
6.1. Error Codes and Solutions
| رمز الخطأ | سبب | حل |
|---|---|---|
| 18 | حجم الطاقة الكهروضوئية المدخلةtagمنخفض جدا | زيادة عدد الألواح الشمسية أو توصيلها على التوالي لرفع حجم مدخلات الطاقة الكهروضوئيةtage. |
| 60 | حماية من ارتفاع درجة الحرارة | اسمح للمعدات بالتبريد إلى درجة حرارة أقل من درجة الاسترداد لاستئناف الشحن والتفريغ الطبيعيين. |
| 63 | حجم البطاريةtagهـ عالية جدا | قم بالقياس للتأكد مما إذا كان حجم البطاريةtage يتجاوز المجلد المقدرtagثم افصل قاطع الدائرة الخاص بمصفوفة الخلايا الكهروضوئية. |
| 65 | حجم البطاريةtagمنخفض جدا | اشحن البطارية حتى المجلدtagه يتجاوز undervoltage recovery point. Refer to "3.7 Default/Parameters for Different Battery Types" for specific details. |
| 71 | حجم الطاقة الكهروضوئية المدخلةtagهـ عالية جدا | قم بتقليل عدد المصفوفات الكهروضوئية المتصلة بوحدة التحكم لتقليل مدخلات الطاقة الكهروضوئية، أو اضبط التوصيلات المتسلسلة والمتوازية لتقليل حجم التيار.tagأو القيم الحالية. |
| 73 | تيار الشحن الزائد | قم بتقليل حمل الطرف الناتج للتأكد من أن الحمل الإجمالي يقع ضمن الحدود المقدرة لوحدة التحكم والبطارية. |
| 72 | تيار التفريغ الزائد | قم بتقليل حمل الطرف الناتج للتأكد من أن الحمل الإجمالي يقع ضمن الحدود المقدرة لوحدة التحكم والبطارية. |
6.2. General Troubleshooting Tips
- لا يوجد عرض/طاقة: Check battery connections and ensure the battery has sufficient charge. Verify polarity.
- البطارية لا تشحن:
- Ensure solar panels are connected correctly and receiving adequate sunlight.
- تحقق من حجم الألواح الشمسيةtagهـ والحالية.
- Verify battery type settings on the controller.
- التحميل لا يعمل:
- Check load connections and ensure the load is within the controller's rated capacity.
- Verify the load work mode setting (00H, 24H, or time control).
- تأكد من أن البطارية بها شحن كافٍ.
- قراءات غير دقيقة: Calibrate battery voltagه كما هو موضح في القسم 4.4.
7. المواصفات
| ميزة | التفاصيل |
|---|---|
| نموذج | M25A-12V/24V (POW-M25-PRO) |
| ماركة | باومر |
| حجم النظامtage | 12 فولت / 24 فولت أوتوماتيكي |
| أقصى طاقة إدخال للخلايا الكهروضوئية (نظام 12 فولت) | 300 واط |
| أقصى طاقة إدخال للخلايا الكهروضوئية (نظام 24 فولت) | 600 واط |
| الأعلى. الكهروضوئية المجلد الدائرة المفتوحةtage | <60 فولت |
| تيار الشحن المقدر | 25 أمبير |
| كفاءة التتبع | تصل إلى 98% |
| كفاءة التحويل القصوى | تصل إلى 97% |
| أنواع البطاريات المدعومة | مُغلّف، هلامي، مغمور، ليثيوم (LFP)، مُحدد من قِبل المستخدم |
| أبعاد المنتج (الطول × العرض × الارتفاع) | 4.52 بوصة × 2 بوصة × 7 بوصة (11.48 سم × 5.08 سم × 17.78 سم) |
| وزن العنصر | 1.1 رطل (500 جرام) |
| تاريخ أول توفر | 3 سبتمبر 2024 |

Figure 9: System Wiring and Model Specifications. This image provides a detailed schematic for connecting solar panels, battery, and load, alongside a table outlining specifications for various PowMr MPPT controller models, including the M25A-12V/24V.
8. الضمان والدعم
للحصول على معلومات الضمان والدعم الفني، يرجى الرجوع إلى موقع PowMr الرسمي. webالموقع أو تواصل مع خدمة العملاء مباشرةً. احتفظ بإيصال الشراء لطلبات الضمان.


