1. المقدمة
شكرا لك على الشراءasing the Ankilo Projection Alarm Clock. This device is designed to provide convenient timekeeping with a unique projection feature, allowing you to view the time on your ceiling or wall. It also includes an alarm, temperature display, and USB charging capabilities. Please read this manual carefully to ensure proper use and maintenance of your new alarm clock.
2. معلومات السلامة
- لا تعرض الجهاز لدرجات حرارة عالية، أو أشعة الشمس المباشرة، أو الرطوبة العالية.
- احتفظ بالجهاز بعيدًا عن الماء أو السوائل الأخرى.
- لا تحاول تفكيك الجهاز أو إصلاحه بنفسك. قم بإحالة جميع أعمال الصيانة إلى فنيين مؤهلين.
- استخدم كابل USB المرفق فقط لتزويد الطاقة.
- The CR2032 battery is for backup only; the clock requires continuous USB power for full functionality.
3. محتويات العبوة

- 1 x Ankilo Projection Alarm Clock
- 1 x USB Power Cable (1.5m)
- 1 x CR2032 Memory Battery (pre-installed for backup)
- 1 × دليل المستخدم
The image above shows the complete contents included in your Ankilo Projection Alarm Clock package. Please verify all items are present upon unboxing.
4. انتهى المنتجview

This diagram illustrates the various buttons and ports on your Ankilo Projection Alarm Clock for easy identification and operation.
| عنصر | وصف |
|---|---|
| زر غفوة / ضوء | Press to snooze alarm or adjust display brightness. |
| PROJECT Button | Press to adjust projection brightness. |
| زر التنبيه | Press to set or activate/deactivate alarm. |
| زر الضبط | Press to enter time/date setting mode. |
| زر UP | Increase values during setting, or switch 12/24H format. |
| الزر الأسفل | Decrease values during setting, or switch temperature unit. |
| الإسقاط Lamp | Emits time projection onto surface. |
| منفذ الطاقة | Connect USB power cable here. |
| حجرة بطارية CR2032 | Houses the backup battery. |
| المتحدث | Outputs alarm sound. |
5. الإعداد
5.1 تشغيل الجهاز
The Ankilo Projection Alarm Clock is primarily powered by a USB cable. Connect the provided USB cable to the power port on the back of the clock and plug the other end into a standard USB power adapter (not included) or a USB port.
ملاحظة هامة:
- The LED screen will only remain on when the USB power supply is connected.
- The included CR2032 battery serves as a backup to retain time and alarm settings during power outages, but it does not power the display or projection.
5.2 ضبط الوقت والتاريخ الأولي
- اضغط مع الاستمرار على تعيين اضغط على الزر لمدة 3 ثوانٍ للدخول إلى وضع ضبط الوقت. ستبدأ أرقام الساعة بالوميض.
- استخدم UP or تحت أزرار لضبط الساعة.
- يضعط تعيين اضغط مرة أخرى لتأكيد الساعة والانتقال إلى إعداد الدقائق. ستومض أرقام الدقائق.
- استخدم UP or تحت أزرار لضبط الدقائق.
- يضعط تعيين again to confirm the minute and move to year setting.
- Repeat the process using UP/تحت و تعيين لتعيين السنة والشهر واليوم.
- بعد ضبط اليوم، اضغط على تعيين للمرة الأخيرة للخروج من وضع الإعدادات.
6. تعليمات التشغيل
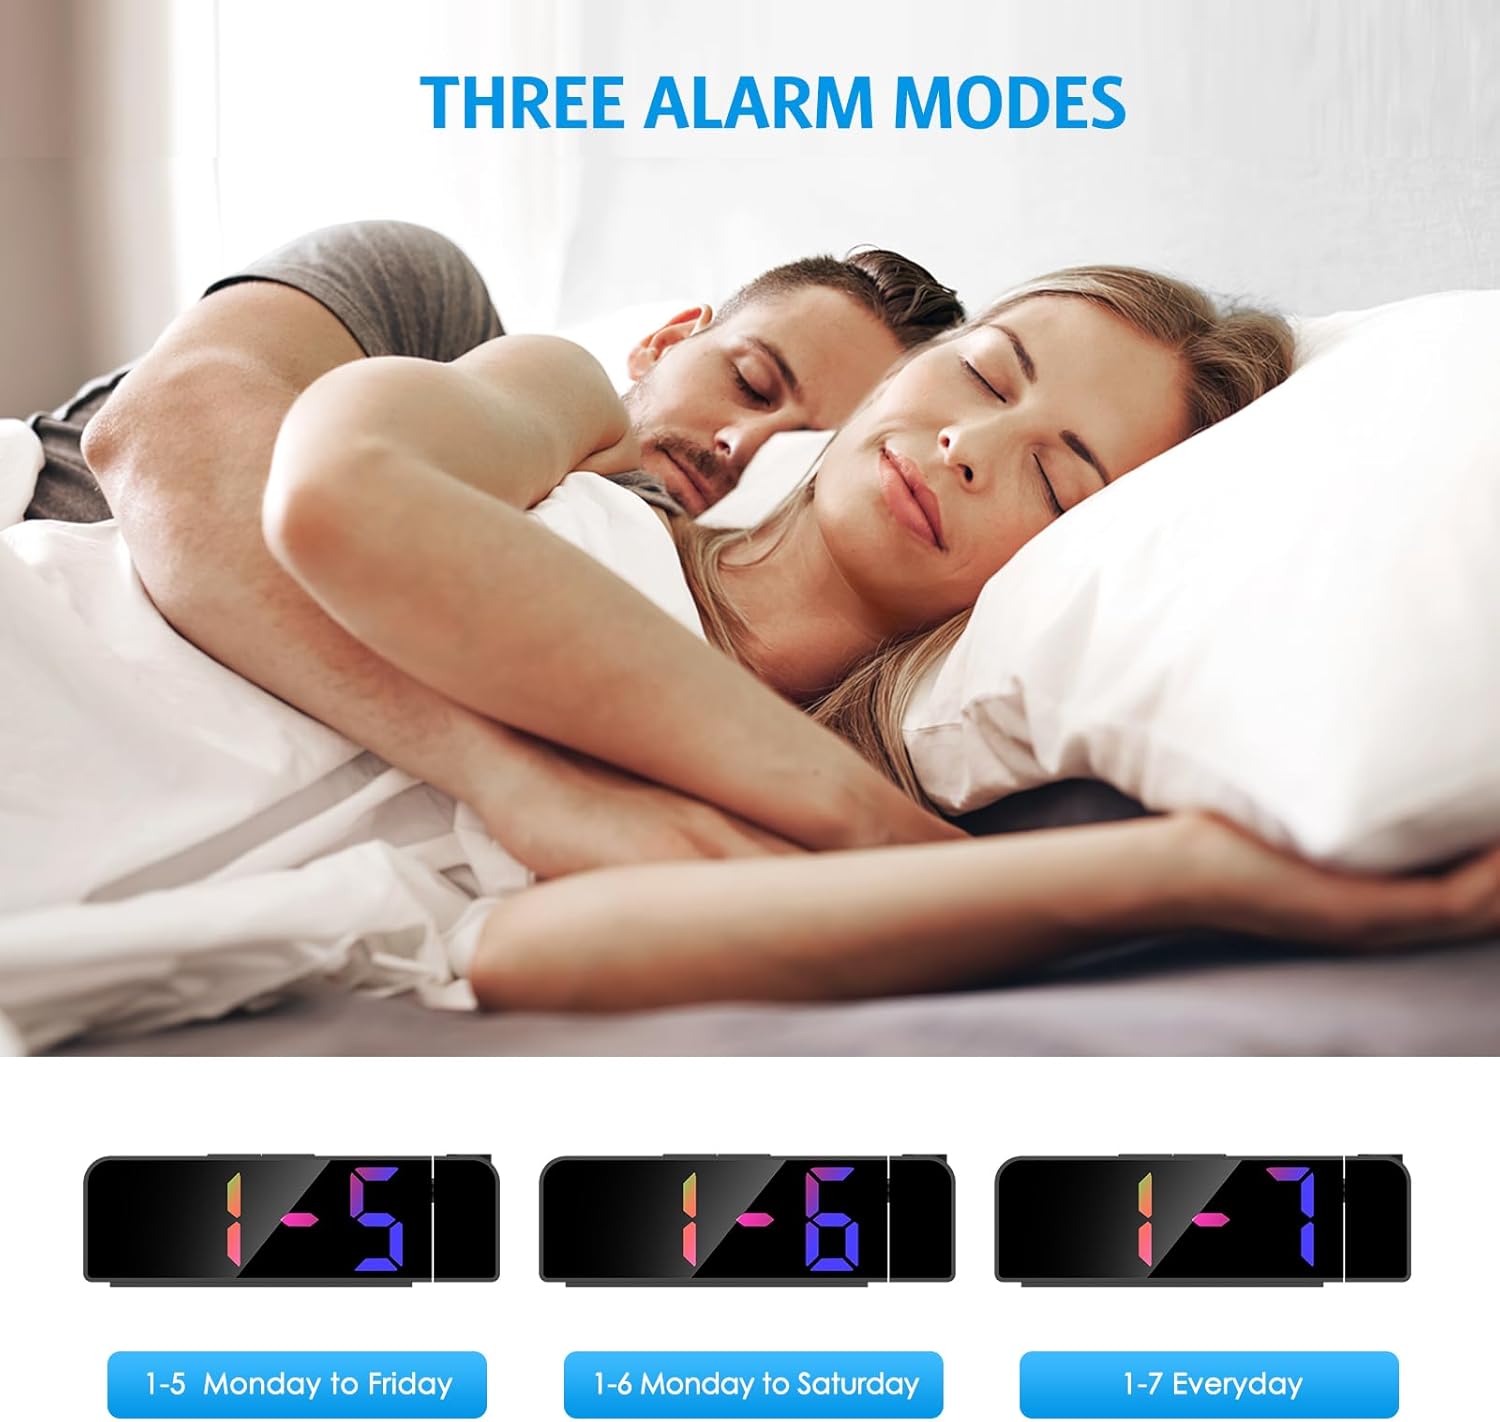
6.1 ضبط المنبه
- اضغط مع الاستمرار على إنذار اضغط على الزر لمدة ثانيتين. ستومض أرقام ساعة المنبه.
- استخدم UP or تحت أزرار لضبط ساعة التنبيه المطلوبة.
- يضعط إنذار مرة أخرى لتأكيد الساعة والانتقال إلى ضبط الدقائق.
- استخدم UP or تحت buttons to set the desired alarm minute.
- يضعط إنذار again to select the alarm mode:
- 1-5: يصدر صوت المنبه من الاثنين إلى الجمعة.
- 1-6: Alarm sounds Monday to Saturday.
- 1-7: Alarm sounds Everyday.
- يضعط إنذار one last time to confirm and exit alarm setting mode.
The image above illustrates the three available alarm modes: weekdays, weekdays plus Saturday, and every day.
6.2 وظيفة الغفوة

عندما يصدر صوت التنبيه، اضغط على الزر الكبير غفوة / ضوء button on the top of the clock to activate the snooze function. This will provide an additional 5 minutes of sleep before the alarm sounds again. You can repeat this process as needed.
The image highlights the prominent SNOOZE/LIGHT button, easily accessible for quick snooze activation.
6.3 ضبط سطوع الشاشة

اضغط على غفوة / ضوء button (short press) to cycle through 4 levels of display brightness: Bright, Medium, Low, and Off. Select the brightness level that best suits your environment.
This image demonstrates the four distinct brightness settings for the main LED display, from bright to completely off.
6.4 Adjusting Projection Brightness and Orientation

اضغط على مشروع button (short press) to cycle through 3 levels of projection brightness: Off, Dim, and Bright. The projection lamp can be rotated 180 degrees to project the time onto your ceiling or wall.
The image illustrates the projection feature, showing the clock projecting time onto a wall and the three available brightness levels for the projection.

Important Projection Orientation: The projection digits are only displayed correctly when the projection direction is towards the back of the alarm clock (away from the front display). If you project forward, the numbers will appear reversed. Ensure the projection is directed appropriately for correct readability.
This image clearly demonstrates the correct and incorrect projection orientations, emphasizing that projection should be directed backward for proper display.
6.5 الوضع الليلي

The alarm clock features an automatic night mode. By default, the display brightness will automatically dim between 18:00 (6 PM) and 5:59 (5:59 AM). This time range can be adjusted to suit your preferences within the settings menu (refer to the full manual for advanced settings).
The image depicts the alarm clock operating in a low-light environment, showcasing the automatic dimming feature of the night mode.
6.6 تنسيق 12/24 ساعة

للتبديل بين تنسيقات الوقت 12 ساعة و24 ساعة، اضغط ضغطة قصيرة على UP button during normal time display. The display will toggle between AM/PM indication (12-hour) and military time (24-hour).
This image visually compares the appearance of the time display in both 12-hour and 24-hour formats.
7. الصيانة
To maintain your Ankilo Projection Alarm Clock, gently wipe the surface with a soft, dry cloth. Avoid using abrasive cleaners or solvents, as these may damage the finish or electronic components. Keep the projection lens clean for clear time display.
8. استكشاف الأخطاء وإصلاحها
| مشكلة | السبب المحتمل | حل |
|---|---|---|
| الشاشة مطفأة أو خافتة. | Not connected to USB power, or display brightness set to 'Off'. | Ensure USB cable is securely connected. Press غفوة / ضوء لضبط السطوع. |
| Projection numbers are reversed. | الإسقاط لamp is facing forward. | Rotate the projection lamp 180 degrees so it projects towards the back of the clock. |
| لا يصدر صوت الإنذار. | لم يتم ضبط جهاز الإنذار أو تم تعطيله. | اضغط مع الاستمرار إنذار to set the alarm time and mode. Ensure the alarm icon is visible on the display. |
| تتم إعادة ضبط الوقت/الإعدادات بعد انقطاع التيار الكهربائيtage. | بطارية النسخ الاحتياطي CR2032 معطلة أو مفقودة. | استبدل بطارية CR2032 في حجرة البطارية. |
| الإسقاط غير واضح. | Projection lens is dirty or surface is too far/close. | Clean the projection lens with a soft cloth. Adjust the clock's distance from the projection surface (ideal 1.6ft-16ft). |
9. المواصفات
| ميزة | التفاصيل |
|---|---|
| ماركة | أنكيلو |
| رقم الموديل | WA113B&C-MA06US-HY |
| نوع العرض | الصمام الرقمي |
| حجم العرض | 7.9 بوصة |
| أبعاد المنتج | 1.7 بوصة عرض × 3.3 بوصة ارتفاع |
| مصدر الطاقة | Corded Electric (USB cable) |
| بطارية احتياطية | شنومكس x كرسنومكس (وشملت) |
| المميزات الخاصة | 180° Projection, Adjustable Brightness (Display & Projection), USB Charging Port, Night Mode, Temperature Display, Snooze Function, Multiple Alarm Modes (1-5, 1-6, 1-7) |
| مادة | معدن |
| وزن العنصر | 6.7 أونصات |
10. الضمان والدعم

- سياسة العائدات: Enjoy a 6-month return period from the date of purchase.
- ضمان: Your Ankilo Projection Alarm Clock is covered by a 24-month warranty against manufacturing defects.
- دعم مدى الحياة: Ankilo is committed to providing lifetime technical support for this product.
The image above summarizes our commitment to customer satisfaction, including return policy, warranty, and ongoing support.
For any questions, troubleshooting assistance, or warranty claims, please contact Ankilo customer support through the platform where you purchased the product or visit our official webموقع لمعلومات الاتصال.


