مقدمة
This manual provides detailed instructions for the setup, operation, and maintenance of your Gioteck SC3 Wireless Pro Controller. Designed for use with Nintendo Switch, PC, and mobile devices, this controller features programmable back buttons, customizable RGB lighting, and changeable magnetic thumb sticks for an enhanced gaming experience.
1. الإعداد
1.1 محتويات العبوة
- Gioteck SC3 Wireless Pro Controller
- كابل شحن USB
- Additional Magnetic Thumb Sticks (if included)
- دليل المستخدم (هذا المستند)
1.2 شحن وحدة التحكم
Before initial use, fully charge the controller. Connect the supplied USB charging cable to the controller's charging port and the other end to a USB power source (e.g., Nintendo Switch dock, PC USB port, or USB wall adapter).
- سيظهر مؤشر LED حالة الشحن.
- تستغرق عملية الشحن الكامل عادةً ما يقرب من 2 إلى 3 ساعات.
الصورة: أسفل view of the Gioteck SC3 controller, highlighting the USB-C charging port located between the two textured grips.
1.3 الاقتران بجهاز نينتندو سويتش
- من قائمة نينتندو سويتش الرئيسية، حدد وحدات التحكم، ثم تغيير القبضة/الترتيب.
- On the SC3 controller, press and hold the زر الاقتران (usually a small button on the top or back) for a few seconds until the LED indicators begin to flash rapidly.
- Once the controller is recognized by the Switch, the player LED(s) on the controller will illuminate solid, indicating successful pairing.
- اضغط على زر للتأكيد.
Note: For subsequent uses, the controller should automatically reconnect to the last paired Switch console when powered on.
1.4 Connecting to PC/Mobile (Bluetooth)
- Ensure Bluetooth is enabled on your PC or mobile device.
- On the SC3 controller, press and hold the زر الاقتران for a few seconds until the LED indicators flash rapidly.
- On your PC/mobile device, navigate to Bluetooth settings and search for new devices.
- Select "Gioteck SC3" or similar from the list of available devices to pair.
- The controller's LED will become solid upon successful connection.
1.5 Installing Magnetic Thumb Sticks
The SC3 controller features changeable magnetic thumb sticks. To replace them:
- Gently pull the existing thumb stick straight up to remove it.
- Align the desired magnetic thumb stick with the base and gently push it down until it snaps into place.

الصورة: الجبهة view of the Gioteck SC3 controller, showcasing the magnetic thumb sticks and button layout.
2. تعليمات التشغيل
2.1 زر تخطيط
The SC3 controller features a traditional button layout. Refer to the image below for button identification.

الصورة: واجهة بزاوية view of the Gioteck SC3 controller, displaying the full button layout including face buttons, D-pad, analog sticks, and shoulder buttons.
- العصي التناظرية اليسرى/اليمنى: للتحكم في الحركة والكاميرا.
- D- الوسادة: الإدخال الاتجاهي.
- أزرار A/B/X/Y: أزرار العمل.
- أزرار L/R/ZL/ZR: أزرار الكتف والزناد.
- +/- الأزرار: Start/Select equivalents.
- زر الصفحة الرئيسة: يعود إلى القائمة الرئيسية للجهاز.
- زر الالتقاط: يلتقط لقطات شاشة.
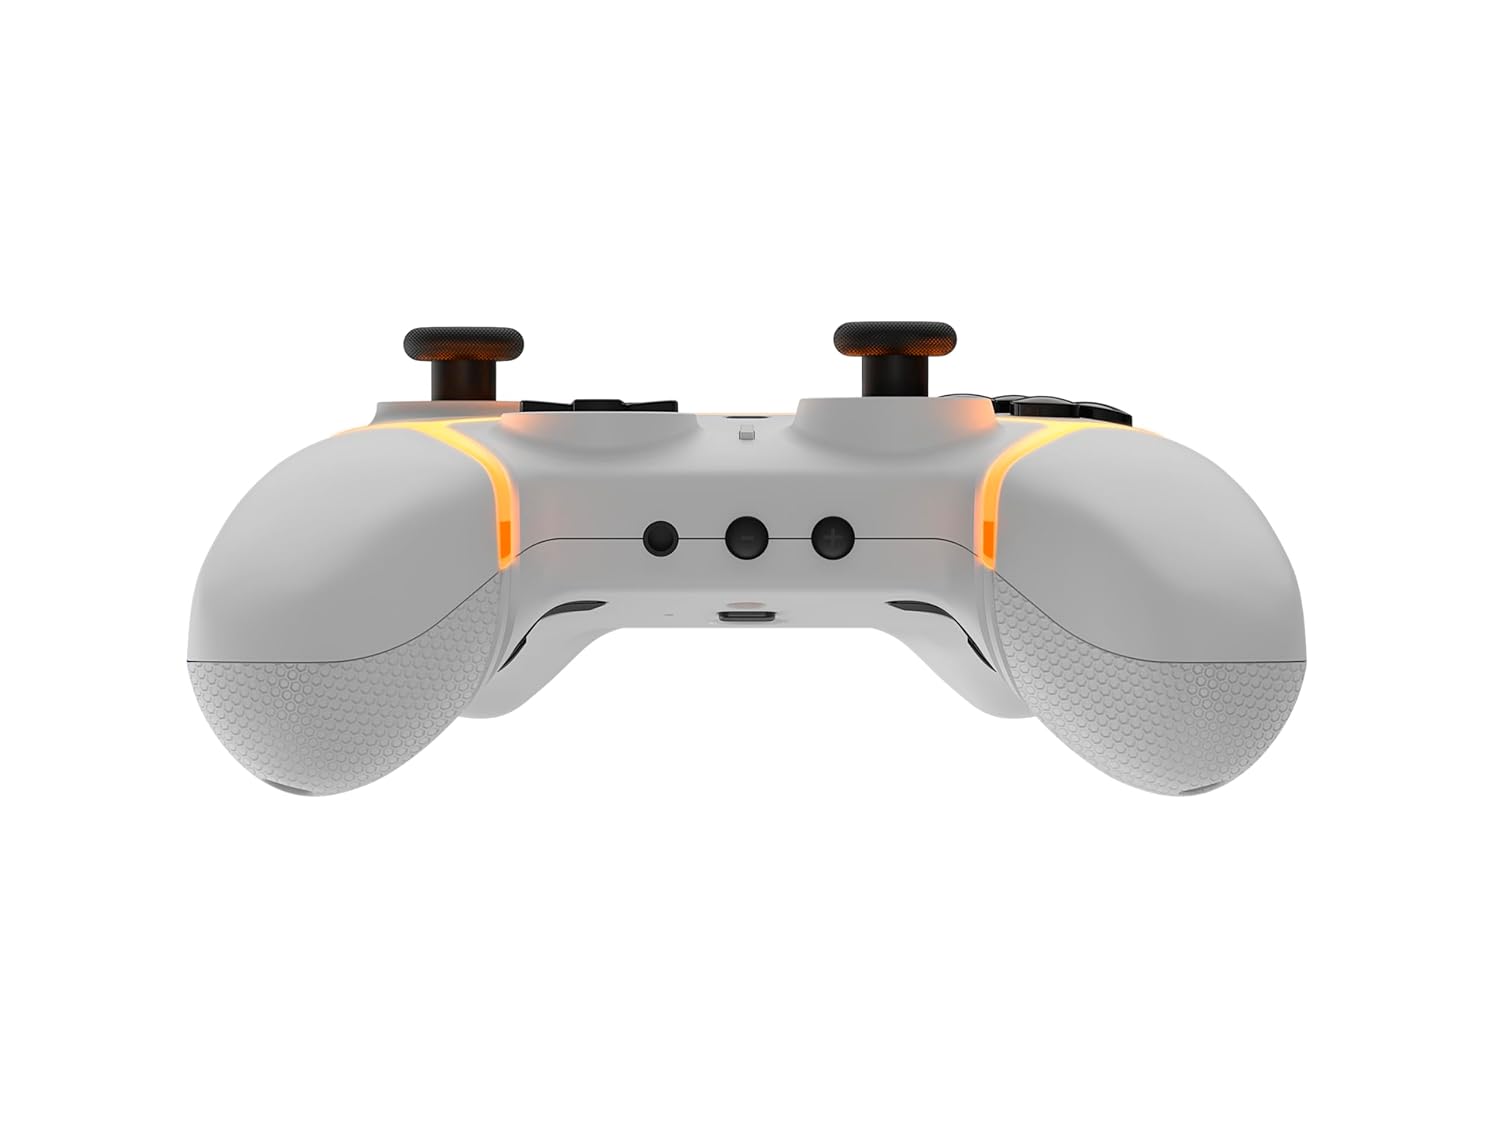
2.2 أزرار الرجوع القابلة للبرمجة
The SC3 controller includes programmable back buttons (M1, M2, M3, M4) for custom assignments.

الصورة: الخلفية view of the Gioteck SC3 controller, clearly showing the four programmable back buttons (M1, M2, M3, M4) and textured grips.
خطوات البرمجة:
- اضغط مع الاستمرار على زر البرنامج (refer to diagram if available, usually a small button on the back) until the LED indicator flashes.
- اضغط على زر الرجوع (M1, M2, M3, or M4) you wish to program. The LED will flash slowly.
- اضغط على زر الإدخال (e.g., A, B, X, Y, L, R, ZL, ZR, D-pad direction) you want to assign to the back button.
- اضغط على زر البرنامج again to save the assignment. The LED will stop flashing.
- Repeat for other back buttons as desired.
To clear a programmed button, follow steps 1-2, then press the Program Button again without pressing an input button.
2.3 تخصيص إضاءة RGB
The controller features customizable RGB lighting. Specific instructions for changing colors or effects are typically found in the product's quick start guide or by pressing a dedicated button combination (e.g., Function + R3).
Consult the quick start guide included with your controller for precise button combinations to adjust RGB lighting.
2.4 أدوات التحكم في الحركة
The SC3 controller supports motion controls, allowing for immersive gameplay in compatible Nintendo Switch titles. No special setup is usually required; motion controls activate automatically when supported by the game.
2.5 Audio Headset Jack
A 3.5mm audio headset jack is located on the controller for connecting compatible headsets. It includes dedicated mute and volume control buttons.
- رفع/خفض الصوت: ضبط إخراج الصوت.
- زر كتم الصوت: Mute/unmute microphone input.

الصورة: أعلى view of the Gioteck SC3 controller, highlighting the 3.5mm audio jack, volume controls, and mute button.
3. الصيانة
3.1 التنظيف
لتنظيف جهاز التحكم، استخدم قطعة قماش ناعمة وجافة. أما بالنسبة للأوساخ العنيدة، فامسحها برفق.ampاغسل قطعة القماش بالماء. تجنب استخدام المواد الكيميائية القاسية، أو المنظفات الكاشطة، أو المذيبات، لأنها قد تُتلف طبقة وحدة التحكم ومكوناتها الداخلية.
- Do not immerse the controller in water or any other liquid.
- Ensure all ports are dry before charging or connecting devices.
3.2 التخزين
خزّن وحدة التحكم في مكان بارد وجاف بعيدًا عن أشعة الشمس المباشرة ودرجات الحرارة القصوى. تجنب وضع أشياء ثقيلة على وحدة التحكم لمنع تلفها.
3.3 العناية بالبطارية
The controller contains a rechargeable battery. To prolong battery life:
- تجنب تفريغ البطارية بالكامل بشكل متكرر.
- Charge the controller regularly, even if not in use for extended periods (e.g., once every 3-6 months).
- Do not expose the controller to temperatures above 60°C (140°F).
4. استكشاف الأخطاء وإصلاحها
4.1 وحدة التحكم لا تتصل/تقترن
- التحقق من البطارية: تأكد من أن وحدة التحكم مشحونة بشكل كافٍ.
- بصلح: Follow the pairing instructions in Section 1.3 or 1.4.
- تدخل: Move closer to the console/device and away from potential sources of wireless interference (e.g., Wi-Fi routers, other Bluetooth devices).
- إعادة تعيين وحدة التحكم: Locate a small reset button (often a pinhole) on the back of the controller. Use a paperclip to press and hold it for a few seconds. Then attempt to re-pair.
- Update Console/Device Software: Ensure your Nintendo Switch, PC, or mobile device's operating system is up to date.
4.2 Buttons/Sticks Not Responding
- إعادة المزامنة: افصل وحدة التحكم ثم أعد توصيلها.
- ينظف: تأكد من عدم وجود أي شوائب عالقة حول الأزرار أو العصي.
- Test in another game/menu: Determine if the issue is specific to a game or system-wide.
- إعادة تعيين وحدة التحكم: Perform a hard reset as described above.
4.3 Motion Controls Not Working
- توافق اللعبة: تأكد من أن اللعبة التي تلعبها تدعم عناصر التحكم بالحركة.
- إعادة المعايرة: On Nintendo Switch, you can recalibrate motion controls in the system settings.
- إعادة تعيين وحدة التحكم: قم بإجراء إعادة تعيين صلبة.
5. المواصفات
| نموذج: | Gioteck SC3 Wireless Pro Controller |
| التوافق: | Nintendo Switch (Original, Lite, OLED), PC, Mobile Devices |
| الاتصال: | بلوتوث لاسلكي |
| الأبعاد (تقريبًا): | 2.87 × 5.35 × 6.34 بوصة (7.29 × 13.59 × 16.1 سم) |
| الوزن (تقريبا): | 10.6 أونصة (300 جرام) |
| مقبس الصوت: | 3.5mm with mute and volume controls |
| المميزات الخاصة: | Programmable back buttons, Magnetic thumb sticks, RGB lighting, Motion controls |
6. معلومات الضمان
The Gioteck SC3 Wireless Pro Controller comes with a manufacturer's warranty. For specific details regarding warranty coverage, duration, and claims process, please refer to the warranty card included with your product or visit the official Gioteck webموقع.
يرجى الاحتفاظ بإثبات الشراء لأغراض الضمان.
7. دعم العملاء
If you encounter any issues or have questions not covered in this manual, please contact Gioteck customer support. Contact information can typically be found on the product packaging or the official Gioteck webموقع.
Gioteck Official Webموقع: www.gioteck.com


