1. المقدمة
This manual provides essential information for the safe and efficient use of your AOC U34V5C/BK 34-inch WQHD LED Monitor. Please read this manual thoroughly before operating the device and retain it for future reference. The AOC U34V5C/BK is designed to deliver a high-quality visual experience with its 3440 x 1440 WQHD resolution and 21:9 aspect ratio, suitable for various applications from professional work to entertainment.
2. معلومات السلامة
يرجى مراعاة احتياطات السلامة التالية لمنع تلف الشاشة وضمان السلامة الشخصية:
- لا تعرض الشاشة للمطر أو الرطوبة لتجنب مخاطر الحريق أو الصدمات الكهربائية.
- لا تفتح الشاشةasinز. لا توجد قطع غيار قابلة للصيانة من قِبل المستخدم. يُرجى إحالة جميع أعمال الصيانة إلى فنيي صيانة مؤهلين.
- ضع الشاشة على سطح ثابت ومستوٍ لمنع سقوطها.
- تأكد من التهوية الجيدة حول الشاشة. لا تسد فتحات التهوية.
- استخدم فقط سلك الطاقة والمحول المرفق مع الشاشة.
- افصل الشاشة عن مأخذ الطاقة أثناء العواصف الرعدية أو عند عدم استخدامها لفترات طويلة.
3. محتويات العبوة
تأكد من وجود جميع العناصر في العبوة:
- AOC U34V5C/BK Monitor
- حامل الشاشة (القاعدة والرقبة)
- كابل الطاقة
- كابل HDMI
- كابل ديسبلايبورت
- كابل USB-C
- دليل المستخدم (هذا المستند)
4. انتهى المنتجview
The AOC U34V5C/BK monitor features a 34-inch VA panel with WQHD resolution, USB-C connectivity with 65W Power Delivery, and a 100Hz refresh rate with AMD FreeSync support.
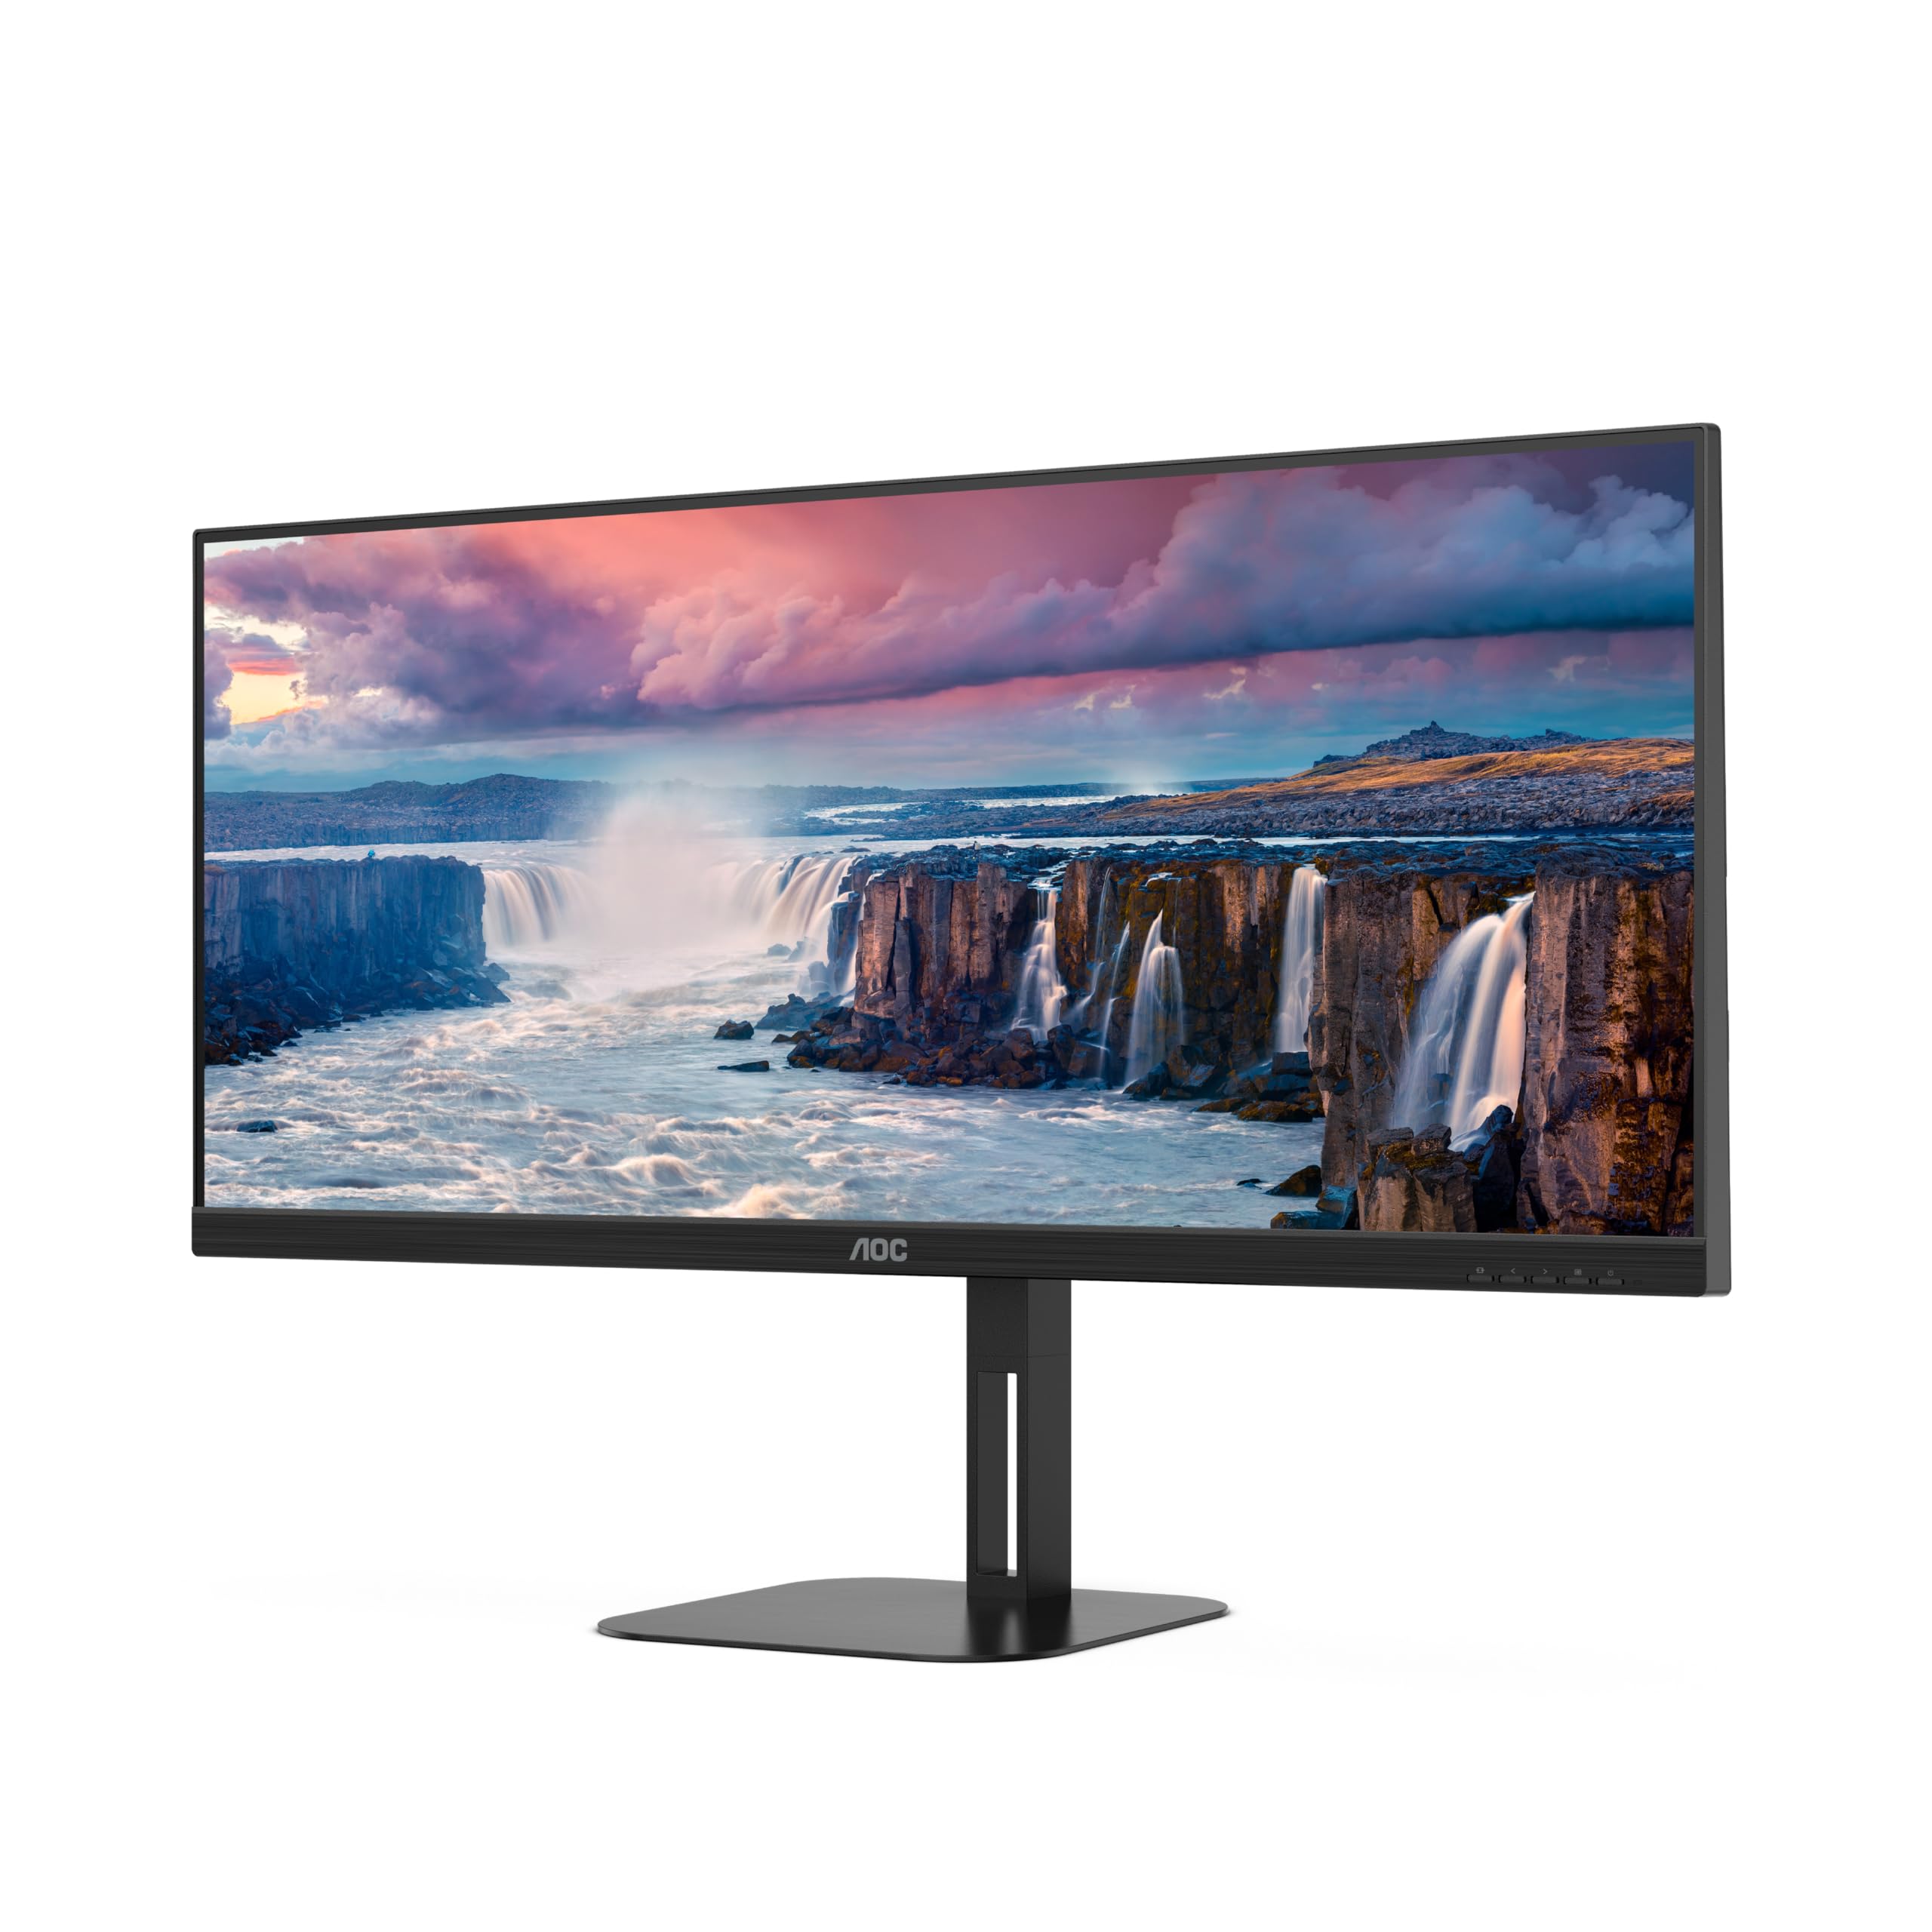
الشكل 4.1: الجبهة view of the AOC U34V5C/BK monitor highlighting its 34-inch VA panel, USB-C port with 65W Power Delivery, 100Hz refresh rate, and AMD FreeSync technology.
4.1 مكونات الشاشة
Familiarize yourself with the various parts of your monitor:
- اللوحة الأمامية: Display screen, OSD control buttons (usually located on the bottom right bezel).
- اللوحة الخلفية: Power input, video input ports (HDMI, DisplayPort, USB-C), USB hub ports, security lock slot.
- يقف: Provides stable support and allows for height, tilt, and swivel adjustments.

الشكل 4.2: خلفي view of the AOC U34V5C/BK monitor, showing the VESA mount compatibility and the stand attachment point.

الشكل 4.3: القاع view of the AOC U34V5C/BK monitor, detailing the power input, DisplayPort, HDMI, USB-C, and USB-A hub ports.
5. الإعداد
5.1 تجميع الحامل
- ضع الشاشة بعناية ووجهها لأسفل على قطعة قماش ناعمة ونظيفة لمنع الخدوش.
- قم بتركيب عنق الحامل في الجزء الخلفي من الشاشة حتى يستقر في مكانه أو يتم تأمينه بالبراغي (إن أمكن).
- قم بتثبيت قاعدة الحامل على رقبة الحامل وقم بربط المسمار المثبت في أسفل القاعدة.
- Carefully lift the monitor and place it on a stable desk.
5.2 توصيل الشاشة
تأكد من إيقاف تشغيل جهاز الكمبيوتر والشاشة قبل إجراء أي توصيلات.
- توصيل الطاقة: قم بتوصيل كابل الطاقة بمدخل الطاقة الخاص بالشاشة ثم بمأخذ كهربائي مؤرض.
- اتصال الفيديو: اختر أحد الخيارات التالية:
- HDMI: Connect one end of the HDMI cable to your computer's HDMI output and the other end to an HDMI input on the monitor.
- منفذ العرض: Connect one end of the DisplayPort cable to your computer's DisplayPort output and the other end to the DisplayPort input on the monitor.
- يو اس بي سي: Connect one end of the USB-C cable to your computer's USB-C port (which supports video output) and the other end to the USB-C input on the monitor. This connection can also provide power delivery and USB data transfer.
- توصيل موزع USB (اختياري): If using the monitor's USB hub, connect a USB upstream cable (USB-C to USB-A or USB-C to USB-C, depending on your computer) from your computer to the monitor's USB upstream port. This enables the monitor's USB-A ports for peripherals.
6. تشغيل الشاشة
6.1 تشغيل/إيقاف التشغيل
Press the power button, usually located on the bottom right bezel, to turn the monitor on or off. The power indicator light will illuminate when the monitor is on.
6.2 قائمة العرض على الشاشة (OSD)
The OSD menu allows you to adjust various monitor settings. Use the control buttons (joystick or individual buttons) on the monitor's bezel to navigate the menu.
- Press the Menu button (or push the joystick) to open the OSD menu.
- Use the navigation buttons (or joystick) to move through the menu options.
- Press the Select button (or push the joystick) to enter a sub-menu or confirm a selection.
- Use the Exit button (or move the joystick left) to go back to the previous menu or exit the OSD.
6.3 إعدادات العرض على الشاشة الشائعة
- السطوع: Adjust brightness, contrast, and gamma.
- إعداد الصورة: Fine-tune image quality, sharpness, and pixel clock.
- إعداد الألوان: اختر درجة حرارة اللون، أو وضع sRGB، أو إعدادات الألوان التي يحددها المستخدم.
- Picture Boost: Enhance specific areas of the screen.
- إعداد OSD: اضبط لغة العرض على الشاشة وموضعها وشفافيتها.
- وضع اللعبة: Enable/disable FreeSync, adjust overdrive, and game modes.
- إضافي: Select input source, reset settings, view معلومة.
7. الصيانة
7.1 تنظيف الشاشة
- افصل الشاشة دائمًا قبل التنظيف.
- استخدم قطعة قماش ناعمة وخالية من الوبر برفق دampيُنظف بالماء أو بمنظف شاشات خفيف وغير كاشط.
- Do not use alcohol, ammonia, or abrasive cleaners, as they may damage the screen or casing.
- Wipe the screen gently. Do not apply excessive pressure.
7.2 العناية العامة
- تجنب وضع أشياء ثقيلة على الشاشة أو كابلاتها.
- أبقِ الشاشة بعيدة عن أشعة الشمس المباشرة ومصادر الحرارة ودرجات الحرارة القصوى.
- Do not expose the monitor to strong vibrations or impacts.
8. استكشاف الأخطاء وإصلاحها
إذا واجهت مشكلات مع شاشتك، فراجع المشكلات والحلول الشائعة التالية:
| مشكلة | السبب المحتمل | حل |
|---|---|---|
| لا توجد صورة على الشاشة | Monitor not powered on; Incorrect input source; Loose video cable | Press power button; Select correct input via OSD; Reconnect video cable securely |
| الصورة داكنة/ساطعة للغاية | إعدادات السطوع/التباين غير صحيحة | Adjust Brightness and Contrast in OSD menu |
| صورة وامضة | Incorrect refresh rate; Faulty cable | Set refresh rate to 100Hz in display settings; Try a different video cable |
| منافذ USB لا تعمل | كابل USB العلوي غير متصل | Connect the USB-C upstream cable from the monitor to your computer |
If the problem persists after trying these solutions, contact AOC customer support.
9. المواصفات
Below are the technical specifications for the AOC U34V5C/BK monitor:

Figure 9.1: Product Information Sheet for AOC U34V5C/BK, detailing energy efficiency and technical parameters.
| المعلمة | قيمة |
|---|---|
| ماركة | شركة أو سي |
| نموذج | U34V5C/BK |
| حجم الشاشة | 34 بوصة (86.4 سم) |
| دقة | 3440 × 1440 WQHD |
| نسبة العرض إلى الارتفاع | 21:9 |
| وقت الاستجابة | 4 ميلي ثانية |
| معدل التحديث | 100 Hz (default 60 Hz) |
| تقنية الألواح | VA Panel, LED LCD |
| Viewزاوية جي | 178 درجة (أفقي/رأسي) |
| واجهة الأجهزة | DisplayPort, HDMI, USB-C |
| إجمالي منافذ USB | 4 (USB Hub) |
| توصيل الطاقة (USB-C) | 65 واط |
| المجلدtage | 5 Volts (Internal Power Supply) |
| أبعاد المنتج | 50 × 25 × 40 سم؛ 7 كجم |
| فئة كفاءة الطاقة (SDR) | G |
| استهلاك الطاقة (SDR) | 34.0 واط |
| فئة كفاءة الطاقة (HDR) | G |
| استهلاك الطاقة (HDR) | 35.0 واط |
| الطاقة الاحتياطية | 0.5 واط |
| Minimum guaranteed software/firmware updates | 8 سنة |
| Minimum guaranteed spare parts availability | 7 سنة |
| الحد الأدنى من دعم المنتج المضمون | 8 سنة |
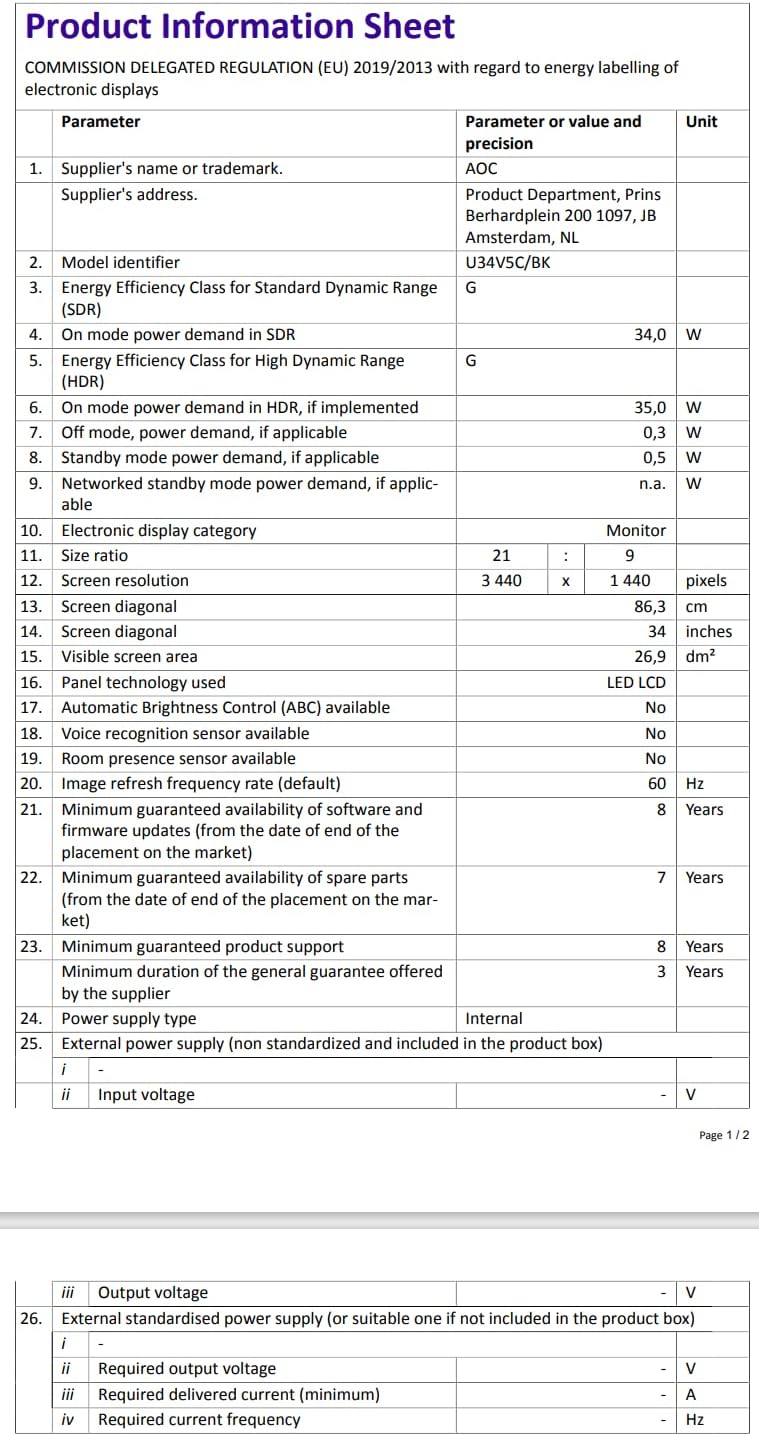
Figure 9.2: Energy Label for AOC U34V5C/BK. For more details, visit the قاعدة بيانات EPREL.
10. الضمان والدعم
The AOC U34V5C/BK monitor comes with a minimum guaranteed general warranty of سنتان المقدمة من المورد.
For technical support, warranty claims, or service inquiries, please visit the official AOC website or contact your local AOC customer service center. Ensure you have your monitor's model number (U34V5C/BK) and serial number ready when contacting support.