1. المقدمة
Thank you for choosing the CREATE THERA RETRO PRO Semi-Automatic Espresso Machine. This machine is designed to provide you with high-quality espresso, cappuccino, and latte beverages using ground coffee. Featuring a 20-bar high-pressure pump, NTC temperature control, and an integrated milk tank, it offers convenience and excellent results. Please read this manual carefully before first use to ensure proper operation and maintenance.

الصورة 1.1: الجبهة view of the CREATE THERA RETRO PRO Espresso Machine in Cream White.
2. تعليمات السلامة
اتبع دائمًا احتياطات السلامة الأساسية عند استخدام الأجهزة الكهربائية لتقليل خطر نشوب حريق أو التعرض لصدمة كهربائية و/أو إصابة الأشخاص، بما في ذلك ما يلي:
- اقرأ كافة التعليمات قبل استخدام الجهاز.
- لا تلمس الأسطح الساخنة. استخدم المقابض أو الأزرار.
- للحماية من الحريق والصدمات الكهربائية وإصابة الأشخاص، لا تغمر السلك أو المقابس أو الجهاز في الماء أو أي سائل آخر.
- من الضروري المراقبة الدقيقة عند استخدام أي جهاز بواسطة الأطفال أو بالقرب منه.
- افصل الجهاز عن المقبس عند عدم استخدامه وقبل التنظيف. اتركه ليبرد قبل تركيب أو خلع الأجزاء وقبل تنظيف الجهاز.
- لا تقم بتشغيل أي جهاز بسلك أو قابس تالف أو بعد حدوث عطل في الجهاز، أو تعرضه للتلف بأي شكل من الأشكال.
- قد يؤدي استخدام ملحقات غير موصى بها من قبل الشركة المصنعة للجهاز إلى نشوب حريق أو حدوث صدمة كهربائية أو إصابة الأشخاص.
- لا تستخدمه في الهواء الطلق.
- لا تترك السلك يتدلى على حافة الطاولة أو المنضدة، أو يلامس الأسطح الساخنة.
- لا تضعه على أو بالقرب من موقد غاز أو كهرباء ساخن، أو في فرن ساخن.
- قم دائمًا بتوصيل القابس بالجهاز أولاً ، ثم قم بتوصيل السلك بمأخذ الحائط. لقطع الاتصال ، اضبط أي عنصر تحكم على "إيقاف التشغيل" ، ثم أزل القابس من مقبس الحائط.
- لا تستخدم الجهاز لغير الغرض المخصص له.
3. مكونات المنتج
Familiarize yourself with the parts of your CREATE THERA RETRO PRO Espresso Machine.
- الوحدة الرئيسية مع لوحة تحكم
- خزان المياه (سعة 1.5 لتر)
- خزان الحليب
- فلتر القهوة
- Filter Baskets (for 1 and 2 cups)
- Measuring Scoop with Tamper
- صينية تقطير قابلة للتعديل
- صينية تدفئة الكوب

Image 3.1: Included accessories: Portafilter, two filter baskets, and a measuring scoop with integrated tampاه.

Image 3.2: Detail of the control panel, showing beverage selection buttons and the temperature gauge.
4. الإعداد
4.1 فك التغليف والتنظيف الأولي
- Carefully remove all packaging materials and place the machine on a stable, flat, heat-resistant surface.
- Wash the water tank, milk tank, portafilter, filter baskets, and drip tray with warm, soapy water. Rinse thoroughly and dry.
- امسح الجزء الخارجي من الماكينة بالإعلانamp قطعة قماش.
4.2 ملء خزان المياه
أزل خزان الماء من الجزء الخلفي للجهاز. املأه بالماء البارد النظيف حتى علامة الحد الأقصى. أعد الخزان إلى مكانه بإحكام.
4.3 Preparing the Milk Tank
If making milk-based drinks, fill the milk tank with desired milk (dairy or plant-based) between the MIN and MAX lines. Ensure the milk frothing tube is properly inserted into the tank.

Image 4.1: Removing the milk tank for filling or cleaning.
4.4 الاستخدام الأول / تحضير الماكينة
Before first use, or if the machine has not been used for a long time, it needs to be primed:
- تأكد من أن خزان المياه ممتلئ.
- Place a large container under the coffee spout and milk frothing nozzle.
- Turn on the machine. It will start heating up.
- Once heated, press the Espresso button and let water flow through until the tank is almost empty. Repeat this process with the milk frothing function (if applicable, by selecting a milk-based drink without coffee grounds) to prime the milk system.
5. تعليمات التشغيل
5.1 Preparing Ground Coffee
Use freshly ground coffee for best results. We recommend using naturally roasted ground coffee. Avoid sugar-roasted mixed coffee as it can clog the filters over time.
- قم باختيار سلة الفلتر المناسبة (لقطة واحدة أو لقطة مزدوجة) ثم ضعها داخل حامل الفلتر.
- Fill the filter basket with ground coffee. Use the measuring scoop provided.
- Tamp قم بتوزيع القهوة بإحكام وبشكل متساوٍ باستخدام الـamper end of the scoop.
- امسح أي بقايا قهوة زائدة من حافة حامل الفلتر.
- Insert the portafilter into the brewing head and turn it to the right until it is securely locked.
5.2 صنع الإسبريسو
- Ensure the machine is heated and ready (temperature gauge indicates optimal temperature).
- ضع الكوب (الأكواب) على صينية التنقيط أسفل فوهات فلتر القهوة.
- اضغط على إسبرسو button. The machine will dispense the programmed amount of espresso.
- To adjust the volume, press and hold the Espresso button until the desired volume is reached, then release. The machine will remember this setting for future use.

Image 5.1: Preparing two cups of espresso simultaneously.
5.3 Making Cappuccino or Latte
The machine features an integrated milk tank for automatic milk frothing.
- Ensure the milk tank is filled with milk and properly attached.
- Place your cup under both the coffee spout and the milk frothing nozzle.
- For Cappuccino, press the كابتشينو button. The machine will first dispense frothed milk, then coffee.
- For Latte, press the لاتيه button. The machine will dispense frothed milk, then coffee, with a different milk-to-coffee ratio.
- To adjust the volume of milk foam, use the foam adjustment dial on the milk tank.
- To adjust the total volume of the drink, press and hold the respective button until the desired volume is reached, then release.
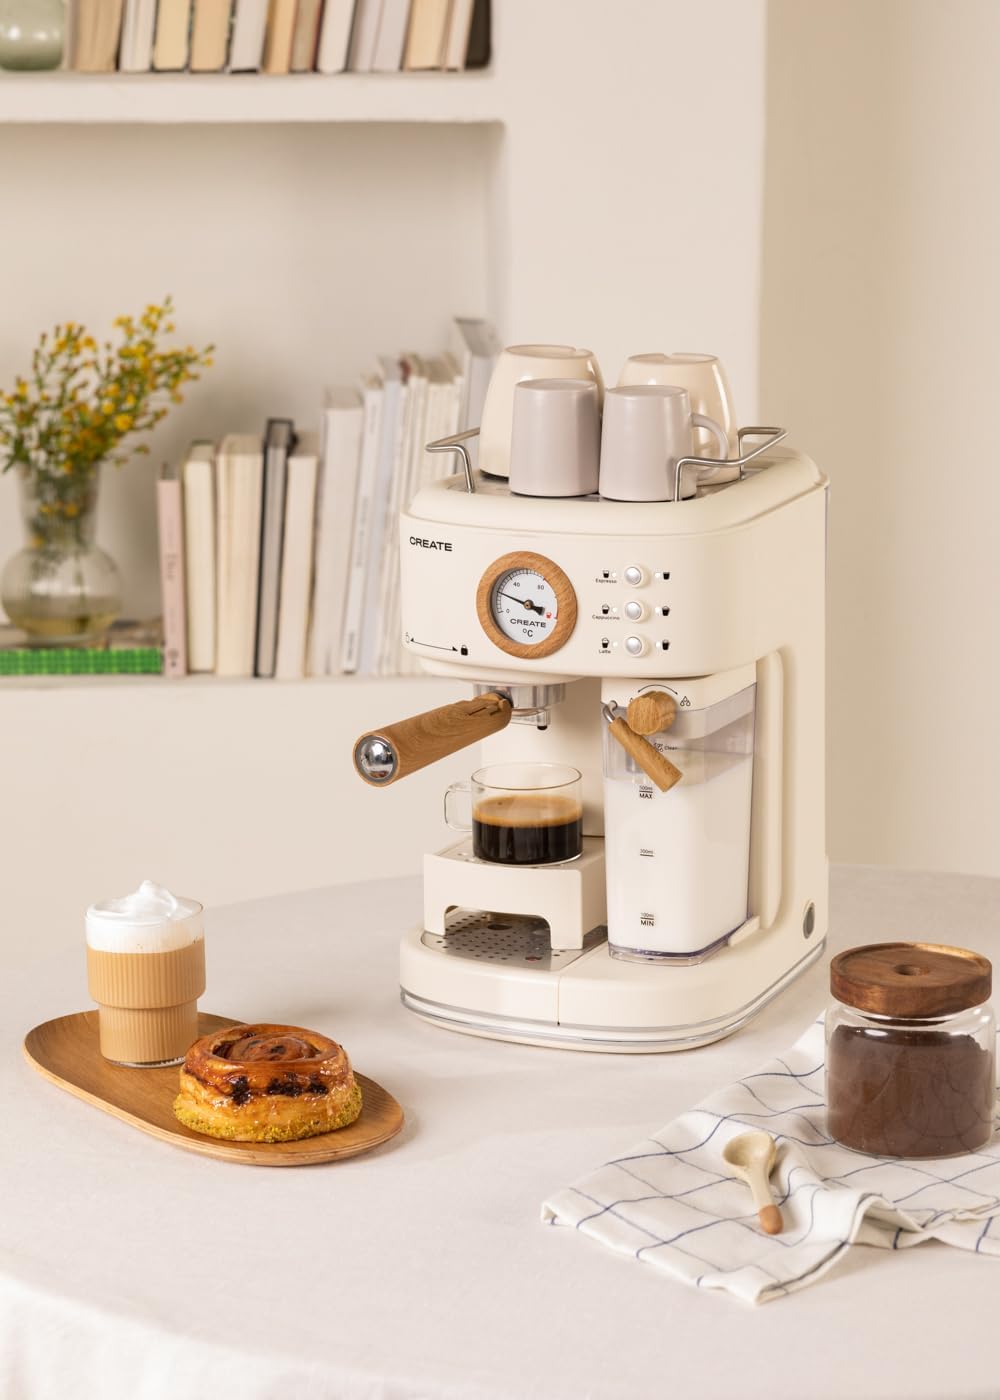
Image 5.2: User interacting with the control panel to select a beverage.
5.4 Adjustable Drip Tray
The drip tray can be adjusted to accommodate different cup sizes. Simply lift or lower the tray as needed to fit your cup comfortably and minimize splashing.

Image 5.3: The adjustable drip tray, designed to fit various cup sizes.
6. الصيانة
6.1 التنظيف اليومي
- صينية التنقيط: Empty and clean the drip tray daily or when the indicator shows it's full. Wash with warm, soapy water and rinse.
- Milk Tank and Frothing Nozzle: After each use, remove the milk tank and clean it thoroughly. Run the "Clean" function (if available, or dispense hot water through the nozzle) to clear any milk residue from the frothing system. This is crucial to prevent blockages and maintain hygiene.
- حامل الفلتر وسلال الفلتر: Remove spent coffee grounds. Rinse the portafilter and filter baskets under running water. Use a brush to remove any stubborn coffee residue.
- الخارج: امسح الجزء الخارجي من الجهاز بقطعة قماش ناعمة، دamp قماش. لا تستخدم المنظفات الكاشطة أو منصات التلميع.
6.2 إزالة الترسبات
Regular descaling is essential to maintain machine performance and extend its lifespan, especially in areas with hard water. The frequency depends on water hardness and usage. Refer to the machine's indicator (if any) or descale every 2-3 months.
- Use a descaling solution specifically designed for coffee machines. Follow the instructions on the descaling solution packaging.
- Empty the water tank and fill it with the descaling solution mixed with water according to the solution's instructions.
- Place a large container under the coffee spout and milk frothing nozzle.
- Run the descaling cycle as per your machine's specific instructions (often involves pressing and holding certain buttons, or a dedicated descaling program).
- After the descaling solution has run through, rinse the water tank and fill it with fresh water. Run several cycles of plain water through the machine to thoroughly rinse out any descaling solution.
7. استكشاف الأخطاء وإصلاحها
| مشكلة | السبب المحتمل | حل |
|---|---|---|
| No coffee dispenses or slow flow. | خزان الماء فارغ؛ الآلة غير جاهزة للاستخدام؛ القهوة مطحونة ناعماً جداً أو أكثر من اللازمamped; brewing head clogged. | Fill water tank; prime the machine; use coarser grind or less coffee; clean brewing head. |
| Milk not frothing properly or no milk dispensed. | Milk tank empty; milk frothing nozzle clogged; milk too cold/warm or type of milk. | Fill milk tank; clean frothing nozzle thoroughly; use cold milk (4-6°C); try different milk types. |
| القهوة ليست ساخنة بما فيه الكفاية. | Machine not fully preheated; cups not preheated. | Allow machine to fully preheat; preheat cups using hot water or the cup warming tray. |
| الماكينة تتسرب منها المياه. | خزان الماء غير مثبت بشكل صحيح؛ صينية التنقيط ممتلئة؛ مشاكل في مانع التسرب. | Ensure water tank is correctly inserted; empty drip tray; contact support if problem persists. |
| Small coffee portions. | Programmed volume is too low. | Reprogram the desired volume by holding the button until the cup is filled to your preference. |
8. المواصفات
| ميزة | التفاصيل |
|---|---|
| ماركة | يخلق |
| نموذج | THERA RETRO PRO |
| لون | كريم ابيض |
| أبعاد المنتج (الطول × العرض × الارتفاع) | 22.8 × 32.5 × 36 سم |
| وزن العنصر | 5 كيلوغرام |
| Volume (Water Tank) | 1.5 لتر |
| المجلدtage | 240 فولت |
| ضغط | 20 بار |
| نوع القهوة | القهوة المطحونة |
| ميزة خاصة | Integrated Milk Frother, Adjustable Drip Tray, NTC Temperature Control, Quick Heating |

Image 8.1: Product dimensions: 36cm height, 22.81cm width, 32.51cm depth.
9. الضمان والدعم
Your CREATE THERA RETRO PRO Espresso Machine comes with a standard manufacturer's warranty. For detailed warranty information, please refer to the warranty card included with your product or visit the official CREATE website. For technical support, spare parts, or service inquiries, please contact CREATE customer service directly. Ensure you have your model number (THERA RETRO PRO) and purchase details ready when contacting support.
For further assistance, please visit the official CREATE brand store: CREATE Brand Store


