1. انتهى المنتجview
The BRINKS Commercial Door Exit Device is a robust and reliable solution designed for commercial door applications. This aluminum finish exit device is engineered to provide secure and efficient egress, meeting stringent industry standards for safety and accessibility.
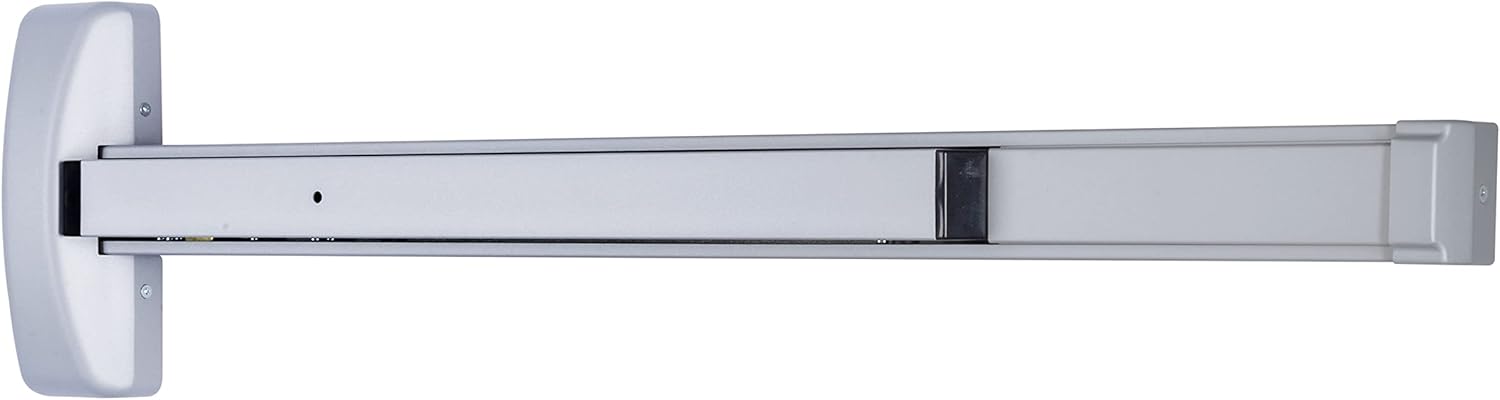
الصورة 1.1: الجبهة view of the BRINKS Commercial Door Exit Device.
Key features include its reversibility for both left- and right-handed doors, and the ability to be adjusted with a dogging device for constant open functionality. It is designed to fit doors ranging from 28 inches to 42 inches wide and includes a deadlocking latch bolt with a 5/8-inch projection.

Image 1.2: BRINKS Commercial Exit Device and Pull Trim overview.
2. تعليمات السلامة الهامة
- اقرأ جميع التعليمات جيداً قبل التركيب والتشغيل.
- استخدم الأدوات ومعدات السلامة المناسبة أثناء التثبيت.
- تأكد من أن الباب والإطار سليمين من الناحية الهيكلية وقادرين على دعم الجهاز.
- For optimal safety and compliance, professional installation is recommended.
- Do not modify the device in any way, as this may compromise its functionality and safety ratings.
3. محتويات العبوة
تأكد من وجود كافة المكونات قبل البدء في التثبيت:
- Commercial Door Exit Device (Main Bar Assembly)
- SC4 Brass Rim Cylinder
- Small Steel Pull Plate
- Mounting Hardware (screws, fasteners)
- كم اسطوانة
- قالب التثبيت

الصورة 3.1: انفجرت view showing the main components and included hardware.
4. دليل التثبيت
This exit device is designed for straightforward installation on commercial doors. It is reversible, allowing it to be mounted on both left- and right-handed doors. The device fits doors between 28 inches and 42 inches wide.
- جهز الباب: Ensure the door is clean and free of obstructions. Use the provided full-scale drilling template to mark the precise locations for drilling holes on the door. Accurate marking is crucial for proper alignment.
- ثقوب الحفر: Carefully drill holes as indicated by the template. For doors requiring 161 door preparation (2-1/8" bore hole), the included cylinder sleeve will simplify the installation process.
- Install the Exit Device: Mount the main bar assembly to the interior side of the door using the provided mounting hardware. Ensure it is level and securely fastened.
- Install the Rim Cylinder and Pull Plate: Attach the SC4 brass rim cylinder to the exterior side of the door, aligning it with the mechanism of the exit device. Install the small steel pull plate on the exterior for entry.
- Adjust and Test: After installation, test the device's operation. Ensure the push bar retracts the latch bolt smoothly and fully. Verify that the deadlocking latch bolt engages properly when the door is closed.
For detailed visual instructions, refer to the installation diagrams provided with your product packaging.
5. تعليمات التشغيل
The BRINKS Commercial Door Exit Device is designed for intuitive and reliable operation.
- Egress (Exiting): To exit, simply push the horizontal bar on the interior side of the door. This action retracts the latch bolt, allowing the door to open.
- Dogging Device (Hold Open): The device can be adjusted with a dogging device to keep the latch bolt retracted, allowing the door to remain constantly open without needing to push the bar. This is useful for high-traffic periods or when temporary unrestricted access is desired. Consult the installation guide for specific instructions on engaging and disengaging the dogging device.
- Entry (From Exterior): Entry from the exterior is typically achieved using the SC4 brass rim cylinder with a key, or by using the small steel pull plate if the dogging device is engaged. Note that this device does not include an exterior handle for unkeyed entry unless the dogging device is active.
6. الرعاية والصيانة
Regular maintenance will ensure the longevity and optimal performance of your BRINKS Commercial Door Exit Device.
- تنظيف: قم بتنظيف الجهاز بانتظام باستخدام قطعة قماش ناعمة.amp القماش. تجنب استخدام المنظفات الكاشطة أو المذيبات التي قد تؤدي إلى إتلاف الطبقة النهائية.
- تشحيم: Periodically apply a small amount of silicone-based lubricant to moving parts, such as the latch bolt mechanism and the pivot points of the push bar, to ensure smooth operation. Do not over-lubricate.
- تقتيش: Routinely inspect the device for any signs of wear, loose screws, or damage. Ensure all mounting hardware remains tight. Address any issues promptly to prevent further damage or malfunction.
- فحص الوظائف: Test the push bar and latch bolt operation regularly to confirm they function smoothly and securely.
7. استكشاف المشكلات الشائعة وإصلاحها
| مشكلة | السبب المحتمل | حل |
|---|---|---|
| Push bar is stiff or sticky. | تراكم الأوساخ/الحطام، ونقص التشحيم. | Clean the mechanism and apply silicone lubricant to moving parts. |
| Latch bolt does not fully retract/extend. | Misalignment, obstruction, worn parts. | Check alignment of the device and strike plate. Clear any obstructions. If worn, consider professional repair or replacement. |
| Device feels loose on the door. | مسامير تثبيت فضفاضة. | أحكم ربط جميع براغي التثبيت. لا تُفرط في الربط. |
| Dogging device not holding open. | Improper engagement, internal issue. | Ensure the dogging device is fully engaged as per instructions. If issue persists, contact support. |
8. المواصفات الفنية
| يصف | التفاصيل |
|---|---|
| رقم الموديل | قبل الميلاد 40010 |
| مادة | Aluminum (Handle), Plastic (Body) |
| ينهي | Aluminum Finish |
| Door Width Compatibility | من 28 بوصة إلى 42 بوصة |
| Latch Bolt Projection | 5/8 بوصة |
| الامتثال للمعايير | ANSI Grade 1, UL 305 Compliant, ADA Compliant |
| وزن العنصر | 9.25 رطل |
| أبعاد المنتج | 2.32 بوصة طول × 3.35 بوصة عرض × 15.27 بوصة ارتفاع |
| رمز المنتج الموحد | 039208237178 |


Image 8.1: Compliance certifications: ANSI Grade 1, UL 305, and ADA.
9. معلومات الضمان
This BRINKS Commercial Door Exit Device comes with a manufacturer's warranty. For specific details regarding warranty coverage, terms, and conditions, please refer to the warranty documentation included with your product packaging or visit the official BRINKS webموقع.
10. الدعم
For further assistance, technical support, or inquiries regarding your BRINKS Commercial Door Exit Device, please contact BRINKS customer service. Contact information can typically be found on the BRINKS official webالموقع أو على عبوة المنتج.

Image 10.1: BRINKS Commercial offers a range of door hardware solutions.


