1. المقدمة
This instruction manual provides essential information for the safe and efficient use of your TecTake Tool Trolley and Toolbox, Model 402651. Please read this manual thoroughly before assembly and operation to ensure proper handling and to maximize the lifespan of your product. Keep this manual for future reference.
2. تعليمات السلامة
احرص دائمًا على مراعاة احتياطات السلامة التالية لمنع الإصابة أو إتلاف المنتج:
- Ensure the tool trolley is placed on a stable, level surface before loading or moving.
- Do not exceed the maximum weight capacity of the drawers or the overall unit. Overloading can cause instability and damage.
- Engage the parking brakes on the wheels when the trolley is stationary to prevent accidental movement.
- Close all drawers before moving the trolley to prevent contents from spilling and to maintain stability.
- Be cautious of pinch points when opening and closing drawers and the toolbox lid.
- Keep children and unauthorized persons away from the tool trolley, especially when it is in use or drawers are open.
- Do not stand or climb on the tool trolley.
- Wear appropriate personal protective equipment (PPE) if handling heavy tools or during assembly.
3. محتويات العبوة
تأكد من وجود جميع المكونات عند فك العبوة:
- 1 x Tool Trolley (lower unit)
- 1 x Modular Toolbox (upper unit)
- 4 x Wheels (2 fixed, 2 swivel with brakes)
- 1 × مقبض
- 2 x Keys for toolbox lock
- Anti-slip mats for drawers and top surface
- أدوات التجميع (البراغي، المسامير، إلخ).
4. تعليمات التجميع
Assembly of the TecTake Tool Trolley and Toolbox is straightforward. Follow these steps:
- قم بتثبيت العجلات: Securely fasten the four wheels to the base of the tool trolley using the provided hardware. Ensure the two swivel wheels with parking brakes are positioned at the front for easier maneuverability and stability. Note: Some components, such as the feet or wheel mounts, may require gentle tapping with a rubber mallet for secure insertion.
- تثبيت المقبض: Attach the practical handle to either the right or left side of the tool trolley, according to your preference, using the supplied screws.
- Place Anti-Slip Mats: Insert the anti-slip mats into each drawer and onto the top surface of the tool trolley.
- Position the Toolbox: Carefully place the modular toolbox onto the top surface of the tool trolley. Ensure it is seated securely.
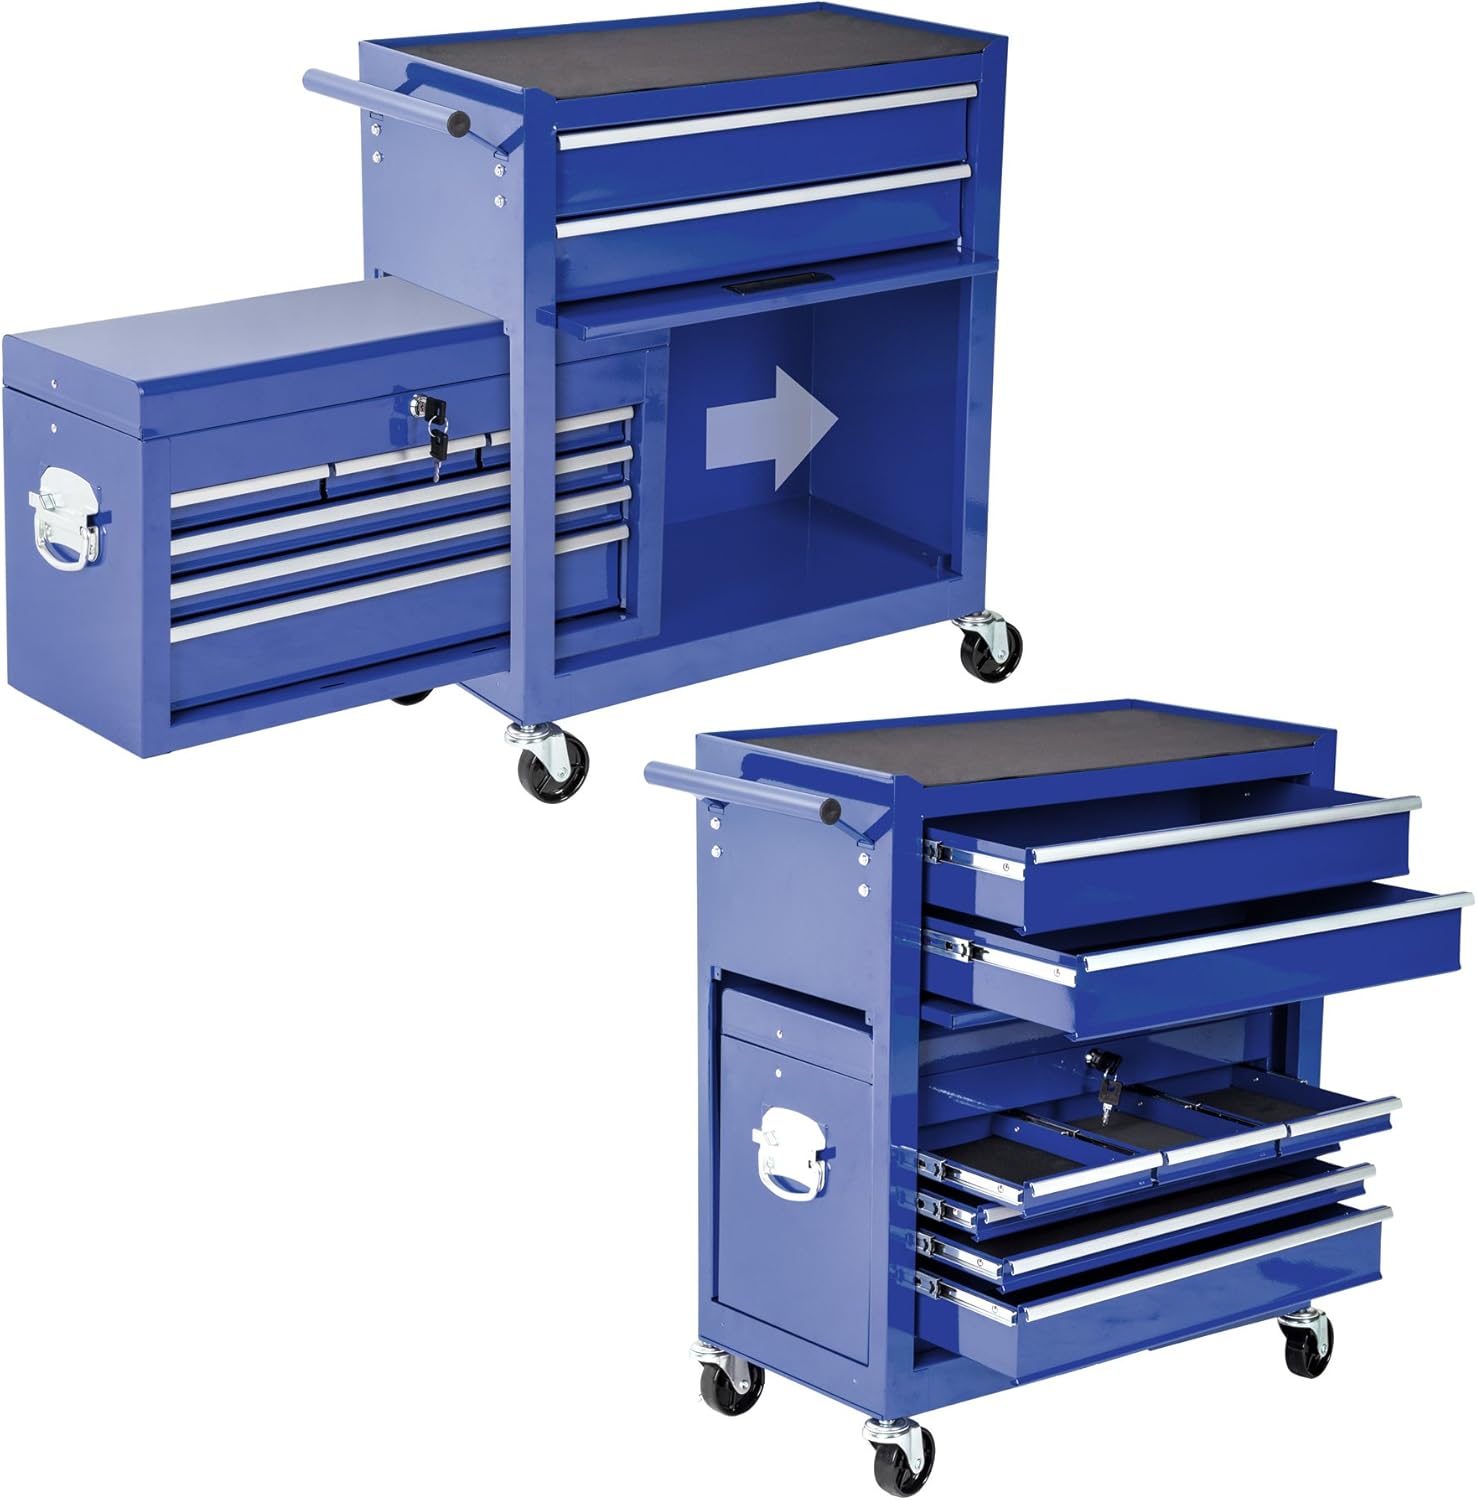
Figure 1: The modular toolbox can be separated from the main trolley unit for independent use or transport.

الشكل 2: تفصيلي view of the practical handle attached to the side of the TecTake Tool Trolley. This handle can be mounted on either the right or left side, providing flexibility for maneuvering the trolley.
5. تعليمات التشغيل
Your TecTake Tool Trolley and Toolbox is designed for convenient tool storage and mobility.
5.1 استخدام الأدراج
- All drawers feature smooth ball-bearing slides for easy opening and closing.
- The anti-slip mats prevent tools from shifting and reduce noise.
- To open a drawer, gently pull the handle. To close, push until it is fully seated.
5.2 Using the Modular Toolbox
- The upper toolbox can be used independently or placed on the trolley.
- It features a lockable lid and side handles for easy transport. Use the provided keys to lock and unlock.
- The lower compartment of the trolley can also be used to store the toolbox when not in use, or for larger items.
5.3 الحركة والكبح
- The four stable wheels, including two swivel wheels, allow for easy maneuvering.
- To move the trolley, ensure the parking brakes on the swivel wheels are disengaged.
- To secure the trolley in place, engage the parking brakes by pressing down on the brake levers on the swivel wheels.
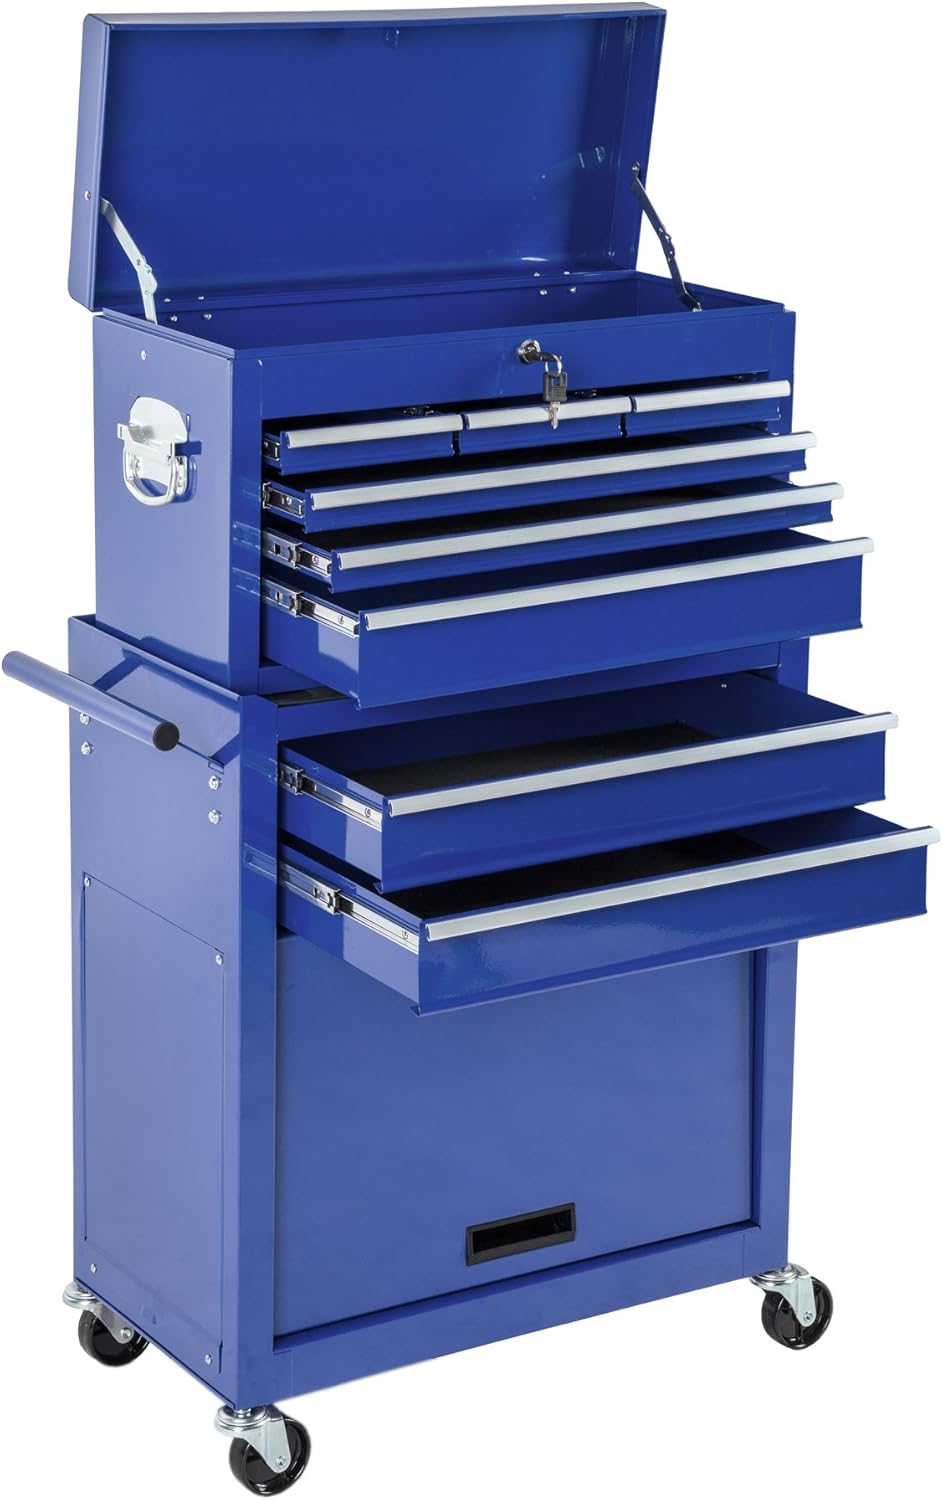
Figure 3: The TecTake Tool Trolley and Toolbox in its complete assembled form, with several drawers partially open, showcasing the storage capacity.

Figure 4: A user organizing small components within the top compartment of the TecTake Toolbox. The open lid reveals ampمساحة كافية لأغراض متنوعة.
6. الصيانة
Regular maintenance ensures the longevity and optimal performance of your tool trolley.
- تنظيف: Wipe down the powder-coated steel surfaces with a damp قطعة قماش ومنظف خفيف. تجنب المنظفات الكاشطة التي قد تؤدي إلى إتلاف الطبقة النهائية.
- شرائح الأدراج: Periodically check the ball-bearing slides for smooth operation. If they become stiff, apply a small amount of silicone lubricant.
- العجلات: Inspect wheels for debris and ensure they rotate freely. Check that the parking brakes engage and disengage properly.
- التفتيش العام: Regularly check all screws and bolts for tightness and re-tighten if necessary.
7. استكشاف الأخطاء وإصلاحها
- الأدراج صلبة أو يصعب فتحها/إغلاقها: Check for obstructions in the slides. Ensure the trolley is on a level surface. Apply lubricant to the ball-bearing slides if needed.
- Trolley is unstable or wobbly: Verify that all wheels are securely attached and all assembly hardware is tightened. Ensure the trolley is on a flat surface.
- Parking brakes not holding: Check for debris around the brake mechanism. Ensure the brake levers are fully engaged.
8. المواصفات
| ميزة | التفاصيل |
|---|---|
| رقم الموديل | 402651-2 |
| الأبعاد الكلية (الطول × العرض × الارتفاع) | 69 × 33 × 109 سم |
| الوزن الإجمالي | حوالي 25.8 كجم |
| مادة | Powder-coated steel, plastic wheels |
| لون | أزرق |
| Tool Trolley (Lower Unit) | |
| الأبعاد (الطول × العرض × الارتفاع) | 69 × 33 × 75 سم |
| وزن | حوالي 14.6 كجم |
| 2 Drawers Dimensions (L x W x H) | 51 x 30.5 x 7.7 cm each |
| Lower Compartment Dimensions (L x W x H) | 62 × 32 × 37 سم |
| Top Surface Dimensions (L x W) | 61 × 32.5 سم |
| Modular Toolbox (Upper Unit) | |
| الأبعاد (الطول × العرض × الارتفاع) | 60 × 25.5 × 35 سم |
| وزن | 11.2 كجم |
| Lid Dimensions (L x W x H) | 58 × 24 × 6 سم |
| 3 Small Drawers Dimensions (L x W x H) | 22.5 x 15 x 3 cm each |
| 2 Intermediate Drawers Dimensions (L x W x H) | 51 x 22.5 x 3 cm each |
| 1 Large Drawer Dimensions (L x W x H) | 51 × 22.5 × 7.8 سم |
9. الضمان والدعم
For warranty information or technical support, please refer to the documentation provided with your purchase or contact TecTake customer service directly. Ensure you have your model number (402651) and proof of purchase available when contacting support.


