1. المقدمة
This manual provides detailed instructions for the setup, operation, and maintenance of the Waveshare 10.1-inch Capacitive Touch Screen LCD. This display features a 1280x800 resolution IPS panel, 10-point capacitive touch control, and a toughened glass cover. It is designed for compatibility with various Raspberry Pi models and Windows PCs, offering a versatile display solution for embedded projects and desktop computing.
2. حزمة المحتوى
Verify that all items listed below are included in your package. If any items are missing or damaged, please contact Waveshare support.
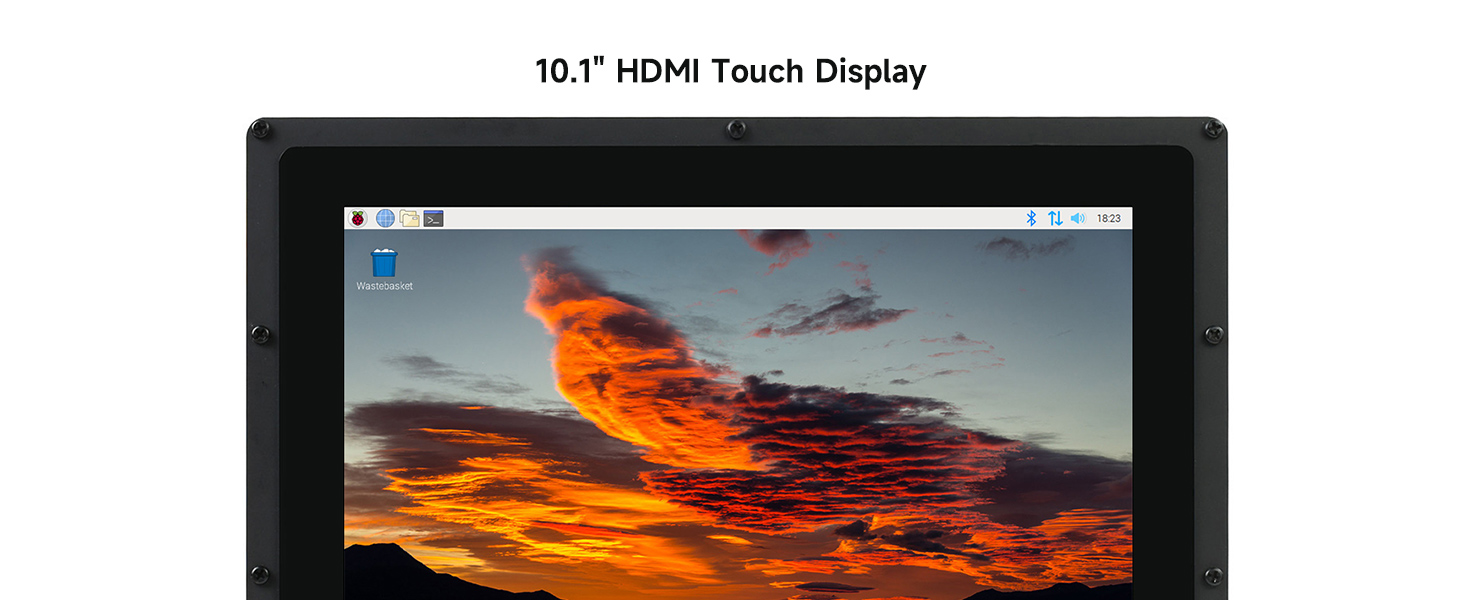
Figure 2.1: Package contents including the 10.1-inch LCD, power adapter, USB cable, HDMI cables, HDMI adapter, and mounting hardware.
- 10.1-inch HDMI LCD (B) with case
- محول الطاقة (5 فولت)
- USB-A to Micro-USB Cable (for touch and power)
- كابل HDMI
- HDMI to Micro-HDMI Adapter (for Raspberry Pi Zero series)
- براغي التثبيت والفواصل
- Back Stand (for 45-degree tilt)
3. المواصفات
Key technical specifications of the Waveshare 10.1-inch Capacitive Touch Screen LCD.

الشكل 3.1: انتهىview of the 10.1-inch HDMI Touch Display's features.
| ميزة | وصف |
|---|---|
| حجم الشاشة | 10.1 بوصة |
| دقة | 1280 × 800 بكسل |
| لوحة العرض | اي بي اس |
| Viewزاوية جي | 170° |
| نوع اللمس | بالسعة، 10 نقطة |
| لوحة اللمس | Toughened Glass (up to 6H hardness) |
| واجهة العرض | منفذ HDMI |
| منفذ اللمس | USB |
| مدخلات الطاقة | 5V (via USB) |
| مواد التغليف | أكريليك |
| أبعاد المنتج | 7.09 × 3.94 × 3.54 بوصة (تقريبًا، مع العلبة) |
| وزن العنصر | 0.352 أونصات (تقريبًا) |
4. الإعداد
4.1 الاتصال العام
To set up the display, you will need to connect both the video signal (HDMI) and the touch/power signal (USB). Ensure your host device (Raspberry Pi or PC) is powered off before making connections.
- Connect the HDMI cable from your host device to the HDMI port on the LCD.
- Connect the USB cable from your host device (or a 5V power adapter) to the Micro-USB port labeled "5V Power Input" on the LCD. This cable provides both power to the display and enables touch functionality.
- Power on your host device. The display should automatically detect the signal.
4.2 الاتصال السابقamples with Raspberry Pi
The display is compatible with various Raspberry Pi models. Specific adapters may be required depending on your Raspberry Pi model.
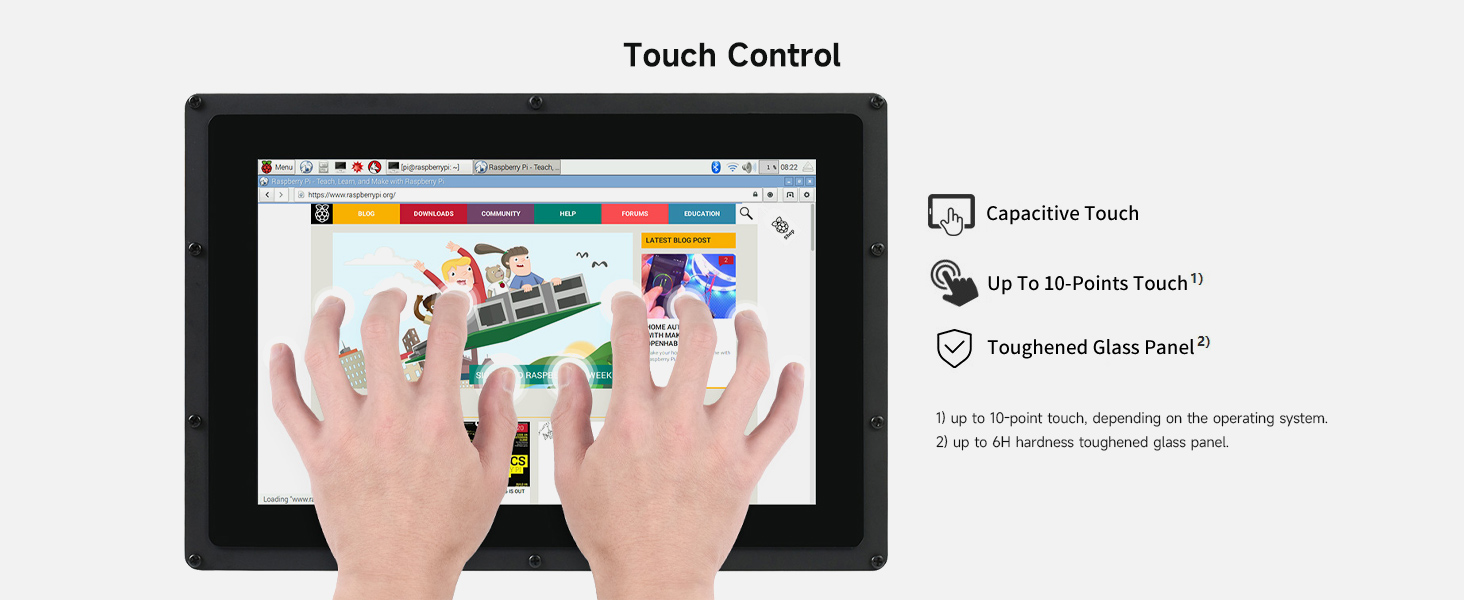
Figure 4.1: Connection diagrams for different host devices.
- Raspberry Pi 4B: Connect the HDMI cable from the Pi's Micro-HDMI port to the display's HDMI port. Connect a USB cable from the Pi's USB port to the display's 5V Power Input/Touch port. Ensure the Pi is powered by a 5V/3A power supply.
- Raspberry Pi 3B+: Connect the HDMI cable from the Pi's HDMI port to the display's HDMI port. Connect a USB cable from the Pi's USB port to the display's 5V Power Input/Touch port. Ensure the Pi is powered by a 5V/3A power supply.
- Raspberry Pi Zero W: You will need an additional Mini-HDMI to HDMI adapter and a USB-OTG cable. Connect the Mini-HDMI adapter to the Pi Zero W, then use an HDMI cable to connect to the display. Connect the USB-OTG cable to the Pi Zero W, then use a USB cable to connect to the display's 5V Power Input/Touch port. Ensure the Pi Zero W is powered by a 5V/2.5A power supply.
4.3 الاتصال السابقample with Mini PC
For use with a Mini PC or other standard computers:
- Connect the HDMI cable from your Mini PC's HDMI output to the display's HDMI port.
- Connect a USB cable from your Mini PC's USB port to the display's 5V Power Input/Touch port. This provides power to the display and enables touch functionality.
5. تعليمات التشغيل
5.1 التحكم باللمس
The display features a 10-point capacitive touch screen with a toughened glass panel for durability.

Figure 5.1: Demonstrating multi-touch capability.
- اللمس السعوي: Provides precise and responsive touch input.
- 10-point Touch: Supports up to 10 simultaneous touch points, depending on the operating system.
- Toughened Glass: The touch panel is made of toughened glass with a hardness of up to 6H, offering enhanced scratch resistance.
5.2 توافق النظام
The display offers broad compatibility with various operating systems:

الشكل 5.2: توافق الجهاز والنظام عبرview.
- With Raspberry Pi: Supports Raspberry Pi OS, Ubuntu, Kali, and Retropie. Touch functionality is generally driver-free. For Ubuntu / Kali / WIN10 IoT, it supports single-point touch.
- As a Computer Monitor: Supports Windows 11/10/8.1/8/7. Touch functionality is typically 10-point and driver-free.
6. الصيانة
Proper maintenance ensures the longevity and optimal performance of your display.
- تنظيف: استخدم قطعة قماش ناعمة وخالية من الوبر وامسحها برفق.ampened with water or a screen-cleaning solution. Avoid harsh chemicals, abrasive cleaners, or alcohol-based solutions, as these can damage the screen surface or acrylic case.
- التعامل: Avoid applying excessive pressure to the screen. Do not drop the display or expose it to strong impacts.
- بيئة: Operate and store the display in a clean, dry environment, away from direct sunlight, extreme temperatures, and high humidity.
- قوة: Always use the provided 5V power adapter or a compatible power source to prevent damage.
7. استكشاف الأخطاء وإصلاحها
إذا واجهت مشكلات، راجع خطوات استكشاف الأخطاء وإصلاحها الشائعة التالية:
- لا يوجد عرض/شاشة سوداء:
- Ensure both the HDMI cable and the USB power cable are securely connected.
- Verify that your host device (Raspberry Pi/PC) is powered on and outputting a video signal.
- Try a different HDMI cable or port on your host device.
- For Raspberry Pi, ensure the operating system is configured to output to HDMI.
- خاصية اللمس لا تعمل:
- Ensure the USB cable connecting the display to your host device is properly connected. This cable carries the touch data.
- For Windows, check "Tablet PC Settings" in the Control Panel to ensure touch input is assigned to the correct display, especially if using multiple monitors.
- أعد تشغيل جهاز المضيف الخاص بك.
- Verify that your operating system supports touch input for the display.
- وميض الشاشة أو عدم استقرار العرض:
- Ensure the display is receiving adequate power. Use the provided power adapter or a reliable 5V power source.
- Check HDMI cable for damage or loose connections.
- Reduce interference by keeping the display away from strong electromagnetic sources.
- White Screen or Fading to Black:
- This can sometimes occur due to power fluctuations. Power off the display and host device completely, wait a few minutes, then power them back on.
8. المظهر والأبعاد
مفصل view of the display's physical characteristics and port locations.

الشكل 8.1: الأمام والجانب والخلف views with dimensions and port labels.
- أبعاد: The display measures approximately 274.11mm x 187.00mm (outer frame) with a display area of 216.96mm x 135.60mm.
- Back Stand: Includes a removable back stand that allows for a 45-degree viewزاوية جي.
- تركيب الفتحات: Features mounting holes compatible with various Raspberry Pi models (A+/B+/2B/3B/3A+/3B+/4B).
- Ports (Rear View):
- مفتاح التشغيل: To turn the display on/off.
- Touch Port: Micro-USB port for touch data.
- مدخل الطاقة 5 فولت: Micro-USB port for power supply. (Note: Often combined with Touch Port via a single USB cable to the host).
- منفذ HDMI: لإدخال الفيديو.
9. شهادة المنتج
The Waveshare 10.1-inch HDMI LCD (B) is an HDMI Certified Adapter, ensuring compliance with HDMI standards.

Figure 9.1: HDMI Certified Adapter certificate.
For verification, visit the official HDMI webموقع: https://hdmi.org/qr/alic/FVP01SGM0CI
10. الضمان والدعم
For technical support, product inquiries, or warranty information, please refer to the official Waveshare website or contact their customer service directly. An online user manual is also available for further details and updates.
Manufacturer: Waveshare
For the most up-to-date information and resources, please visit the متجر Waveshare على أمازون أو الرسمية الخاصة بهم webموقع.


