1. المقدمة
This manual provides essential information for the safe and efficient installation, operation, and maintenance of your Sentiotec Qube sauna heater. Please read these instructions carefully before installation and use, and retain them for future reference. The Sentiotec Qube heater is designed for use in Finnish saunas, offering reliable performance and a modern aesthetic.
2. معلومات السلامة
- التركيبات الكهربائية: يجب أن تتم جميع التوصيلات الكهربائية بواسطة فني كهربائي مؤهل وفقًا لقوانين الكهرباء المحلية والوطنية.
- تهوية: Ensure proper ventilation in the sauna room as specified by sauna construction standards.
- التصاريح: Maintain minimum safe distances from walls, benches, and other combustible materials as indicated in the installation section.
- ماء: Only use clean tap water on the sauna stones. Do not pour excessive amounts of water at once.
- الأطفال والحيوانات الأليفة: Keep children and pets away from the hot sauna heater.
- المواد القابلة للاشتعال: Never place flammable materials near or on the sauna heater.
- صيانة: افصل الطاقة قبل إجراء أي صيانة أو تنظيف.
3. انتهى المنتجview
The Sentiotec Qube sauna heater features a robust design with outer casings made of brushed and powder-coated stainless steel, and inner components also crafted from stainless steel for durability. Its 3-mantel technology ensures efficient heat distribution. The heater is available in various power outputs to suit different sauna sizes.
- خيارات الطاقة: 9 كيلو واط، 10.5 كيلو واط، 12 كيلو واط، 15 كيلو واط
- مواد: Brushed and powder-coated stainless steel exterior, stainless steel interior.
- تصميم: Straight-lined, modern aesthetic.
- صيانة: Easy-to-maintain design with a removable connection box.
- التعديل: أرجل قابلة لتعديل الارتفاع لضمان ثباتها.
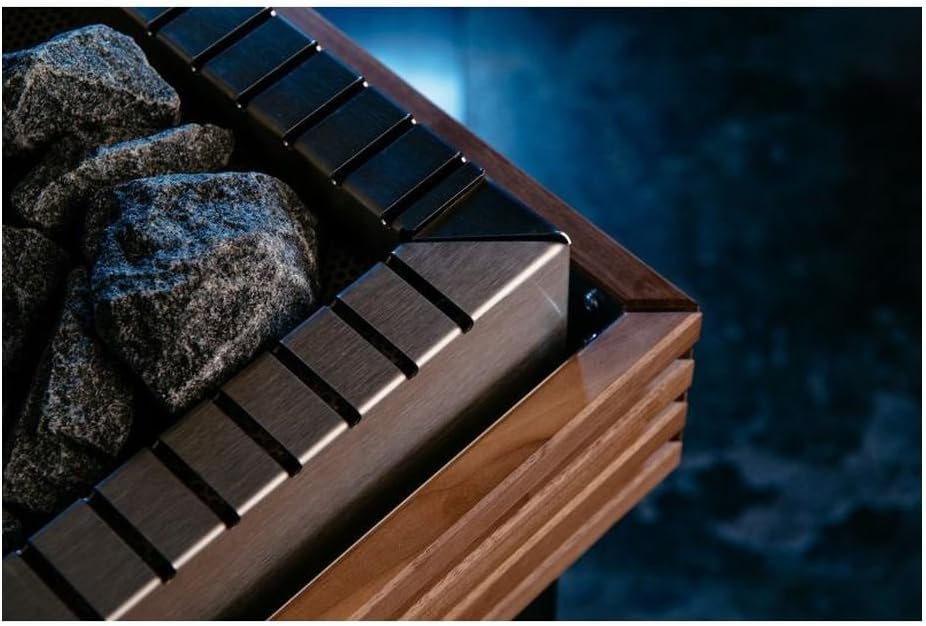
الشكل 1: The Sentiotec Qube sauna heater, showcasing its modern design with a black base, wooden accents, and a stainless steel stone basket.
4. الإعداد والتثبيت
4.1 فك التعبئة
Carefully remove the heater from its packaging. Inspect for any damage that may have occurred during transit. Retain packaging materials for potential future transport or warranty claims.
4.2 التنسيب
Position the heater in the sauna room according to the manufacturer's recommended clearances from walls, benches, and other combustible materials. Ensure the floor beneath the heater is level and capable of supporting its weight. The height-adjustable feet allow for minor leveling adjustments.
4.3 التوصيل الكهربائي
تحذير: Electrical installation must be carried out by a certified electrician. Incorrect wiring can lead to electric shock, fire, or damage to the heater. Refer to the wiring diagram provided with the heater and ensure all connections comply with local electrical codes and the heater's power requirements.
The removable connection box facilitates easier wiring access.
4.4 وضع أحجار الساونا
Place the sauna stones (optionally included) into the stone compartment of the heater. Arrange the stones loosely to allow for good air circulation, which is crucial for efficient heating and element longevity. Do not pack stones too tightly. Ensure heating elements are fully covered but not excessively burdened.
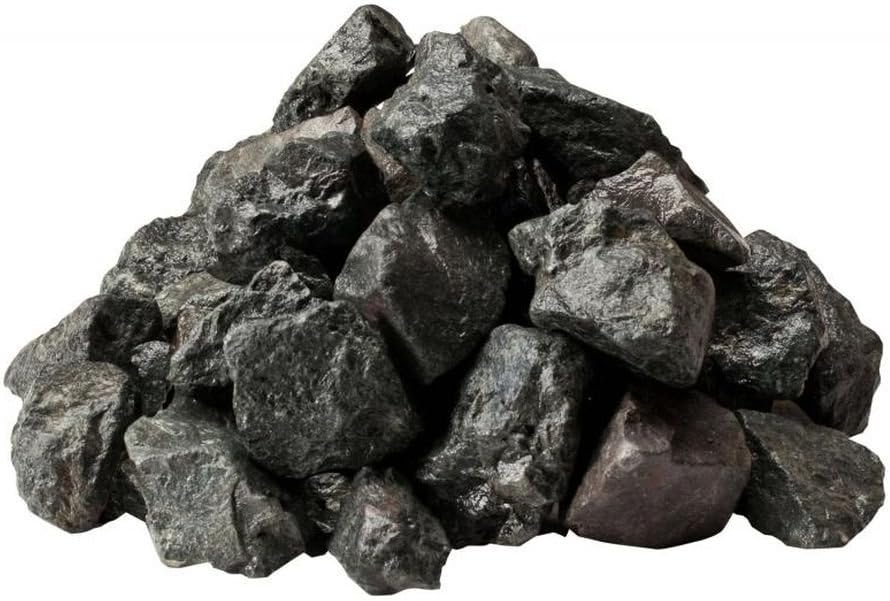
الشكل 2: A pile of sauna stones, suitable for use with the Sentiotec Qube heater. These stones are designed to absorb and radiate heat effectively.

الشكل 3: عن قرب view of sauna stones properly placed within the stainless steel basket of the Sentiotec Qube heater, showing good air circulation around the heating elements.

الشكل 4: من أعلى إلى أسفل view of the Sentiotec Qube heater's stone compartment, highlighting the perforated metal base for stone support and heat distribution.
5. تعليمات التشغيل
5.1 Control Unit (Optional)
The Sentiotec Qube heater requires an external control unit for operation (Sentiotec sauna controls are optionally available). Refer to the instruction manual of your specific control unit for detailed operating procedures. Typically, the control unit allows you to set the desired temperature and operating time.
5.2 Heating the Sauna
- Ensure the sauna room is empty and the door is closed.
- Turn on the heater via the control unit and set the desired temperature.
- Allow 30-60 minutes for the sauna to reach the set temperature, depending on room size and insulation.
5.3 Adding Water (Löyly)
Once the stones are hot, you may gently pour small amounts of water onto them to create steam (löyly). Use a sauna ladle and only clean tap water. Do not pour large quantities of water at once, as this can cool the elements too rapidly or cause water to splash out.
5.4 بعد الاستخدام
Turn off the heater using the control unit. Allow the heater and sauna room to cool down completely before cleaning or covering.
6. الصيانة
6.1 تنظيف السخان
تأكد من أن المدفأة باردة تمامًا ومفصولة عن مصدر الطاقة قبل التنظيف. امسح الأسطح الخارجية بقطعة قماش مبللة.amp cloth. Do not use abrasive cleaners or solvents. The removable connection box facilitates access for internal cleaning if necessary, but this should only be done by qualified personnel.
6.2 Inspecting Heating Elements
Periodically inspect the heating elements for signs of damage or excessive mineral buildup. Damaged elements should be replaced by a qualified technician. Ensure stones are always properly placed to protect the elements.
6.3 Replacing Sauna Stones
Sauna stones should be replaced every 1-2 years, or more frequently with heavy use. Over time, stones can crumble or lose their heat retention properties. Remove old stones, clean the stone compartment, and replace with new, suitable sauna stones, arranging them loosely.
7. استكشاف الأخطاء وإصلاحها
| مشكلة | السبب المحتمل | حل |
|---|---|---|
| السخان لا يعمل. | No power supply; faulty control unit; tripped circuit breaker. | Check power connection and circuit breaker. Consult control unit manual. Contact electrician if problem persists. |
| المدفأة لا تسخن بشكل كافٍ. | Incorrect temperature setting; sauna room too large for heater power; poor stone arrangement; faulty heating element. | Adjust temperature. Ensure stones are loosely packed. Inspect elements (power off). Consult technician. |
| Excessive steam or water splashing. | Too much water poured at once; stones packed too tightly. | Pour smaller amounts of water. Rearrange stones for better air flow. |
| Unusual noises from heater. | Loose components; stones settling; foreign object. | Ensure heater is stable. Check stone placement. If noise persists, disconnect power and inspect. |
8. المواصفات
| ميزة | التفاصيل |
|---|---|
| ماركة | Sentiotec |
| نموذج | كيوب |
| خيارات الطاقة | 9 كيلو واط، 10.5 كيلو واط، 12 كيلو واط، 15 كيلو واط |
| المواد الخارجية | Brushed and powder-coated stainless steel |
| المواد الداخلية | الفولاذ المقاوم للصدأ |
| تكنولوجيا | 3-mantel technology |
| قابلية التعديل | أقدام قابلة لتعديل الارتفاع |
| ASIN | B0196UNBNW |
| متوفر أولاً | 15 يناير 2020 |
9. الضمان والدعم
For warranty information, technical support, or service inquiries, please refer to the official Sentiotec website or contact your authorized Sentiotec dealer. Keep your proof of purchase for warranty claims.