
1. المقدمة
Thank you for choosing the Homde Sturdy Garment Rack, Model HS002. This heavy-duty clothes organizer is designed to provide ample storage for your garments and accessories, featuring double hanging rods, side hooks, and lower shelves. Its robust metal frame and universal swivel wheels ensure stability and mobility. Please read this manual carefully before assembly and use to ensure proper setup and safe operation.
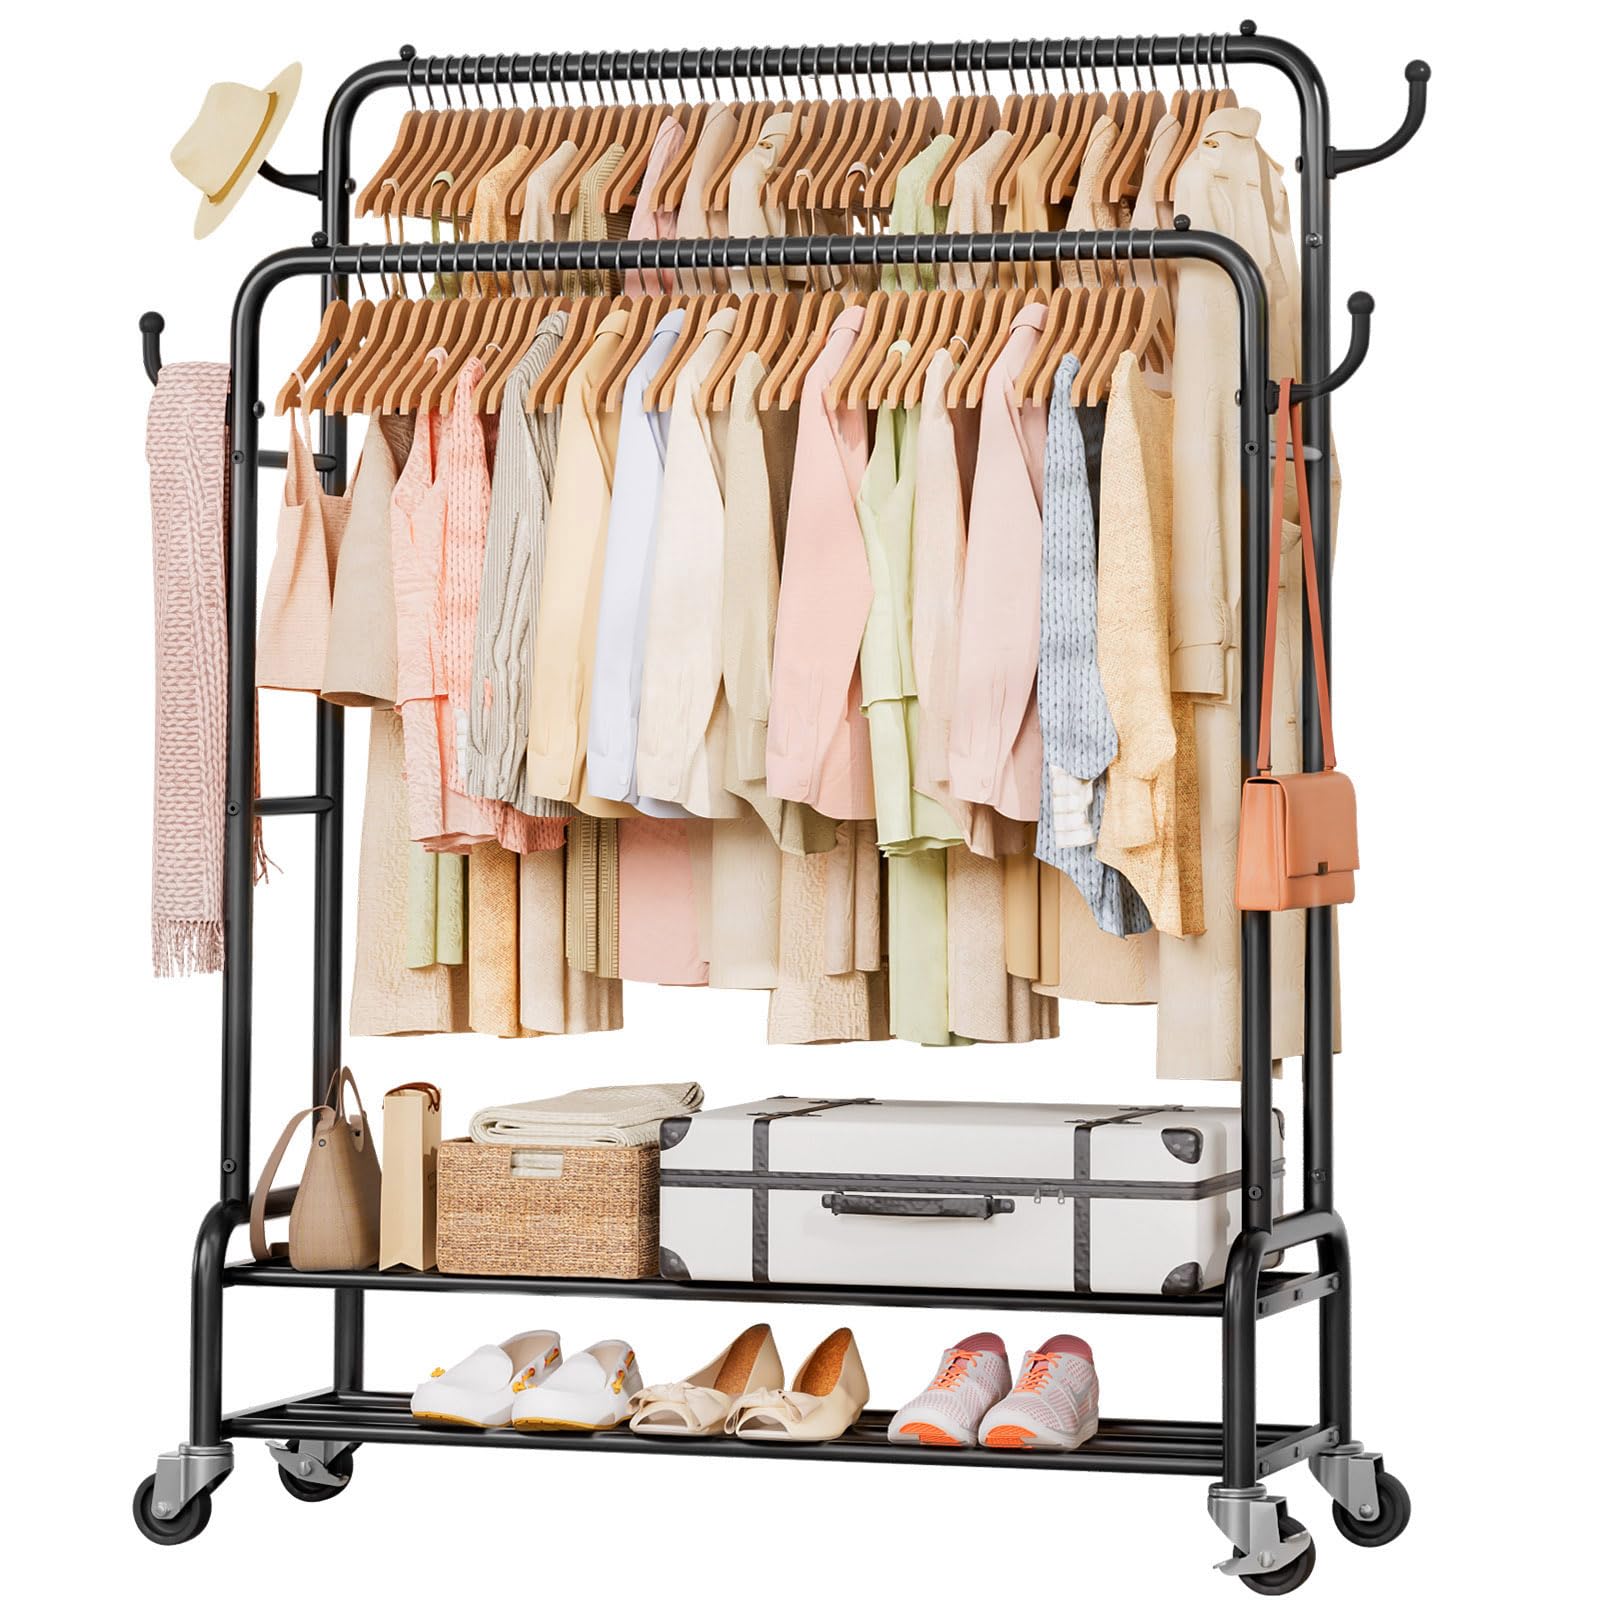
Figure 1: Homde Sturdy Garment Rack (Model HS002)
2. معلومات السلامة
- تأكد من تثبيت جميع الأجزاء بإحكام قبل الاستخدام.
- لا تتجاوز الحد الأقصى للحمل وهو 265 رطلاً (120 كجم).
- قم بتوزيع الوزن بالتساوي على قضبان التعليق والرفوف للحفاظ على الثبات.
- احتفظ بالأجزاء الصغيرة بعيدًا عن متناول الأطفال أثناء التجميع.
- Use the locking wheels to secure the rack in place when not moving it.
- Avoid placing the rack on uneven surfaces.
3. محتويات العبوة
تأكد من وجود جميع المكونات قبل البدء بالتجميع. في حال وجود أي أجزاء مفقودة أو تالفة، يرجى التواصل مع خدمة العملاء.
- Main Frame Components (various metal tubes and connectors)
- 2 x Hanging Rods
- 2 x Lower Shelf Grids
- 4 x Universal Swivel Wheels (2 with locking mechanism)
- 4 خطافات جانبية
- أدوات التجميع (البراغي والمفتاح)
- دليل التعليمات
4. الإعداد والتجميع
Assembly is straightforward and typically takes less than 30 minutes. All necessary tools are included.
- فك مكونات الحزمة: أخرج جميع الأجزاء من العبوة بعناية وضعها على سطح نظيف ومستوٍ. قارنها بقائمة محتويات العبوة.
- ربط العجلات: Screw the four universal swivel wheels into the designated holes at the bottom of the base frame. Ensure the two wheels with locking mechanisms are placed on the same side for easier access. Tighten securely with the provided wrench.
- تجميع الإطار الأساسي: Connect the horizontal base bars to the vertical support posts according to the diagrams. Ensure all connections are firm.
- تركيب الرفوف السفلية: Place the two lower shelf grids onto the designated supports on the base frame. These should fit snugly.
- Attach Vertical Rods: Insert the vertical support rods into the base frame.
- Install Hanging Rods: Attach the two horizontal hanging rods to the top of the vertical support rods. Ensure the anti-slip beads are facing upwards to prevent hangers from sliding off.
- Add Side Hooks: Secure the four side hooks to the outer vertical posts as shown in the diagram.
- التحقق النهائي: Verify that all screws are tightened and all connections are secure before loading the rack.

Figure 2: Detailed Features and Storage Areas

Figure 3: Universal Swivel Wheels with Locking Mechanism

Figure 4: Anti-slip Beads on Hanging Rods
فيديو الجمعية
Video 1: Official Homde Garment Rack Assembly and Feature Overview. This video demonstrates the assembly process and highlights key features of the garment rack.
5. تعليمات التشغيل
- تعليق الملابس: Utilize the two hanging rods for clothes of various lengths. The upper rod is ideal for shorter items like shirts and jackets, while the lower rod can accommodate pants or longer garments. The anti-slip beads help keep hangers in place.
- Using Side Hooks: The four side hooks are suitable for hanging accessories such as hats, scarves, belts, or bags.
- تخزين الرفوف: The two lower shelves provide space for shoes, storage boxes, luggage, or folded clothing.
- التنقل: To move the rack, unlock the two locking wheels by flipping their levers. Gently push or pull the rack to its desired location.
- تأمين الرف: Once the rack is in position, engage the locking mechanism on the two wheels to prevent unintended movement.
6. الصيانة
- تنظيف: امسح الإطار المعدني بقطعة قماش ناعمة.amp القماش. تجنب المنظفات الكاشطة أو المواد الكيميائية القاسية التي قد تلحق الضرر بالطبقة النهائية.
- تقتيش: Periodically check all connections and screws to ensure they remain tight. Re-tighten if necessary.
- العناية بالعجلات: احرص على إبقاء العجلات خالية من الحطام لضمان حركة سلسة.
- منع الصدأ: The high-quality steel construction with surface coating is designed to prevent rust. Avoid prolonged exposure to excessive moisture.

Figure 5: High-Quality Steel Construction Details
7. استكشاف الأخطاء وإصلاحها
- الرف غير مستقر: Ensure all screws are fully tightened. Verify that the rack is placed on a flat, level surface. Distribute clothing weight evenly.
- Wheels do not roll smoothly: Check for any debris (hair, lint) caught in the wheels. Clean as necessary. Ensure the locking mechanisms are disengaged.
- Wheels do not lock: Confirm that the locking levers are fully engaged. If a wheel thread is defective, contact customer support for a replacement.
- Hangers slide off: Ensure the anti-slip beads on the hanging rods are correctly positioned.
8. المواصفات
| ميزة | التفاصيل |
|---|---|
| ماركة | هومد |
| رقم الموديل | إتش إس 002 |
| لون | أسود |
| مادة | الحديد، الفولاذ السبائكي |
| أبعاد المنتج (العمق × العرض × الارتفاع) | 16.53 بوصة عمق × 44.1 بوصة عرض × 61.42 بوصة ارتفاع (42 سم عمق × 112 سم عرض × 156 سم ارتفاع) |
| توصية الوزن الأقصى | 265 رطل (120 كجم) |
| عدد الرفوف | 2 |
| نوع التثبيت | قائم بذاته |
| المكونات المضمنة | Clothes Rack, Assembly Hardware |
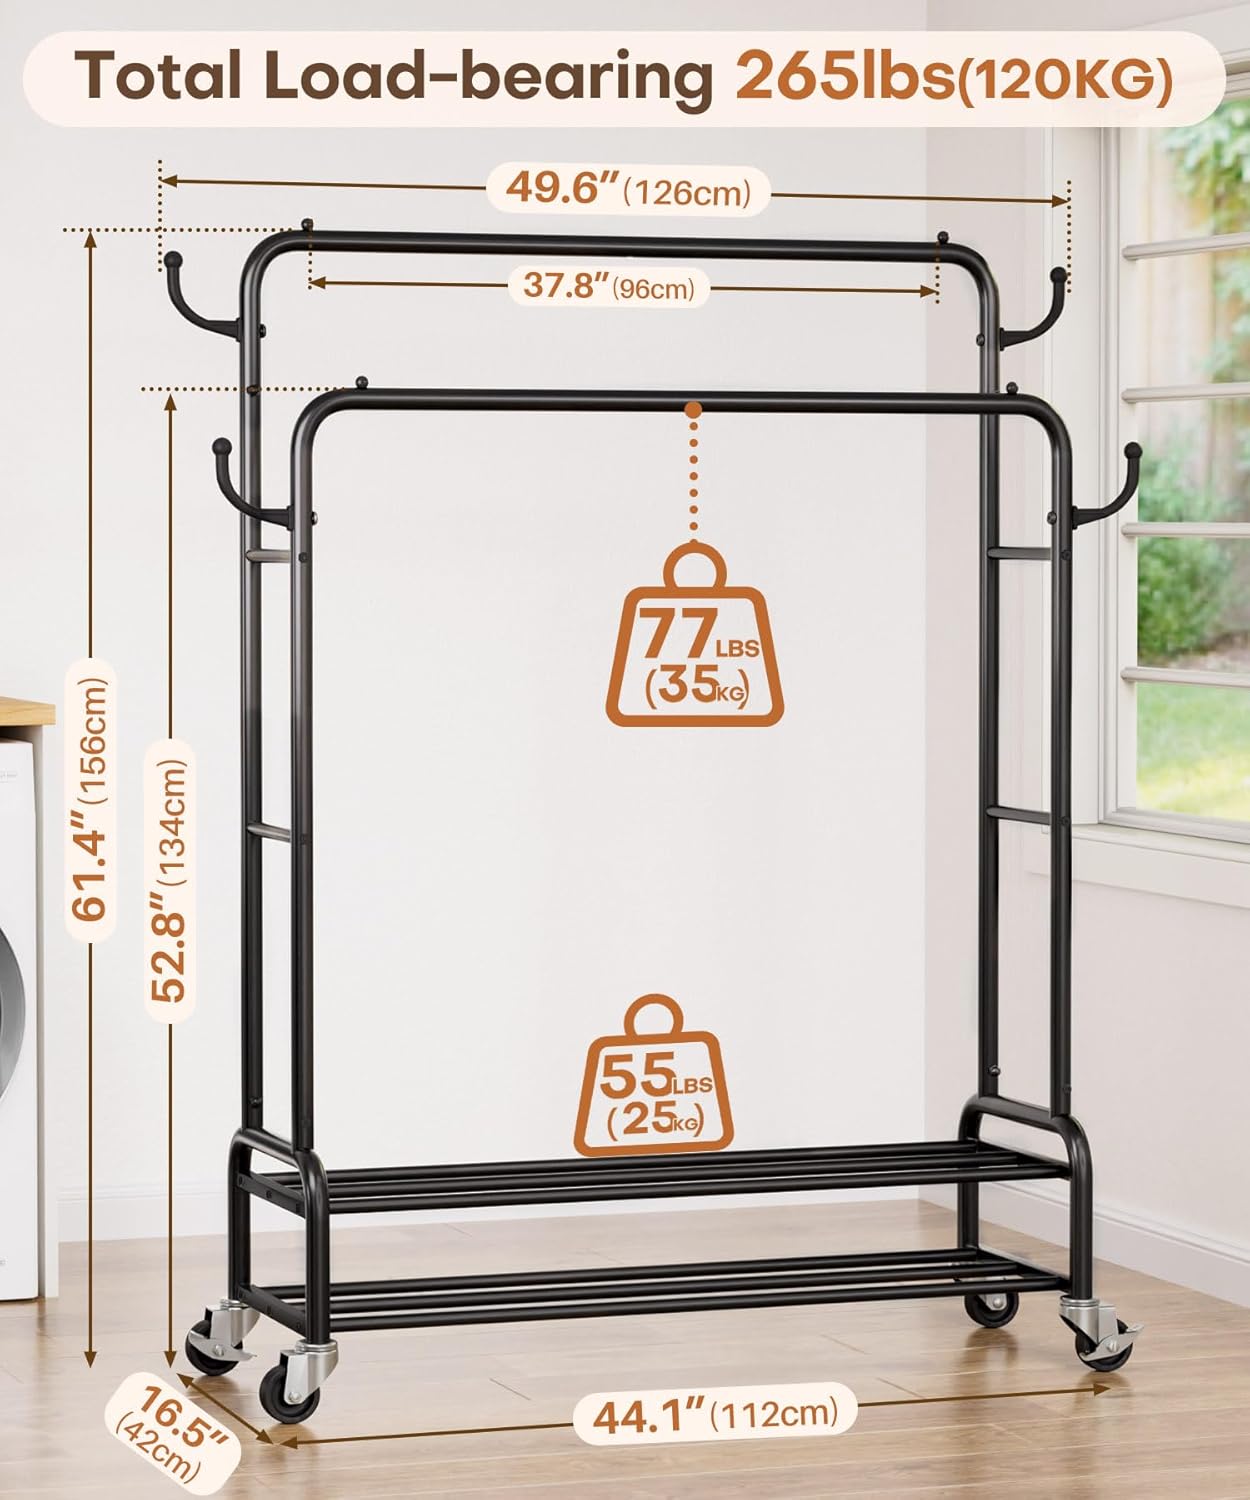
الشكل 6: أبعاد المنتج وسعة التحميل
9. الضمان والدعم
Homde products are manufactured to high-quality standards. For any questions, missing parts, or support needs, please refer to your purchase documentation or contact Homde customer service directly. Please retain your proof of purchase for warranty claims.