
HOMLAND C7-SL
HOMLAND 3-in-1 Bedside Commode Instruction Manual
Model: C7-SL
1. المقدمة وما فوقview
Thank you for choosing the HOMLAND 3-in-1 Bedside Commode. This versatile product is designed to provide enhanced safety and convenience for individuals requiring assistance with toileting. It can function as a standalone bedside commode, a raised toilet seat, or a safety toilet frame. Please read this manual thoroughly before assembly and use to ensure proper operation and safety.
المميزات الرئيسية:
- 3 في 1 متعدد الاستخدامات: Functions as a bedside commode, raised toilet seat, or toilet safety frame.
- Sturdy Dual-Crossbar Support: Enhanced construction for stability and security.
- Spacious & Comfortable Design: Ergonomic seat and armrests for user comfort.
- 7.5Qt Removable Bucket: Easy to clean with lid and splash guard.
- ارتفاع قابل للتعديل: Accommodates various users and toilet heights.
2. معلومات السلامة
WARNING: Failure to follow these safety instructions may result in injury.
- قدرة الوزن: لا تتجاوز الحد الأقصى للوزن وهو 350 رطلاً (158 كجم).
- استقرار: Ensure all four legs are evenly placed on a flat, stable surface before use. Verify that all locking pins are securely engaged after height adjustments.
- حَشد: Assemble the commode completely and correctly before initial use. Refer to the 'Setup and Assembly' section.
- التفتيش الدوري: Periodically check all components for wear, damage, or loose parts. Do not use if any part is damaged or missing.
- تنظيف: Clean the commode regularly to maintain hygiene.
- أطفال: Keep children away from the commode unless supervised by an adult.
- التحويل: Use caution when transferring to and from the commode. Ensure the commode is stable and use the armrests for support.
3. محتويات العبوة
يرجى التأكد من وجود جميع المكونات قبل البدء في التجميع:
- Commode Frame (main body with dual-crossbar support)
- Commode Seat with Lid
- 7.5 Qt Commode Bucket
- الحرس سبلاش
- Armrests (pre-attached or separate, depending on model revision)
- Non-slip Feet (pre-attached)
Note: Instructions and small tools (if any) are typically located inside the commode bucket upon delivery.
4. الإعداد والتجميع
The HOMLAND 3-in-1 Bedside Commode is designed for tool-free assembly. Follow these steps to set up your commode:
- فك مكونات الحزمة: Carefully remove all parts from the packaging. It is recommended to save the packaging for potential future storage or transport.
- افتح الإطار: Gently pull the sides of the commode frame outwards until it fully extends and locks into place. Ensure the dual-crossbar support is properly aligned.
- قم بتثبيت المقعد: Place the commode seat onto the frame, aligning the hinges or attachment points. Press down firmly until it clicks securely into position.
- Insert Splash Guard: Position the splash guard into the opening of the commode seat.
- أدخل دلو المرحاض: Slide the 7.5 Qt commode bucket into the frame beneath the seat opening. Ensure it is seated firmly.
- ضبط الارتفاع: Refer to the 'Operating Instructions - Height Adjustment' section to set the desired height. Ensure all locking pins are fully engaged.
وسيلة مساعدة بصرية:
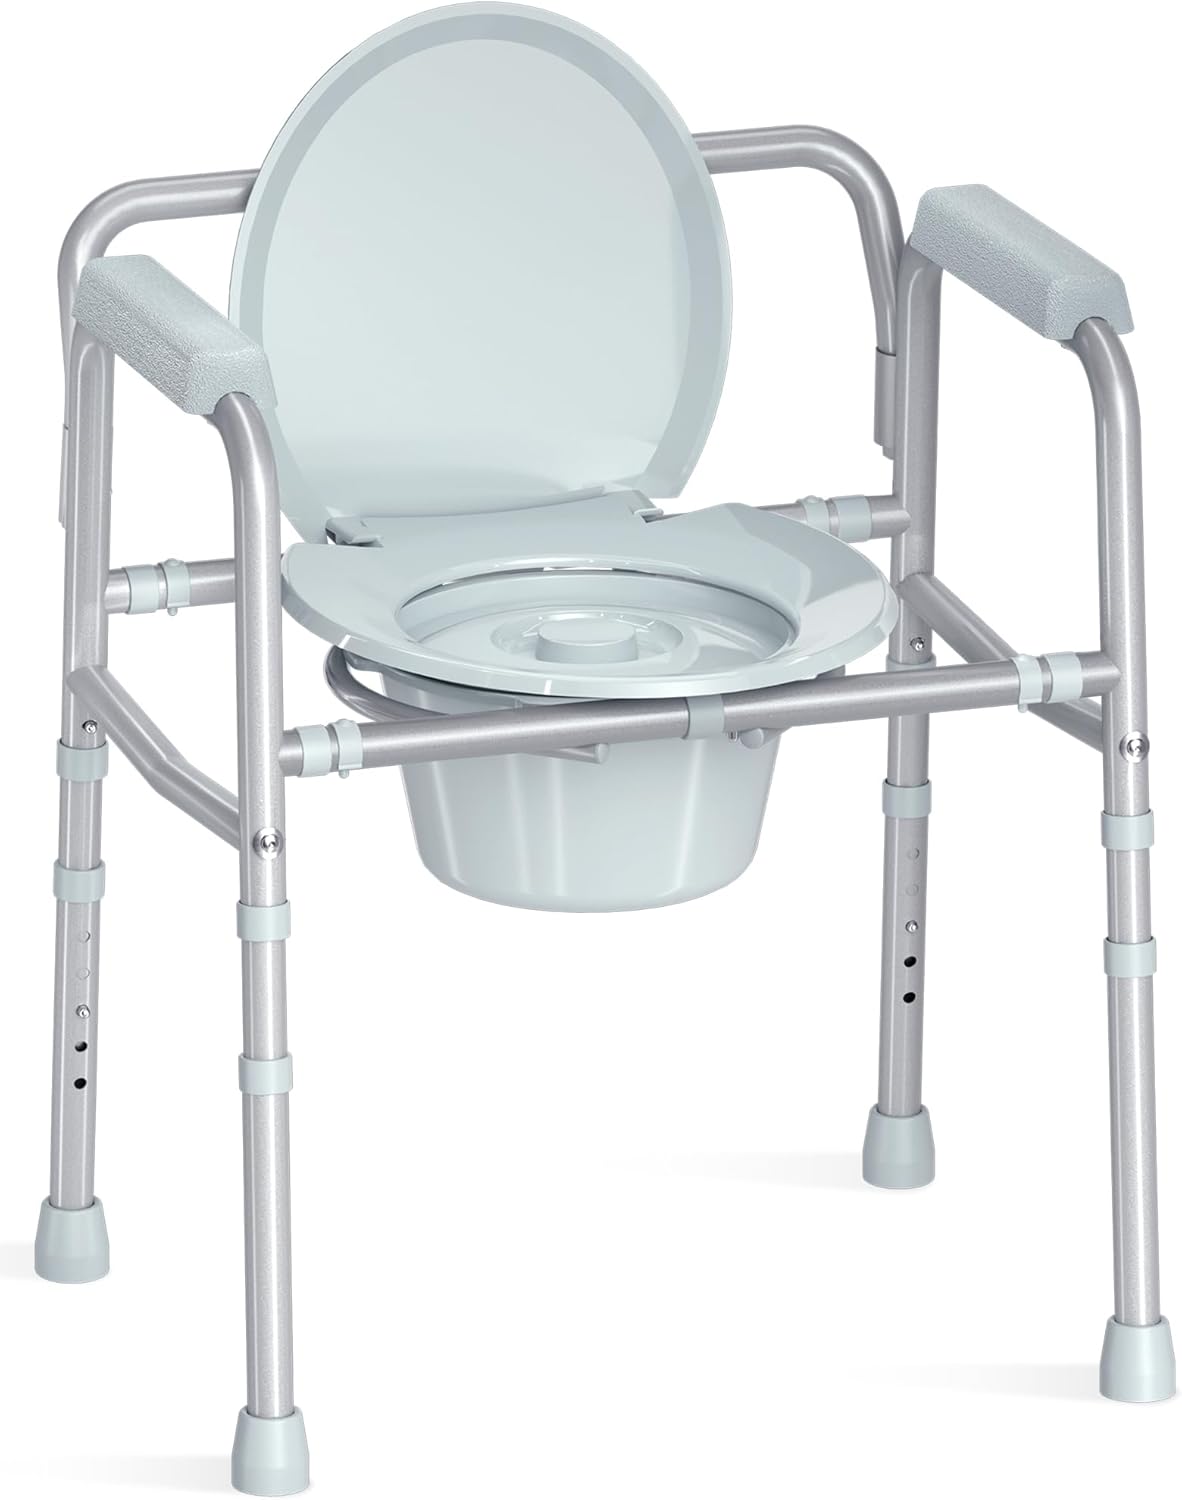
Image: Fully assembled HOMLAND 3-in-1 Bedside Commode, ready for use.
5. تعليمات التشغيل
5.1. 3-in-1 Versatility
Your HOMLAND commode offers three primary modes of use:
- Bedside Commode: Use as a standalone unit next to a bed or in any room. Ensure the bucket is in place.
- Raised Toilet Seat: Position the commode over an existing toilet. Remove the bucket and splash guard. Adjust the height so the commode seat is comfortably above the toilet bowl.
- Toilet Safety Frame: Similar to the raised toilet seat mode, but primarily used for the sturdy armrests to assist with sitting and standing from a standard toilet. Remove the bucket and splash guard.
وسيلة مساعدة بصرية:
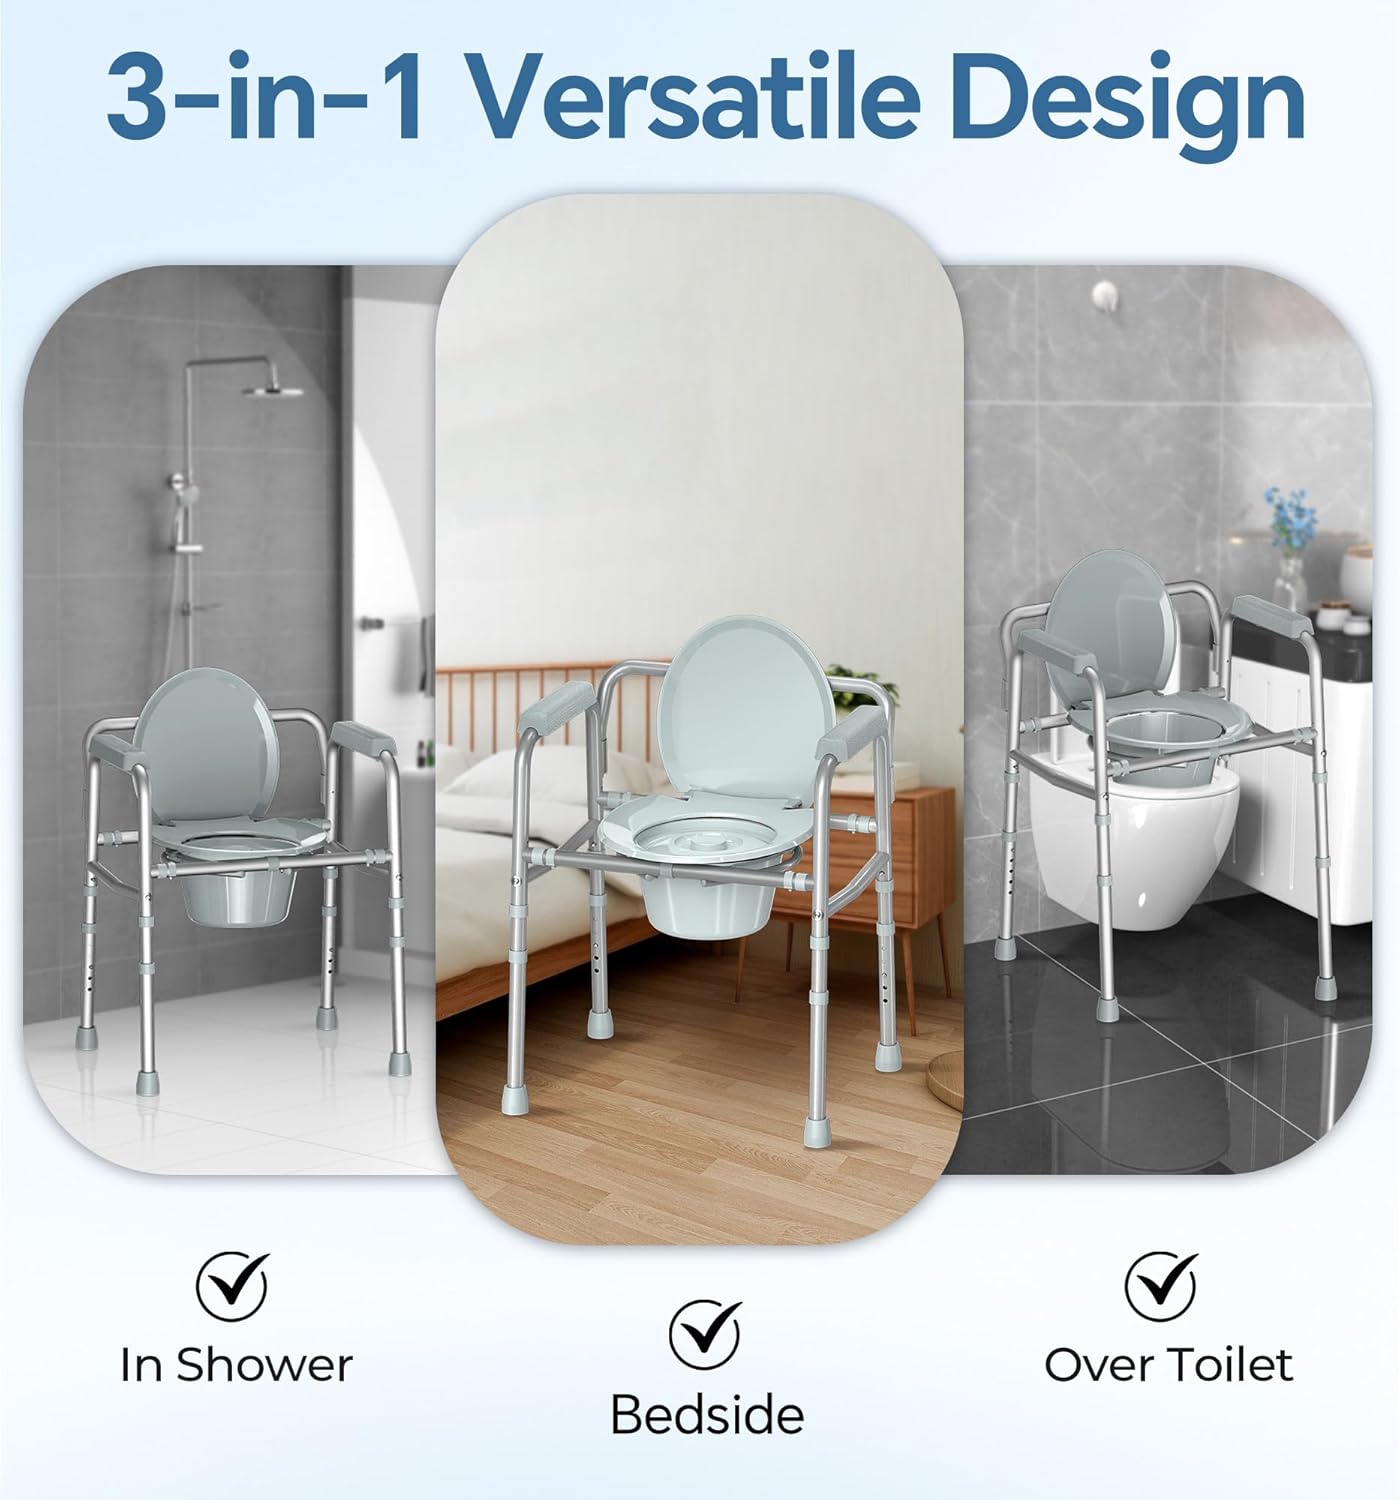
Image: Demonstrates the commode's use as a bedside unit, over a toilet, and in a shower setting.
5.2. ضبط الارتفاع
The commode's height can be adjusted to suit individual user needs and to fit over various toilet heights. Each leg has multiple adjustment holes.
- Locate Adjustment Pins: On each leg, you will find a spring-loaded push pin.
- Adjust One Leg at a Time: Press the push pin on one leg and slide the lower leg section up or down to the desired height.
- Secure Pin: Release the push pin, ensuring it fully protrudes through one of the adjustment holes. Wiggle the leg slightly to confirm it is locked.
- Repeat for All Legs: Adjust all four legs to the same height setting to ensure stability. Verify all pins are securely engaged before use.
وسيلة مساعدة بصرية:

Image: Diagram illustrating the height adjustment mechanism and seat dimensions (13"W x 14.5"D, adjustable height from 17.1" to 23").
6. الصيانة والتنظيف
Regular cleaning and maintenance will prolong the life of your commode and ensure hygienic use.
- التنظيف بالدلو: The 7.5 Qt bucket is removable for easy cleaning. After each use, remove the bucket, empty its contents, and clean thoroughly with a mild disinfectant and water. Rinse completely and dry before reinserting. The lid and splash guard should also be cleaned.
- تنظيف الهيكل والمقعد: امسح إطار المرحاض والمقعد ومساند الذراعين بـamp cloth and a mild, non-abrasive cleaner. Avoid harsh chemicals that may damage the materials.
- تقتيش: Periodically check all bolts, screws, and pins to ensure they are tight and secure. Inspect the non-slip feet for wear and tear. Replace any worn or damaged parts immediately.
وسيلة مساعدة بصرية:

Image: Illustration of the easy-to-clean 7.5 qt removable bucket with lid and splash guard.
7. استكشاف الأخطاء وإصلاحها
If you encounter any issues with your HOMLAND commode, please refer to the following common solutions:
- المرحاض غير مستقر:
- تأكد من ضبط جميع الأرجل الأربعة على نفس الارتفاع.
- Verify that all spring-loaded pins are fully engaged in the adjustment holes.
- Check that the commode is placed on a flat, level surface.
- Inspect the non-slip feet for damage or excessive wear.
- صعوبة في التجميع:
- تأكد من توجيه جميع الأجزاء بشكل صحيح وفقًا للمخططات.
- Some connections may require firm pressure to snap into place. If you experience significant difficulty, ensure no parts are misaligned.
- Remember that instructions and small tools are often found inside the commode bucket.
- Bucket does not fit properly:
- Ensure the splash guard is correctly inserted into the seat opening before placing the bucket.
- Verify the bucket is oriented correctly and fully seated within the frame.
If these steps do not resolve the issue, please contact HOMLAND customer support.
8. المواصفات
| ميزة | التفاصيل |
|---|---|
| رقم الموديل | C7-SL |
| أبعاد المنتج | 17.32 بوصة عمق × 7.48 بوصة عرض × 13.3 بوصة ارتفاع (إجمالي) |
| أبعاد المقعد | 13"W x 14.5"D (approximate) |
| نطاق الارتفاع القابل للتعديل | 17.1" - 23" (from floor to seat) |
| مادة | فُولاَذ |
| سعة الوزن | 350 رطل (158 كجم) |
| وزن العنصر | 15.61 رطل (7.08 كجم) |
| سعة الدلو | 7.5 كوارت |
| لون | قطعة من الجبن |
وسيلة مساعدة بصرية:

Image: Illustrates the reinforced thicker steel tube (1.55mm) used in HOMLAND commodes compared to others (0.8mm), contributing to the 350 lbs capacity.

الصورة: عن قرب view of the enhanced non-slip feet designed for improved stability and safety.
9. الضمان والدعم
HOMLAND is committed to providing quality products and customer satisfaction. While specific warranty details are not provided in this manual, please retain your proof of purchase for any warranty claims.
For product support, questions, or to report any issues, please contact HOMLAND customer service. HOMLAND offers a US-based hotline for assistance.
معلومات الاتصال: Please refer to the HOMLAND official webقم بزيارة الموقع أو وثائق الشراء الخاصة بك للحصول على تفاصيل الاتصال الحالية.
Ask a question about this manual
Ask about setup, troubleshooting, compatibility, parts, safety, or missing instructions. Manuals+ will review the question and use this page’s manual context to help answer it.