مقدمة
This manual provides detailed instructions for the installation, operation, and maintenance of your Zyyini B150M V3 Computer Motherboard. Please read this manual thoroughly before proceeding with installation to ensure proper setup and to prevent damage to the components. This motherboard is designed for desktop computers, supporting LGA 1151 CPUs and DDR4 memory, offering a stable and efficient platform for various computing needs.
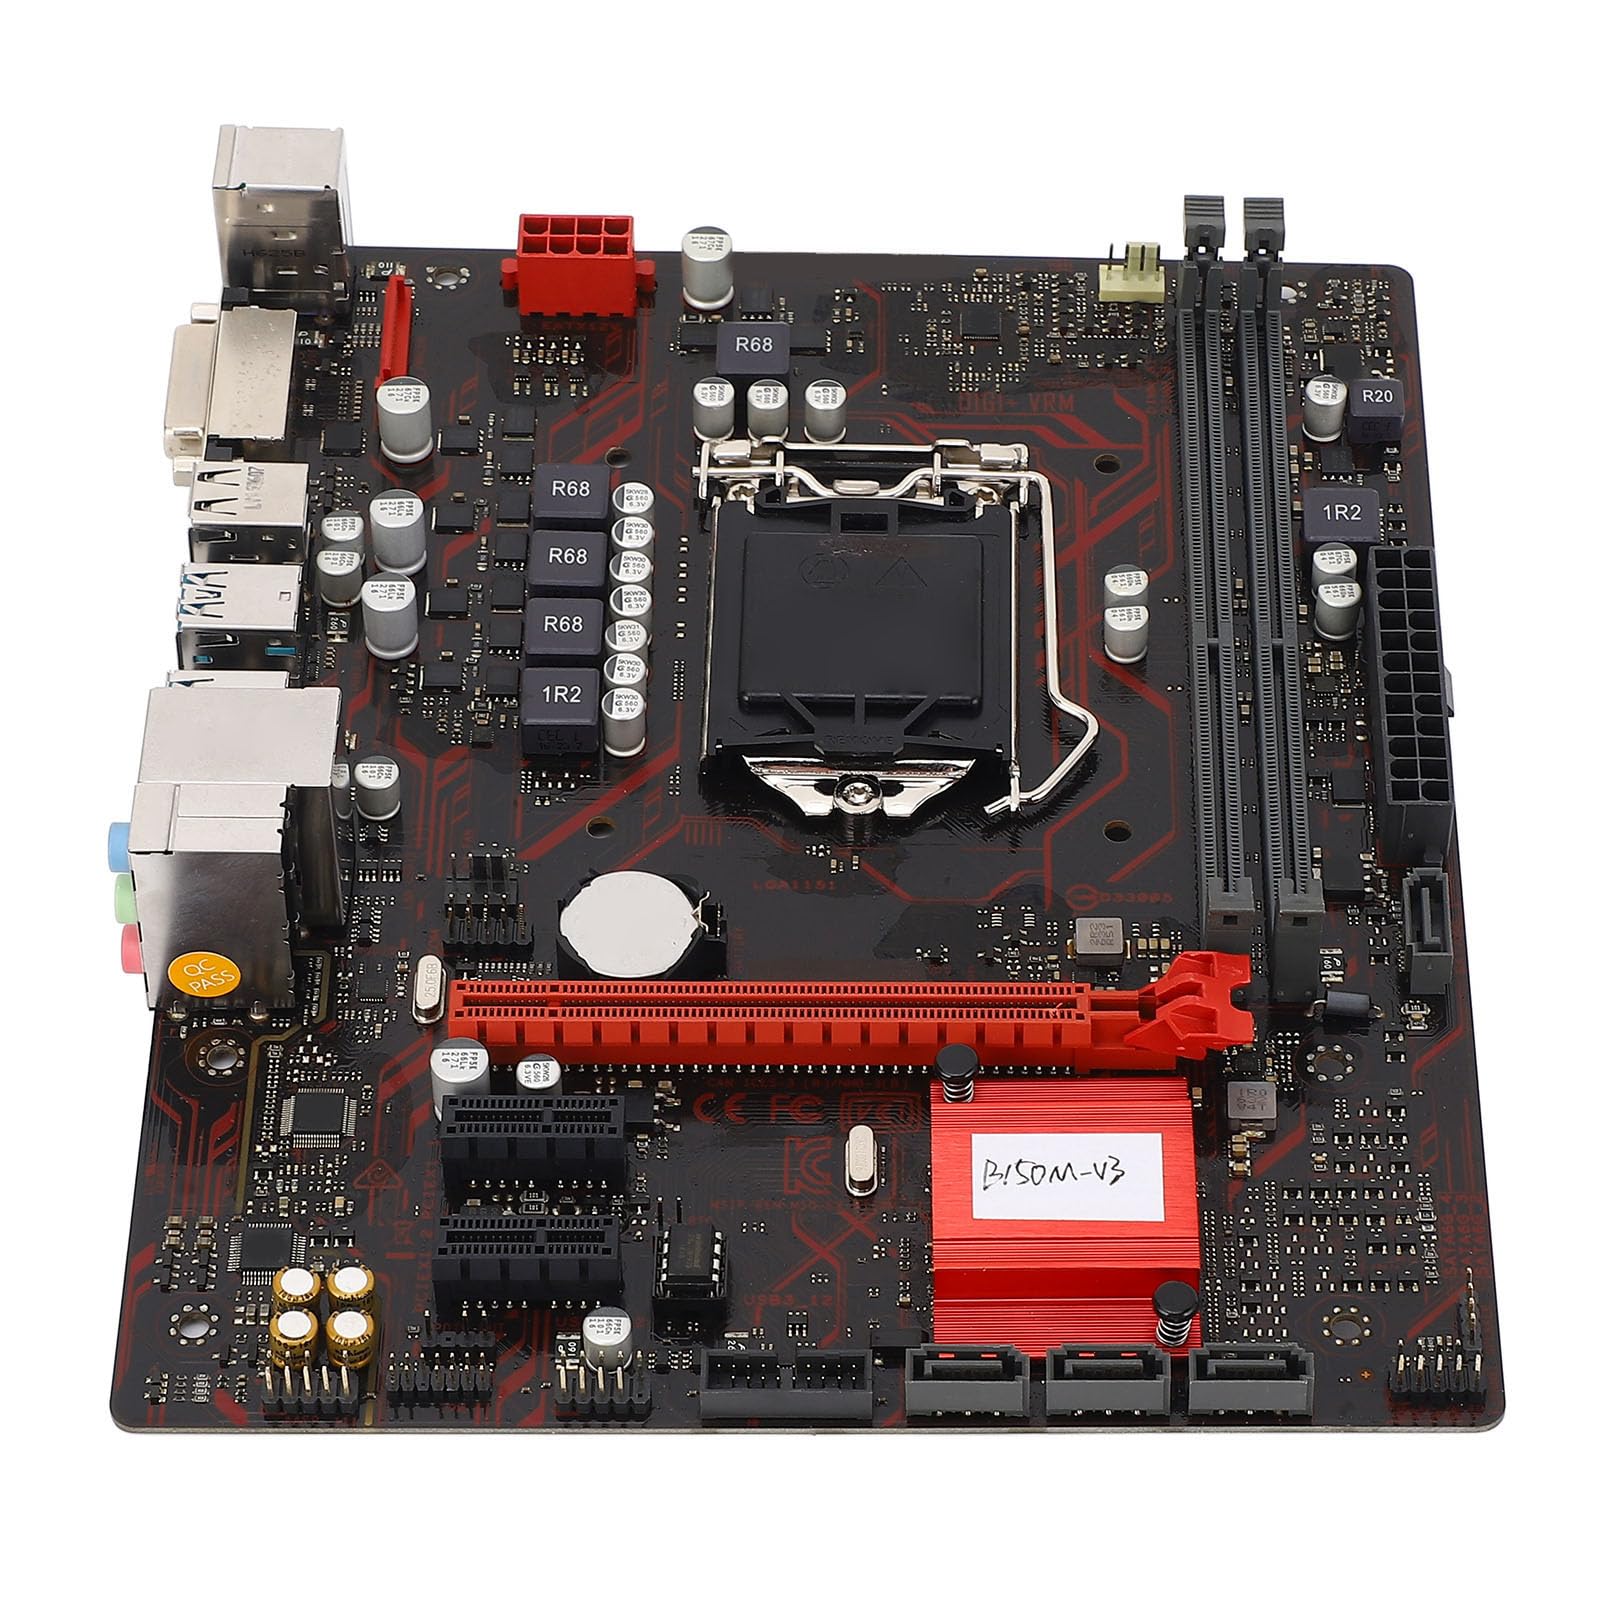
الشكل 1: انتهىview of the Zyyini B150M V3 Motherboard.
الإعداد والتثبيت
Before beginning installation, ensure your workspace is clean and static-free. It is recommended to wear an anti-static wrist strap to prevent electrostatic discharge (ESD) damage to components.
1. احتياطات السلامة
- افصل دائمًا مصدر الطاقة من مأخذ الحائط قبل تثبيت أو إزالة أي مكونات.
- Handle components by their edges to avoid touching sensitive circuits.
- Ensure proper grounding to prevent ESD.
- Refer to the CPU, memory, and other component manuals for specific installation instructions.
2. تخطيط اللوحة الأم

الشكل 2: من أعلى إلى أسفل view highlighting key components and connectors on the motherboard.
Familiarize yourself with the locations of the CPU socket, memory slots, PCI-E slots, SATA ports, and power connectors before installation.
3. تركيب وحدة المعالجة المركزية (LGA 1151)
- حدد مكان مقبس وحدة المعالجة المركزية LGA 1151 على اللوحة الأم.
- Gently push down the load lever and pull it sideways to open the CPU socket cover.
- Carefully align the notches on your Intel Core i7/i5/i3/Pentium/Celeron (14nm) processor with the corresponding keys on the socket. Ensure the gold triangle on the CPU matches the triangle on the socket.
- Place the CPU gently into the socket without forcing it.
- أغلق لوحة التحميل وادفع ذراع التحميل إلى مكانه حتى تسمع صوت طقطقة.

الشكل 3: الصورة عن قرب view of the LGA 1151 CPU socket, ready for processor installation.
4. Memory Installation (DDR4 DIMM)
The motherboard features two DDR4 DIMM slots, supporting dual-channel DDR4 2133MHz memory up to a maximum of 32GB.
- افتح المشابك الموجودة في كلا طرفي فتحة DIMM.
- قم بمحاذاة الشق الموجود على وحدة الذاكرة DDR4 مع المفتاح الموجود في فتحة DIMM.
- أدخل وحدة الذاكرة بإحكام في الفتحة حتى تستقر المشابك في مكانها. تأكد من إغلاق كلا المشبكين.

Figure 4: The two DDR4 DIMM slots for memory installation.
5. Storage Device Installation (SATA III & M.2)
The motherboard provides 4 x Serial ATA III interfaces and 1 x M.2 slot for storage devices.
- أجهزة SATA: Connect one end of a SATA data cable to a SATA III port on the motherboard and the other end to your SATA hard drive or SSD. Connect the SATA power cable from your power supply to the drive.
- M.2 Devices: Insert your M.2 SSD into the M.2 slot, securing it with the provided screw.
6. Expansion Card Installation (PCI-E)
The motherboard includes 1 x PCI-E x16 graphics card slot and 2 x PCI-E x1 slots for expansion cards.
- Align your PCI-E expansion card (e.g., graphics card, sound card, network card) with the desired PCI-E slot.
- Press the card firmly into the slot until it is fully seated. Secure the card with a screw to the chassis.
7. Connecting Peripherals and Front Panel
Connect your USB devices, DVI display, audio devices, and Ethernet cable to the rear I/O panel. Connect the front panel connectors (power button, reset button, USB ports, audio jacks) from your PC case to the corresponding headers on the motherboard.

الشكل 5: مفصل view of the rear I/O panel, showing USB, DVI, Ethernet, and audio ports.
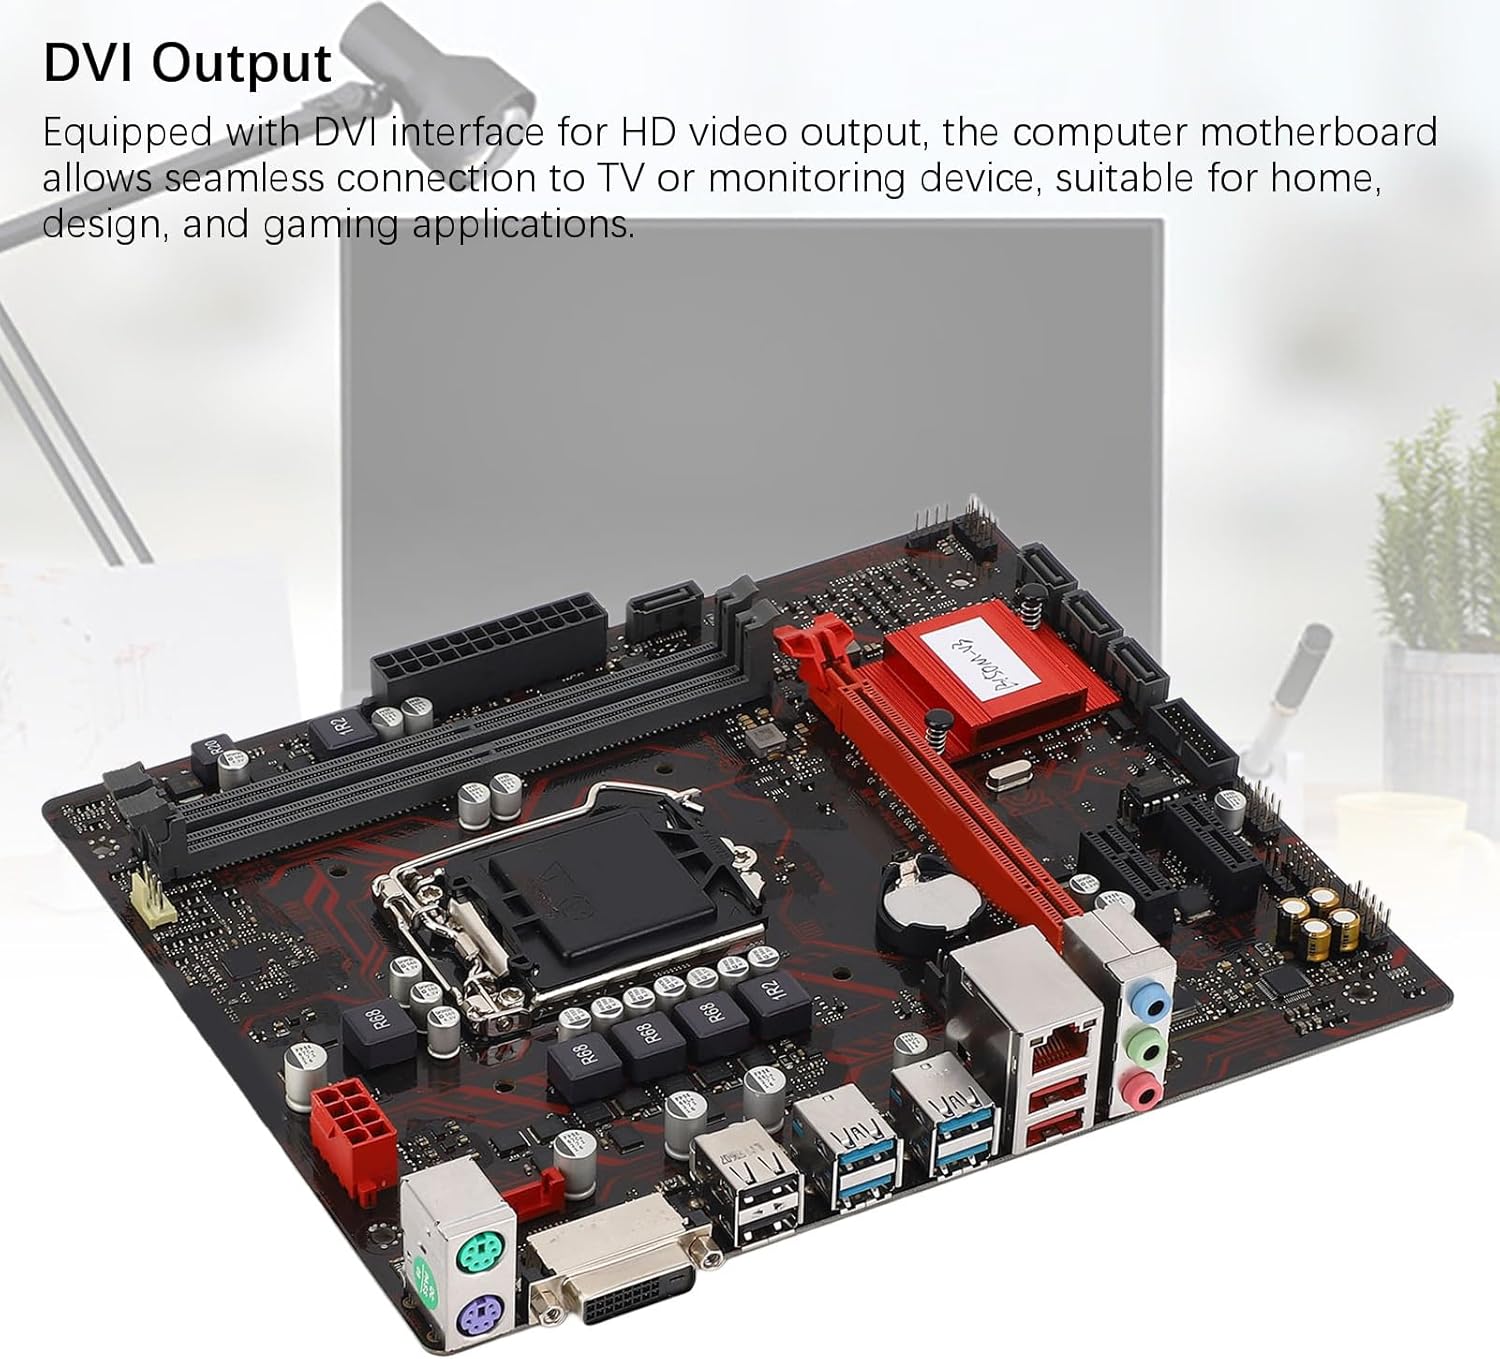
Figure 6: The DVI interface for connecting a display.
8. توصيلات الطاقة
Connect the 24-pin ATX power connector and the 8-pin CPU power connector from your power supply to the respective ports on the motherboard. Ensure they are firmly seated.

الشكل 7: بزاوية view showing the location of power connectors and other ports.
تعليمات التشغيل
1. التمهيد الأولي
After all components are installed and connected, power on your system. The system should initiate the boot process. If no display appears, refer to the troubleshooting section.
2. تهيئة BIOS/UEFI
During boot-up, press the designated key (usually ديل or F2) to enter the BIOS/UEFI setup. Here you can configure boot order, system time, and other advanced settings. Save changes before exiting.
3. تثبيت برنامج التشغيل
After installing your operating system, install the necessary drivers for the motherboard chipset, network, and audio. These are typically provided on a driver CD or available for download from the manufacturer's webموقع.
صيانة
1. تنظيف الغبار
Regularly clean the inside of your computer case to prevent dust buildup, which can lead to overheating and component failure. Use compressed air to gently remove dust from fans, heatsinks, and motherboard surfaces.
2. تحديثات BIOS
التحقق بشكل دوري من الشركة المصنعة webموقع لتحديثات BIOS. يمكن لتحديثات BIOS تحسين استقرار النظام، وإضافة دعم لأجهزة جديدة، أو إصلاح الأخطاء. اتبع تعليمات التحديث بدقة لتجنب إتلاف اللوحة الأم.
استكشاف الأخطاء وإصلاحها
1. لا قوة
- تأكد من توصيل مصدر الطاقة بمأخذ الحائط وتشغيله.
- Verify that the 24-pin and 8-pin power connectors are securely attached to the motherboard.
- تحقق من توصيل مفتاح الطاقة الموجود على اللوحة الأمامية باللوحة الأم.
2. لا يوجد عرض
- Confirm that the monitor is connected to the correct video output (DVI) on the motherboard or graphics card and is powered on.
- Reseat the memory modules. Try booting with only one memory module installed.
- أعد تركيب بطاقة الرسومات (إن وجدت).
- Ensure the CPU is properly installed and the CPU cooler is securely attached.
3. عدم استقرار النظام/الأعطال
- Check for overheating. Ensure all fans are working and heatsinks are clean.
- Verify that all components (CPU, RAM, storage) are properly seated.
- قم بتشغيل أدوات تشخيص الذاكرة للتحقق من وجود خلل في ذاكرة الوصول العشوائي (RAM).
- تأكد من تحديث كافة برامج التشغيل.
تحديد

Figure 8: The motherboard's robust construction ensures stable performance and longevity.
| ميزة | التفاصيل |
|---|---|
| نموذج اللوحة الأم | B150M-V3 |
| مجموعة الشرائح | شريحة B150 |
| مقبس وحدة المعالجة المركزية | إل جي إيه 1151 |
| Compatible CPU Type | Intel Core i7, i5, i3, Pentium, Celeron (14nm processors) |
| نوع الذاكرة | 2 × DDR4 DIMM (قناة مزدوجة) |
| سرعة الذاكرة | 2133 ميجا هرتز |
| سعة الذاكرة القصوى | 32 جيجا بايت |
| معيار PCI-E | PCI-E 3.0 |
| PCI-E x16 Slots | 1 |
| PCI-E x1 Slots | 2 |
| واجهات التخزين | 4 x Serial ATA III, 1 x M.2 |
| USB Interfaces (Rear) | 4 x USB3.0 و 4 x USB2.0 |
| USB Interfaces (Internal) | 1 x USB3.0 header, 1 x USB2.0 header |
| واجهة الفيديو | 1 × دي في آي |
| Network Chip | Realtek RTL8111GR Gigabit Ethernet |
| رقاقة الصوت | Realtek ALC887 8-Channel |
| واجهات الطاقة | One 8-Pin, One 24-Pin |
| عامل الشكل | ام-اتكس |
| وضع امدادات الطاقة | 5 مراحل |
| واجهات أخرى | RJ45, Chassis Fan, Internal Speaker, System Panel, Sound, PS/2 Mouse, PS/2 Keyboard, COM |
معلومات الضمان
For specific warranty terms and conditions, please refer to the documentation provided with your purchase or visit the official Zyyini webالموقع. يشمل الضمان عادةً عيوب المواد والتصنيع في ظل الاستخدام العادي.
دعم العملاء
If you encounter any issues that cannot be resolved using this manual, please contact your retailer or visit the Zyyini official support channels for assistance. Have your product model number (B150M-V3) and purchase details ready when seeking support.