
OMTech LYF-30JW(S)
OMTech 30W MOPA Fiber Laser Engraver with Rotary Axis
Model: LYF-30JW(S) - User Manual
1. المقدمة
This manual provides essential instructions for the safe and efficient operation, setup, and maintenance of your OMTech 30W MOPA Fiber Laser Engraver with Rotary Axis, Model LYF-30JW(S). Please read this manual thoroughly before operating the machine to ensure proper usage and to prevent damage or injury.
The OMTech 30W MOPA Fiber Laser Engraver is designed for precise and high-speed marking and engraving on various materials, including metals and certain plastics. It features a robust 30W JPT fiber laser source, a 5.9"x5.9" (150x150mm) work area, and comes with a rotary axis for cylindrical object engraving.
2. تعليمات السلامة
WARNING: This is a Class 2 laser product. Always wear appropriate laser safety glasses when operating the machine. Never look directly into the laser beam.
- تأكد من تأريض الجهاز بشكل صحيح قبل الاستخدام.
- Operate the laser engraver in a well-ventilated area to dissipate fumes and debris.
- احرص على إبقاء منطقة العمل خالية من المواد القابلة للاشتعال.
- لا تترك الجهاز دون مراقبة أثناء التشغيل.
- تعرف على موقع زر التوقف في حالات الطوارئ ووظيفته.
- Only trained personnel should operate or maintain the machine.
- Avoid placing reflective materials in the laser path without proper precautions.
3. مكونات المنتج
The OMTech 30W MOPA Fiber Laser Engraver system includes the main laser unit, a rotary axis attachment, and necessary cables and software.

Image 3.1: The OMTech 30W MOPA Fiber Laser Engraver with the rotary axis accessory.
3.1 Main Laser Unit
- Laser Head (Galvo Scanner): Directs the laser beam.
- منصة العمل: The base where materials are placed for engraving.
- لوحة التحكم: Includes power switch, emergency stop, and key switch.
- Focusing Column: Adjustable column for setting the correct focal distance.
- Dual Red Dot Locators: Aids in precise material positioning and focusing.
3.2 Rotary Axis
The included rotary axis allows for engraving on cylindrical or irregularly shaped objects.

Image 3.2: The laser engraver shown with the rotary axis connected, ready for cylindrical object engraving.
4. دليل الإعداد
4.1 فك الصندوق ووضعه في مكانه
- قم بإزالة جميع المكونات بعناية من العبوة.
- Place the laser engraver on a stable, level surface in a well-ventilated area.
- Ensure adequate space around the machine for operation and maintenance.
4.2 التوصيل الكهربائي
- Connect the power cable to the machine and a grounded electrical outlet.
- تأكد من مستوى الصوتtagيتوافق مع متطلبات الجهاز.
4.3 تثبيت البرنامج
The engraver is compatible with LightBurn and EZCad software. Install the software on your computer using the provided media or by downloading the latest version from the official OMTech webموقع.
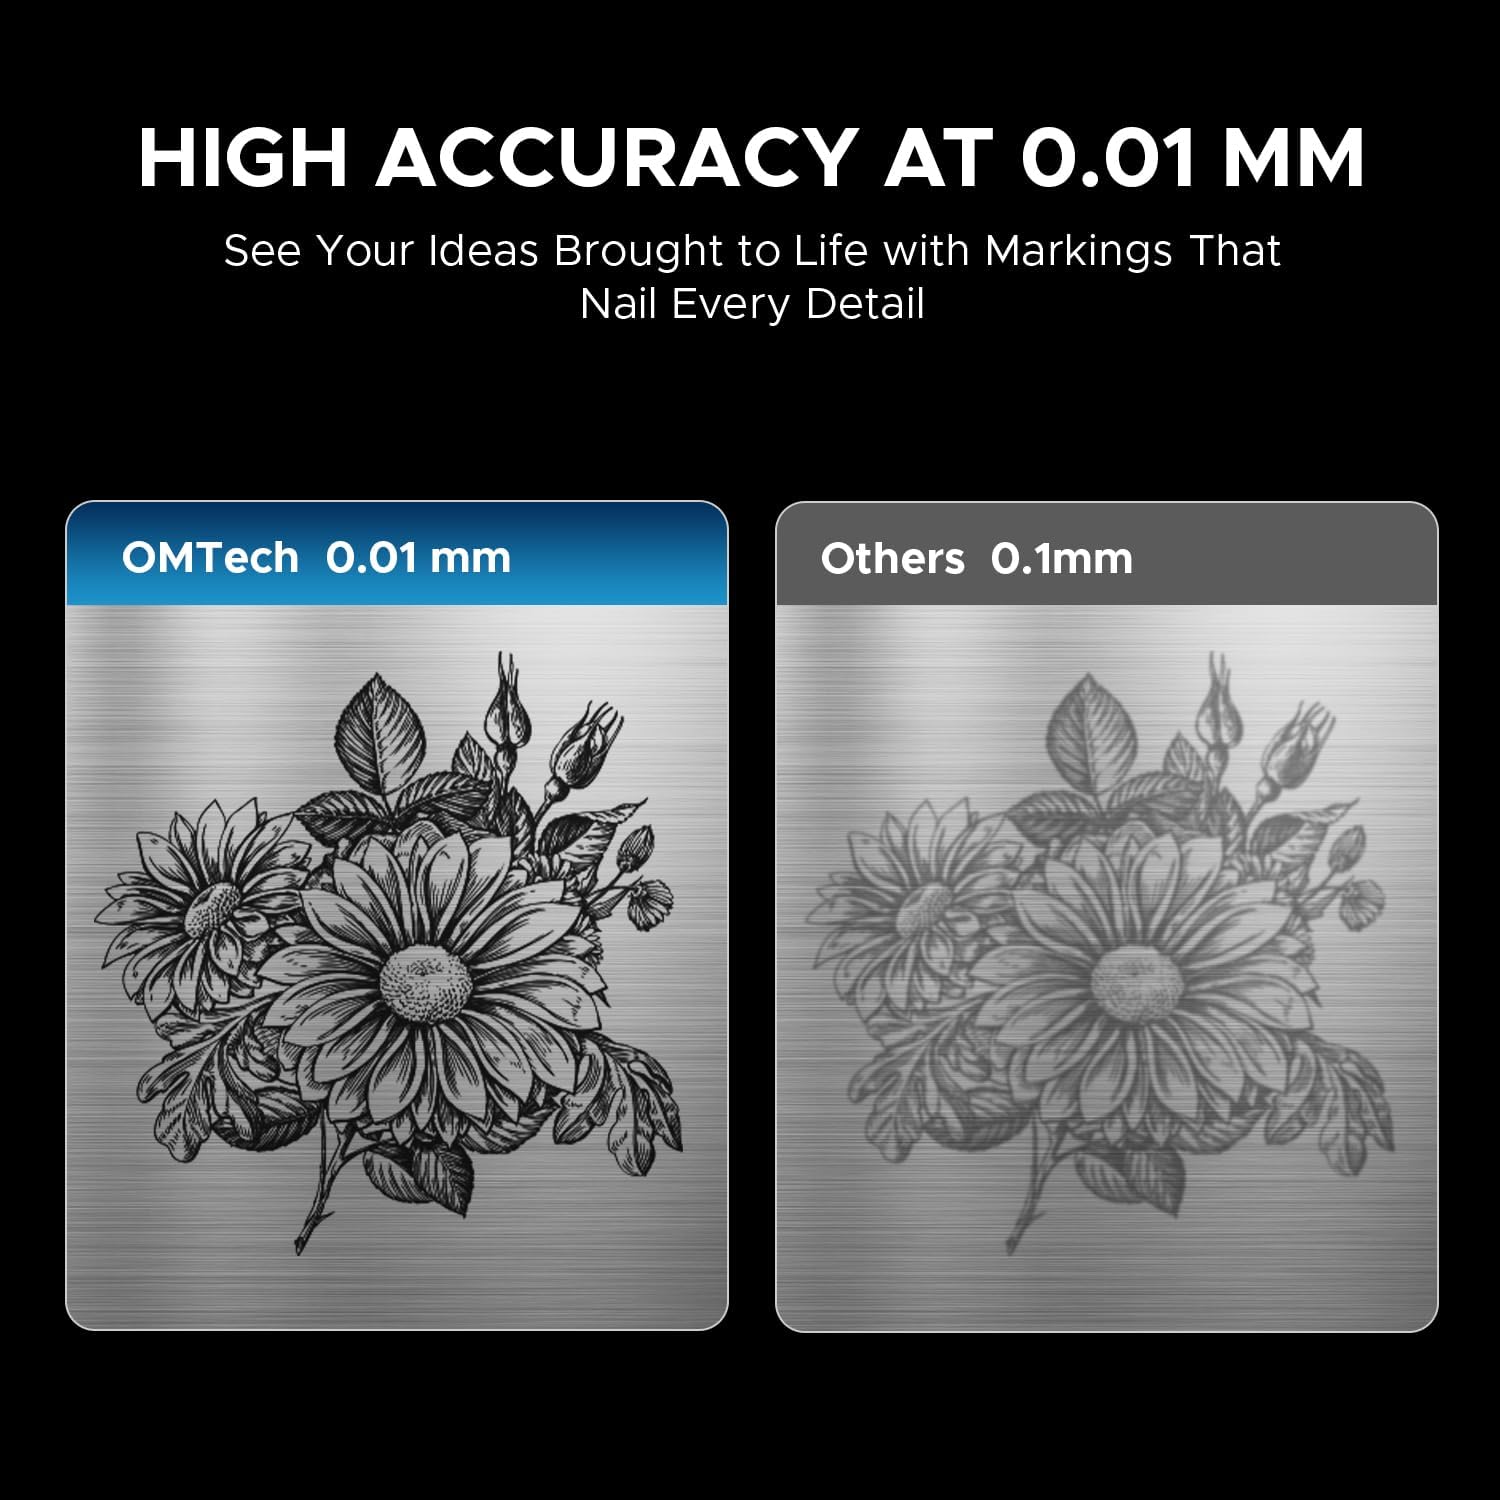
Image 4.1: The laser engraver connected to a computer, illustrating software compatibility and setup.
4.4 Rotary Axis Connection (Optional)
- If using the rotary axis, connect its cable to the designated port on the main laser unit.
- Securely mount the rotary axis to the work platform if required for your application.
5. تعليمات التشغيل
5.1 التشغيل
- Insert the key into the key switch and turn it to the 'ON' position.
- اضغط على زر الطاقة الرئيسي.
- The machine will initialize.
5.2 تحضير المواد ووضعها
Ensure your material is clean and free of obstructions. Place the material securely on the work platform or within the rotary axis chuck.
5.3 تركيز الليزر
Use the dual red dot locators to achieve the correct focal distance. Adjust the height of the laser head until the two red dots converge into a single, sharp point on the material surface. This ensures optimal engraving quality and depth.
5.4 Software Operation (LightBurn/EZCad)
- Launch the engraving software (LightBurn or EZCad) on your computer.
- Import or create your design.
- Set engraving parameters such as power, speed, frequency, and pulse width according to your material and desired effect. Refer to the software's user manual for detailed parameter guidance.
- قبلview the engraving path to confirm positioning.
5.5 عملية النقش
- Ensure all safety precautions are in place, including wearing laser safety glasses.
- Initiate the engraving job from the software.
- Monitor the engraving process. In case of any issue, press the emergency stop button immediately.
- Once complete, wait for the laser to stop before removing the engraved material.
5.6 المواد المتوافقة
The OMTech 30W MOPA Fiber Laser Engraver is suitable for marking and engraving a wide range of materials:

الصورة 5.1: مثالamples of materials that can be engraved with the OMTech MOPA Fiber Laser.
- Metals: Brass, Gold, Silver, Aluminum, Titanium, Tungsten, Stainless Steel.
- Other Materials: Brick, Tile, Marble, Granite.
5.7 Engraving Performance
The machine offers high speed and precision for various applications.

Image 5.2: Illustration of the high engraving speed capability of fiber lasers compared to other laser types.

الصورة 5.3: مثالample of engraving depth, demonstrating the machine's capability for multi-pass cutting up to 0.8 mm.

Image 5.4: Visual comparison highlighting the 0.01 mm engraving accuracy of the OMTech laser.
6. الصيانة
تضمن الصيانة المنتظمة طول العمر والأداء الأمثل لجهاز النقش بالليزر الخاص بك.
- تنظيف العدسة: Periodically inspect and clean the laser lens using specialized lens cleaning solutions and wipes to prevent dust and debris from affecting beam quality.
- Work Area Cleanup: Keep the work platform and surrounding area clean from engraved material residue.
- فحص الكابلات: افحص جميع الكابلات بانتظام بحثًا عن علامات التلف أو التآكل. استبدل أي كابلات تالفة على الفور.
- فتحات التهوية: Ensure the machine's air vents are clear and unobstructed to maintain proper cooling.
The fiber laser source has an estimated service life of over 100,000 hours, requiring minimal maintenance for the laser source itself.
7. استكشاف الأخطاء وإصلاحها
This section addresses common issues you might encounter. For more complex problems, please contact OMTech support.
- لا يوجد خرج ليزر:
- Check if the machine is powered on and the key switch is in the 'ON' position.
- Ensure the emergency stop button is not engaged.
- Verify all cables are securely connected. - جودة نقش رديئة:
- Re-check the laser focus. The red dots should converge perfectly.
- Clean the laser lens if it appears dirty.
- Adjust engraving parameters (power, speed, frequency, pulse width) for the specific material.
- Ensure the material is flat and securely placed. - مشاكل الاتصال بالبرامج:
- Restart both the machine and the computer.
- Check USB cable connection.
- Reinstall software drivers if necessary. - Rotary Axis Not Functioning:
- Ensure the rotary axis is correctly connected to the main unit.
- Verify that the rotary axis settings are enabled and configured in the software.
8. المواصفات
| ميزة | مواصفة |
|---|---|
| رقم الموديل | LYF-30JW(S) |
| قوة الليزر | 30 واط |
| مصدر الليزر | JPT Fiber Laser |
| طول موجة الليزر | 1064 نانومتر |
| الأعلى. بمناسبة السرعة | 10,000 مم/ثانية |
| دقة العلامات | 0.01 ملم |
| أقصى عمق للعلامات في تمريرة واحدة | 0.08 ملم |
| نطاق التردد | 1-4000 كيلو هرتز |
| Adjustable Pulse Width | 2-500 ns |
| منطقة العمل | 5.9 بوصة × 5.9 بوصة (150 مم × 150 مم) |
| العمر الافتراضي المقدر لليزر | 100,000+ ساعات |
| نظام التبريد | تبريد الهواء |
| البرامج المتوافقة | LightBurn (Windows 7, 8, 10, 11, macOS), EZCad2 |
| تنسيقات الصور المدعومة | .bmp، .gif، .jpg، .jpeg، .dxf، .dst، .ai |
| الأبعاد (الطول × العرض × الارتفاع) | 15.8 × 13.4 × 21.3 بوصة |
| الوزن الصافي | 40 رطل. |
| الشهادات | إدارة الغذاء والدواء، الاتحاد الأوروبي |
ملاحظة: المواصفات عرضة للتغيير دون إشعار مسبق.
9. الدعم والضمان
9.1 دعم العملاء
For technical assistance, troubleshooting, or any inquiries regarding your OMTech laser engraver, please contact our support team:

Image 9.1: OMTech customer support contact details.
- هاتف: +1 (949) 438-4949
- البريد الإلكتروني العام: SUPPORT@OMTECHLASER.COM
- البريد الإلكتروني للدعم الفني: TECHSUPPORT@OMTLASER.COM
Support is available 24/7.
9.2 معلومات الضمان
Please refer to the official OMTech website or your purchase documentation for detailed warranty information regarding your OMTech 30W MOPA Fiber Laser Engraver. Warranty terms and conditions may vary.
Ask a question about this manual
Ask about setup, troubleshooting, compatibility, parts, safety, or missing instructions. Manuals+ will review the question and use this page’s manual context to help answer it.