
Carro CFR523N4N-FM
Carro 52-Inch White Flush Mount Ceiling Fan Instruction Manual
Model: CFR523N4N-FM
1. معلومات هامة حول السلامة
Please read and understand all instructions before beginning installation. Failure to follow these instructions could result in electric shock, fire, or serious personal injury.
- تأكد من إيقاف تشغيل الطاقة عند قاطع الدائرة قبل التثبيت أو الصيانة.
- يجب أن تكون جميع الأسلاك مطابقة للقوانين الكهربائية الوطنية والمحلية.
- يجب تركيب المروحة على عارضة السقف أو هيكل الدعم القادر على تحمل وزن لا يقل عن 35 رطلاً (15.9 كجم).
- لا تقم بتشغيل المروحة إذا كانت الأسلاك تالفة أو إذا كانت المروحة تالفة بشكل واضح.
- أبقِ يديك وملابسك وأشياءك الأخرى بعيدة عن شفرات المروحة أثناء تشغيلها.
- هذه المروحة مصممة للاستخدام الداخلي فقط.
2. محتويات العبوة
تأكد من وجود كافة المكونات قبل المتابعة بالتثبيت.
- مجموعة محرك التيار المستمر
- 3 شفرات ABS
- جهاز التحكم عن بعد
- أدوات التثبيت (براغي، صواميل أسلاك، إلخ).
- دليل التعليمات
3. المواصفات
| ميزة | التفاصيل |
|---|---|
| ماركة | كارو |
| اسم الموديل | CFR523N4N-FM |
| لون | أبيض |
| تصميم المروحة الكهربائية | مروحة سقف |
| مصدر الطاقة | DC |
| أبعاد المنتج | 10 بوصة عمق × 52 بوصة عرض × 52 بوصة ارتفاع |
| نوع الغرفة | غرفة نوم، غرفة طعام، مطبخ، غرفة معيشة، غرفة دراسة |
| ميزة خاصة | سرعة قابل للتعديل |
| مستوى الضوضاء | 55 ديسيبل (كحد أقصى) |
| واتtage | 17 واط |
| عدد الشفرات | 3 |
| سعة تدفق الهواء | 3955 قدم مكعب في الدقيقة |
| المجلدtage | 120 فولت |
| طريقة التحكم | بعيد |
| عدد مستويات الطاقة | 10 |
| الاستخدام الداخلي والخارجي | داخلي |
| نوع التركيب | تركيب السقف (تركيب سطحي) |
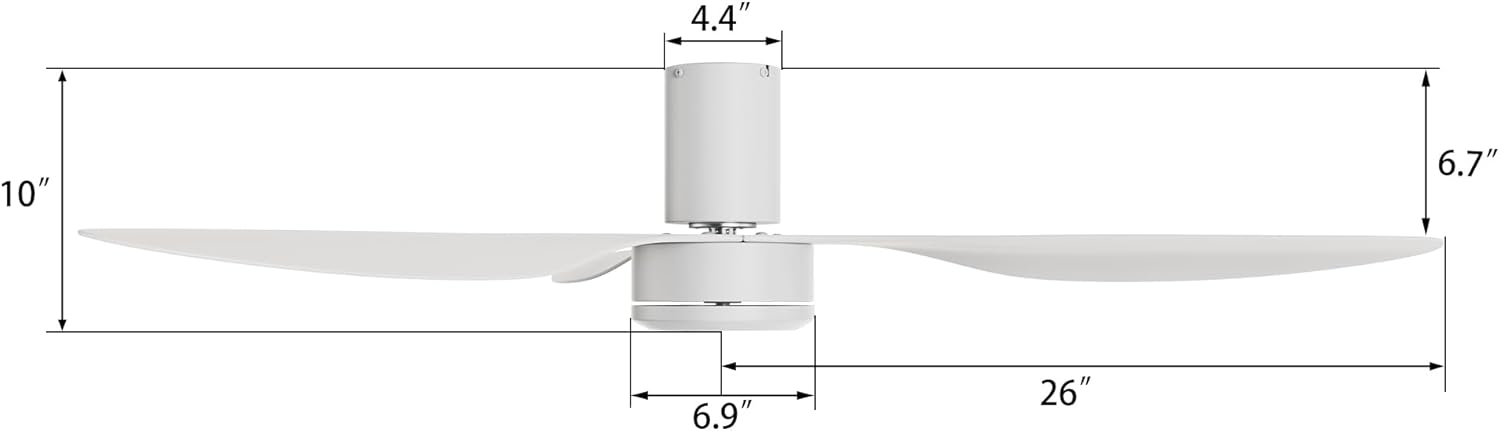
Figure 3.1: Fan Dimensions. Total height is 10 inches, motor housing is 4.4 inches wide, and blades extend 26 inches from the center.
4. دليل التثبيت
4.1 فحوصات ما قبل التثبيت
- Ensure the ceiling is flat and capable of supporting the fan's weight. This fan is not adaptable for sloped ceilings.
- Confirm that the electrical box is securely mounted and rated for ceiling fan support.
- قم بفصل التيار الكهربائي من قاطع الدائرة الرئيسي قبل البدء بأي عمل كهربائي.
4.2 تعليمات الأسلاك
Connect the fan's wiring to your household electrical system as follows:
- قم بتوصيل الأبيض (محايد) wire from the fan to the neutral wire from the ceiling.
- قم بتوصيل Black/Red (Hot/Live) wire from the fan to the hot/live wire from the ceiling.
- Ensure all connections are secure using wire nuts.

Figure 4.1: Wiring Diagram and Flush Mount Compatibility. This fan is suitable for flat ceilings and requires connection of neutral and live wires.
4.3 ملحق الشفرة
Attach the three ABS blades to the motor housing using the provided screws. Ensure they are securely fastened.

Figure 4.2: Fan Blade and Motor Details. Illustrates the robust structure and ABS blade material.
5. تعليمات التشغيل
5.1 وظائف التحكم عن بعد
The fan is controlled via the included remote. Familiarize yourself with its buttons:
- تشغيل/إيقاف: لتشغيل أو إيقاف تشغيل المروحة.
- F/R (للأمام/للخلف): يغير اتجاه دوران الشفرة لوضع الصيف أو الشتاء.
- أزرار السرعة (+/-): Adjusts fan speed across 10 levels.
- الوضع الطبيعي: Activates a varying speed setting to simulate natural breezes.

Figure 5.1: 10 Adjustable Fan Speeds. The fan offers a range of speeds from soft to cool wind.

Figure 5.2: Recommended Speed Settings for various activities.
5.2 وظيفة محرك التيار المستمر العكسي
The fan features a reversible DC motor, allowing for year-round use:
- الوضع الصيفي (الهواء الطلق): Press the "F/R" button to set blades to rotate counter-clockwise, creating a cooling breeze.
- وضع الشتاء (التيار الهوائي الصاعد): Press the "F/R" button to set blades to rotate clockwise, circulating warm air trapped near the ceiling.
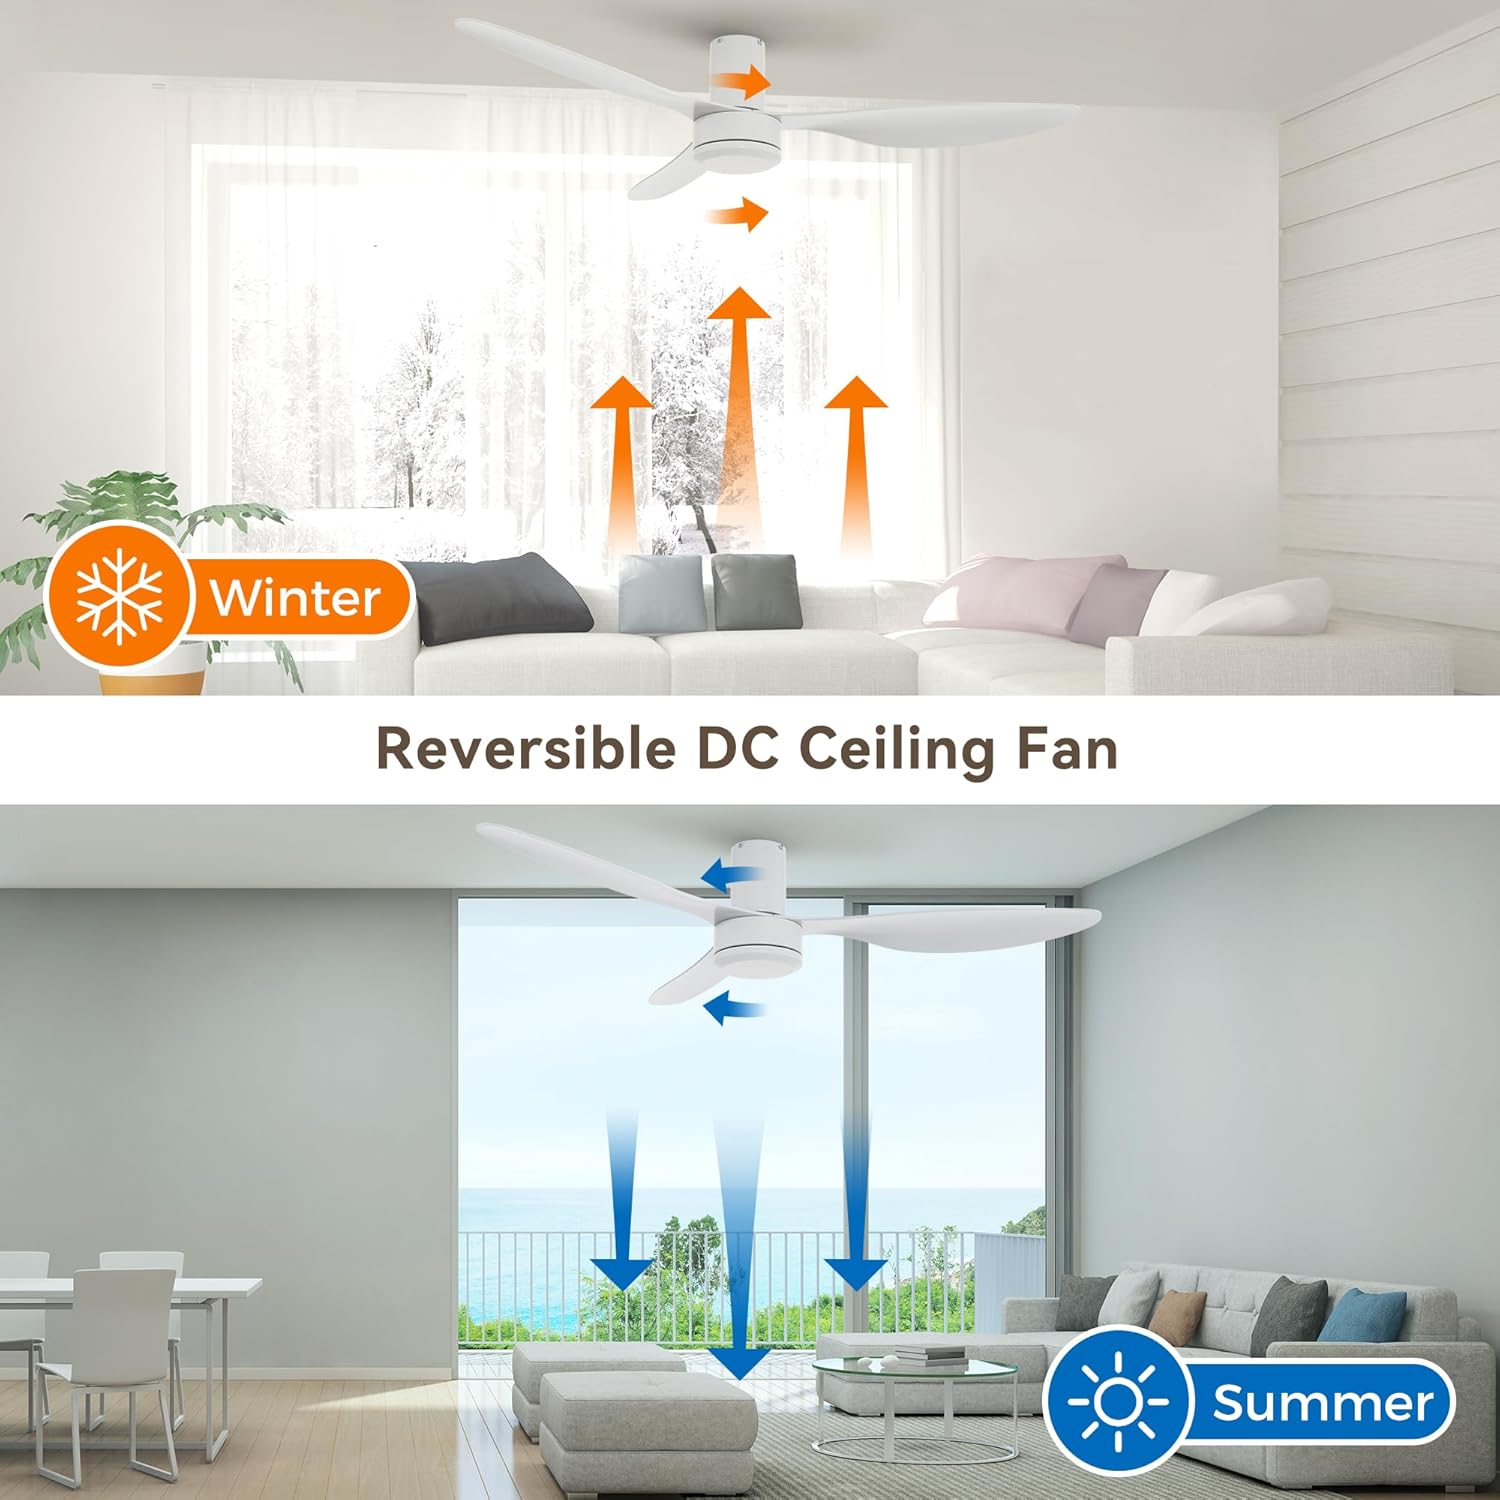
Figure 5.3: Reversible DC Motor Operation for Summer and Winter modes.
6. الصيانة
تضمن الصيانة المنتظمة الأداء الأمثل وطول العمر لمروحة السقف الخاصة بك.
- تنظيف: امسح شفرات المروحة وغطاء المحرك بشكل دوري بقطعة قماش ناعمة.amp القماش. لا تستخدم المنظفات أو المذيبات الكاشطة.
- توازن الشفرة: If the fan wobbles, check that all blade screws are tight and that blades are not bent or damaged.
- تزييت المحرك: يتم تشحيم محرك التيار المستمر بشكل دائم ولا يتطلب زيتًا إضافيًا.
- إيقاف التشغيل: احرص دائمًا على فصل التيار الكهربائي من قاطع الدائرة قبل التنظيف أو إجراء أي صيانة.
7. استكشاف الأخطاء وإصلاحها
| مشكلة | السبب المحتمل | حل |
|---|---|---|
| المروحة لا تبدأ | لا يوجد طاقة للمروحة؛ توصيلات الأسلاك غير محكمة؛ بطارية جهاز التحكم عن بعد منخفضة أو غير مقترنة. | افحص قاطع الدائرة الكهربائية؛ تأكد من أن جميع توصيلات الأسلاك محكمة؛ استبدل بطارية جهاز التحكم عن بعد أو أعد إقران جهاز التحكم عن بعد. |
| المروحة تصدر ضوضاء مفرطة | Loose screws on blades or mounting bracket; Unbalanced blades. | Tighten all screws; Check blade balance and adjust if necessary. |
| جهاز التحكم عن بعد لا يعمل | Low or dead battery; Remote not paired with fan; Obstruction between remote and receiver. | Replace battery; Follow pairing instructions (if applicable, typically power cycle fan and press remote button); Ensure clear line of sight. |
| تذبذب المروحة | Loose mounting bracket; Unbalanced blades; Blades not securely attached. | Ensure mounting bracket is tight; Use a balancing kit (not included) if needed; Tighten blade screws. |

Figure 7.1: Fan Noise Level Comparison. The Carro fan operates quietly, below 55dB.
8. الضمان والدعم
8.1 معلومات الضمان
This Carro ceiling fan comes with a ضمان لمدة 12 شهرًا يسري هذا الضمان من تاريخ الشراء، ويغطي عيوب التصنيع وعيوب المواد في ظل الاستخدام العادي.
The warranty does not cover damage caused by improper installation, misuse, accidents, or unauthorized repairs.
8.2 دعم العملاء
For any questions, technical assistance, or warranty claims, please contact Carro customer support. When contacting support, please have your order details and model number (CFR523N4N-FM) available.
سيتم الرد على جميع رسائل البريد الإلكتروني في غضون 24 ساعة.
For more information, visit the official Carro webالموقع أو الرجوع إلى وثائق الشراء الخاصة بك.
Ask a question about this manual
Ask about setup, troubleshooting, compatibility, parts, safety, or missing instructions. Manuals+ will review the question and use this page’s manual context to help answer it.