1. المقدمة
Thank you for choosing the VOUNOT Front Door Canopy Outdoor Awning. This manual provides essential information for the safe and correct installation, operation, and maintenance of your new awning. Please read these instructions thoroughly before beginning assembly and retain them for future reference.
2. معلومات السلامة
Your safety and the safety of others are paramount. Please observe all safety warnings and instructions.
- اتبع دائمًا تعليمات التجميع الواردة في هذا الدليل.
- Ensure the awning is properly anchored and securely fastened to a suitable wall structure to withstand wind and various weather conditions. Improper installation can lead to injury or damage.
- Keep children and pets away from the installation area and any moving parts during assembly.
- Do not use this awning in high winds or during severe storms. It is designed for rain, snow, and sun protection under normal weather conditions.
- Regularly inspect all fasteners and connections to ensure they remain tight and secure.
- Wear appropriate personal protective equipment (e.g., safety glasses, gloves) during installation.
- إذا لم تكن متأكدًا من أي جزء من عملية التثبيت، فاستشر متخصصًا مؤهلًا.
3. محتويات العبوة
يرجى التأكد من وجود جميع المكونات وسلامتها قبل البدء بالتجميع. في حال وجود أي أجزاء مفقودة أو تالفة، يرجى التواصل مع خدمة العملاء.

Image 3.1: Awning dimensions and main components.

الصورة 3.2: تفصيلية view of individual components.
- Polycarbonate Sheets (Canopy Panels)
- Aluminum Bands / Strips (Front and Rear)
- PPO Curved Frames (Support Brackets)
- Expansion Bolts / Screws (for wall mounting)
- Plastic Caps (for screws)
4. الإعداد والتثبيت
This section outlines the steps for assembling and installing your VOUNOT Front Door Canopy. Ensure you have the necessary tools before starting.
4.1 الأدوات المطلوبة (غير متضمنة)
- استخدم مثقابًا بريش حفر مناسبة لنوع جدارك
- شريط قياس
- مستوى
- قلم رصاص أو علامة
- مطرقة
- مفك البراغي
- Wrench (if applicable for expansion bolts)
4.2 خطوات التجميع
- إعداد اللجان: Carefully remove any protective films from the polycarbonate sheets.
- Attach Aluminum Bands: Slide the aluminum bands onto the front and rear edges of the polycarbonate sheets. Ensure they fit snugly.
- تثبيت الأقواس: Attach the PPO curved frames (brackets) to the sides of the assembled canopy panels. The panels should slot into the grooves of the brackets. Secure with screws if provided.
- حدد نقاط الحفر: Hold the assembled awning against the desired installation location on your wall. Use a level to ensure it is straight. Mark the drilling points for the bracket mounting holes with a pencil.
- ثقوب الحفر: Drill holes at the marked points using an appropriate drill bit for your wall material (e.g., masonry bit for brick/concrete). The depth and diameter should match the expansion bolts.
- أدخل مسامير التمدد: Insert the expansion bolts into the drilled holes. Tap gently with a hammer if necessary until they are flush with the wall surface.
- Mount the Awning: Align the mounting holes on the PPO curved frames with the expansion bolts. Secure the awning to the wall by tightening the nuts or screws of the expansion bolts. Ensure all connections are firm and secure.
- Apply Plastic Caps: Cover the screw heads with the provided plastic caps for a finished look and added protection.

الصورة 4.1: مثالample of a properly installed VOUNOT door canopy.

Image 4.2: Installed canopy, side view.
5. تعليمات التشغيل
The VOUNOT Front Door Canopy operates passively, providing continuous protection once installed. It requires no manual operation.
- الحماية من المطر: The polycarbonate sheets are designed to effectively divert rainwater away from your door or window, keeping the area dry.
- حماية من الأشعة فوق البنفسجية: The canopy material filters harmful UV rays, protecting your door, window frames, and interior furnishings from sun damage and fading.
- مقاومة الصدمات: Constructed with durable materials, the canopy offers resistance against impacts from small debris.
- Rain Drop Sound Reduction: The design and material help to reduce the noise of raindrops, contributing to a quieter environment.
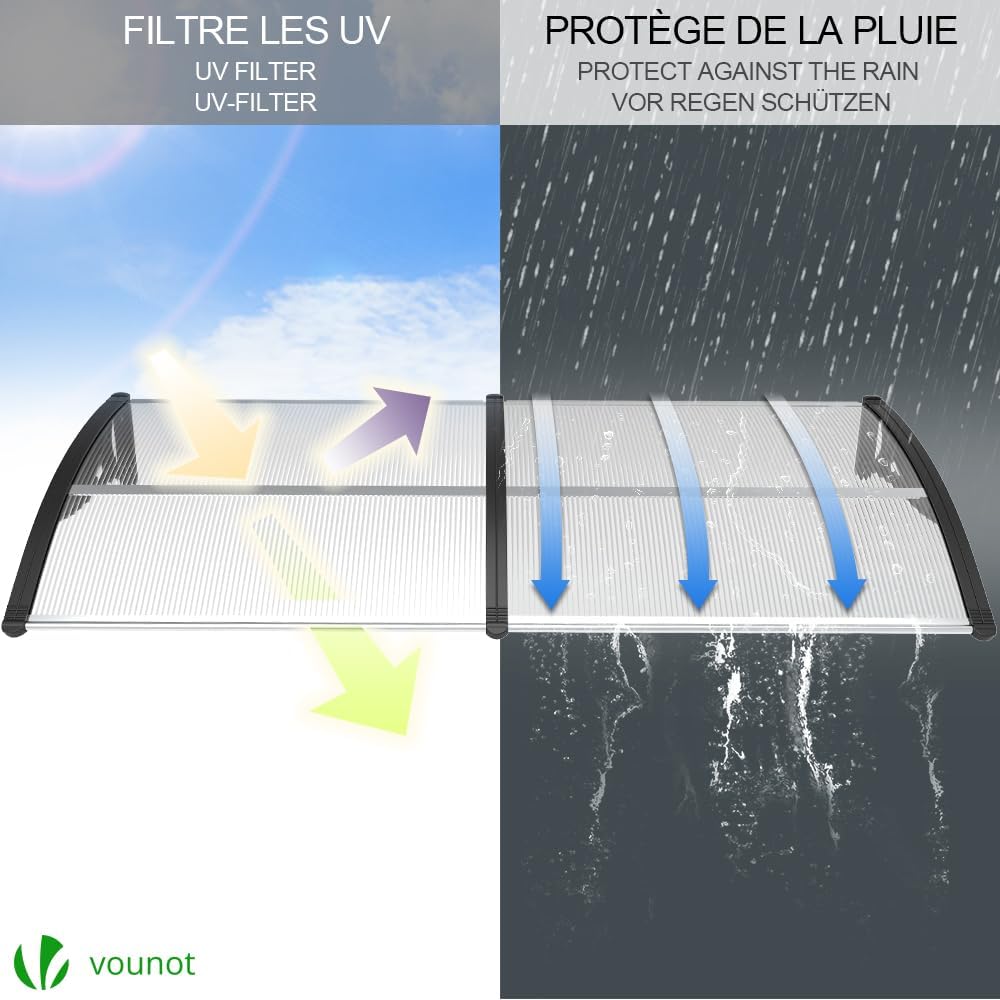
Image 5.1: Canopy features: UV filter and rain protection.

Image 5.2: Canopy features: Shock resistance and rain sound reduction.
6. الصيانة
ستساعد الصيانة المنتظمة على إطالة عمر ومظهر المظلة الخاصة بك.
- تنظيف: Clean the polycarbonate sheets and aluminum frames periodically with a soft cloth, mild soap, and water. Avoid abrasive cleaners or harsh chemicals that could damage the material. Rinse thoroughly with clean water.
- تقتيش: Annually, or after severe weather, inspect all mounting points, screws, and brackets for any signs of loosening, corrosion, or damage. Tighten any loose fasteners.
- إزالة الأنقاض: Remove any accumulated leaves, snow, or other debris from the canopy surface to prevent excessive weight or blockage of water runoff.
7. استكشاف الأخطاء وإصلاحها
If you encounter any issues with your awning, refer to the following common troubleshooting tips:
- تسرب المياه: Check if all screws and bolts are tightly secured. Ensure the canopy panels are correctly seated in the brackets and that any sealing strips (if included) are properly installed.
- Awning Feels Loose: Re-tighten all mounting bolts and screws. Ensure the wall structure is sound and capable of supporting the awning.
- Damage to Panels: If polycarbonate panels are cracked or severely damaged, they may need to be replaced. Contact customer support for replacement parts.
- Excessive Noise During Rain: While the canopy is designed to reduce rain sound, some noise is normal. Ensure all components are tightly fitted to minimize rattling.
8. المواصفات
| ميزة | التفاصيل |
|---|---|
| ماركة | فونو |
| رقم الموديل | 8695718248797 |
| مادة | البولي كربونات، الألومنيوم |
| لون | أسود |
| الحجم (الطول × العرض) | 200 x 80 cm (78.74"W x 31.5"D) |
| وزن العنصر | 4.7 كيلوغرام |
| التجميع المطلوب | نعم |
| وضع التشغيل | Manual (Passive) |
9. الضمان والدعم
For warranty information or technical support, please refer to the purchase documentation or contact VOUNOT customer service directly. Keep your proof of purchase for any warranty claims.