1. المقدمة
This manual provides comprehensive instructions for the installation, operation, maintenance, and troubleshooting of your Renogy 200 Watt 12 Volt Monocrystalline Solar Panel Starter Kit and 1000W Pure Sine Wave Inverter. This system is designed for off-grid applications such as RVs, trailers, boats, sheds, and cabins, offering reliable and independent power generation. Please read this manual thoroughly before installation and use to ensure safe and efficient operation.
2. معلومات السلامة
Always prioritize safety during installation and operation. Failure to follow these instructions may result in serious injury or damage to equipment.
- المخاطر الكهربائية: Solar panels generate electricity when exposed to light. Treat all electrical components with caution.
- Inverter Safety: ينتج العاكس حجمًا عاليًاtage AC power. Do not open the inverter casing or attempt repairs. Ensure proper grounding.
- سلامة البطارية: Work with batteries in a well-ventilated area. Wear protective eyewear and gloves. Avoid short-circuiting battery terminals.
- تثبيت: Ensure all connections are tight and correct. Use appropriate tools and personal protective equipment.
- حماية من التحميل الزائد: Do not exceed the rated power of the inverter or charge controller.
- التعرض للماء: Protect electrical components from water and moisture unless specifically rated for outdoor use.
3. محتويات العبوة
Verify that all components listed below are included in your package. If any items are missing or damaged, contact Renogy customer support.

وصف الصورة: This image displays the complete Renogy 200W Solar Panel Starter Kit. It includes two rectangular black solar panels, a black Renogy Wanderer solar charge controller, various cables (including a 20ft 10AWG Solar Panel Connectors Adaptor Kit and an 8ft 10AWG Tray Cable), branch connectors, and Z-brackets for mounting. These are the primary components for setting up your solar power system.
3.1. 200W Solar Panel Starter Kit Components
- Two (2) Renogy 100W 12V Monocrystalline Solar Panels
- One (1) 30A PWM Wanderer Charge Controller
- One (1) 20ft 10AWG Solar Panel Connectors Adaptor Kit
- One (1) 8ft 10AWG Tray Cable
- One (1) Pair of Branch Connectors
- Two (2) Sets of Z-brackets

وصف الصورة: This image shows the Renogy 1000W Pure Sine Wave Inverter, a rectangular black unit with blue accents. Also included are a wired remote control with an on/off switch and indicator lights, and a set of red and black 6AWG battery cables with ring terminals. These components are essential for converting DC power from your battery bank to AC power for household appliances.
3.2. 1000W Pure Sine Wave Inverter Components
- One (1) Renogy 1000W 12V Pure Sine Wave Inverter
- One (1) Built-in 5V/2.1A USB Port (on inverter)
- Two (2) AC Outlets (on inverter)
- One (1) AC Terminal Block (on inverter)
- Two (2) 3Ft 6AWG Cables
- One (1) 19.8ft Wired Remote
4. انتهى المنتجview
4.1. Renogy 100W Monocrystalline Solar Panels
These 100W 12V monocrystalline solar panels are designed for high efficiency and durability. They feature advanced encapsulation material and multi-layered sheet laminations to protect cells from physical damage and distortion, ensuring a long service life. Bypass diodes are integrated to ensure excellent performance in low-light environments, and the TPT back sheet dissipates excess heat for smooth output.
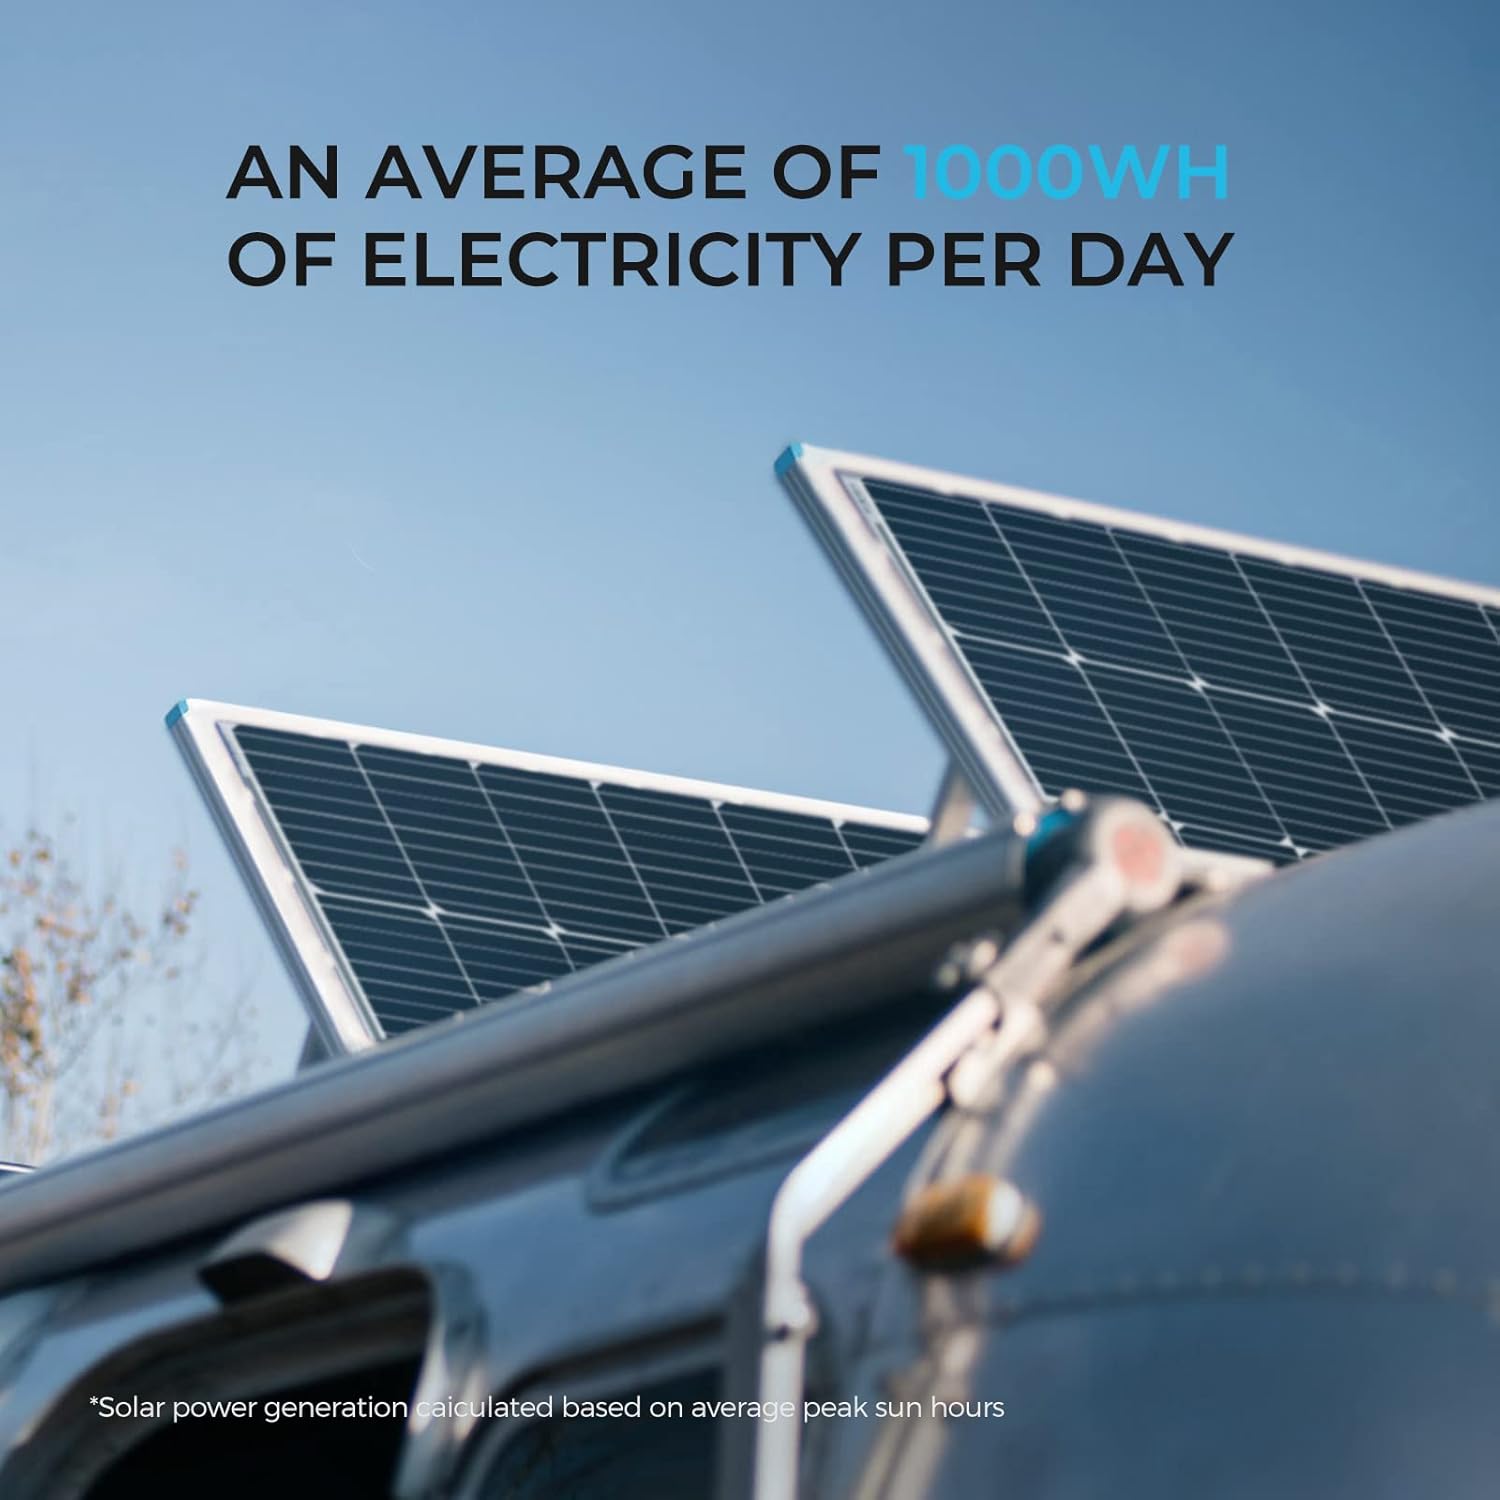
وصف الصورة: This image shows two solar panels mounted on what appears to be an RV or trailer, under a clear sky. Text overlay indicates "AN AVERAGE OF 1000WH OF ELECTRICITY PER DAY," highlighting the energy generation capability of the solar panels under optimal conditions.

وصف الصورة: This diagram illustrates the construction of a Renogy solar panel, emphasizing its reliability and durability. Key layers shown include an anti-corrosion frame, durable low-iron tempered glass, EVA film, high-efficiency solar cells, and a TPT backsheet. This layered design protects the cells and ensures long-term performance in outdoor environments.
4.2. Renogy 30A PWM Wanderer Charge Controller
The Wanderer PWM Charge Controller is compatible with four different types of batteries: Sealed, Gel, Flooded, and Lithium. It features advanced 4-stage charging (bulk, boost, float, and equalization) to efficiently and safely charge your battery to 100%. It also includes built-in protections against reverse polarity, battery overcharging, overload, and short circuits to safeguard your system.
4.3. Renogy 1000W Pure Sine Wave Inverter
This 1000W 12V Pure Sine Wave Inverter converts 12V DC power to 120V AC power, providing 1000W continuous output and 2000W peak surge power. Its pure sine wave technology ensures clean, stable power, protecting sensitive electronics and appliances. The inverter operates with high efficiency (>90%) and includes LED indicators for various protections such as under-voltagه ، أكثر من المجلدtage, over-temperature, overload, and short circuit. It also features cooling fans and Ground-Fault Circuit Interrupter (GFCI) protection for enhanced safety.

وصف الصورة: This image presents a circuit board diagram highlighting the "Advanced Pure Sine Wave Technology" of the inverter. It points out key benefits such as "Smooth, Continuous Power," "Quiet Operation," and handling "High Inductive Loads," indicating the inverter's capability to provide high-quality AC power.

وصف الصورة: This image features a prominent shield icon, symbolizing protection, surrounded by smaller icons representing various safety features of the inverter. These include over-temperature protection, GFCI protection, over-load protection, cooling fans, short circuit indication, under-voltagحماية البريد ، والإفراط في المجلدtage protection, emphasizing the product's robust safety mechanisms.
5. الإعداد
5.1. Solar Panel Kit Installation
- Mounting Solar Panels: Securely mount the solar panels using the provided Z-brackets in a location that receives maximum direct sunlight throughout the day. Ensure proper ventilation around the panels.
- Wiring Solar Panels: Connect the two 100W solar panels in parallel using the branch connectors. Connect the positive (+) output of the branch connector to the positive (+) input of the 20ft 10AWG Solar Panel Connectors Adaptor Kit, and the negative (-) output to the negative (-) input.
- Connecting to Charge Controller: Connect the other end of the 20ft 10AWG Solar Panel Connectors Adaptor Kit to the PV input terminals on the 30A PWM Wanderer Charge Controller. Ensure correct polarity (PV+ to controller PV+, PV- to controller PV-).
- Connecting Charge Controller to Battery: Connect the 8ft 10AWG Tray Cable from the battery terminals on the charge controller to your 12V deep cycle battery. Connect the positive (+) terminal of the controller to the positive (+) terminal of the battery, and the negative (-) terminal of the controller to the negative (-) terminal of the battery. Always connect the battery to the charge controller first before connecting the solar panels.
- Connecting Load (Optional): If you have a DC load, connect it to the load terminals on the charge controller, observing polarity.
5.2. 1000W Pure Sine Wave Inverter Installation
- Mounting Inverter: Choose a dry, well-ventilated location for the inverter, away from direct sunlight and heat sources. Securely mount the inverter.
- Connecting to Battery: Using the provided 3Ft 6AWG Cables, connect the inverter's DC input terminals to your 12V deep cycle battery. Connect the positive (+) cable from the inverter to the positive (+) terminal of the battery, and the negative (-) cable from the inverter to the negative (-) terminal of the battery. Ensure connections are tight.
- التأريض: Connect the inverter's chassis ground terminal to a reliable earth ground.
- توصيل جهاز التحكم عن بعد: Plug the 19.8ft Wired Remote into the designated remote port on the inverter.
- توصيل الأحمال الكهربائية المترددة: Plug your AC appliances into the 2 AC Outlets on the inverter. For hardwired applications, use the AC Terminal Block. Ensure the total wattage of your appliances does not exceed the inverter's continuous power rating (1000W).
6. تعليمات التشغيل
6.1. Solar Panel System Operation
- Charge Controller Display: The Wanderer charge controller features LED indicators to show the status of the PV input, battery charge, and load output. Refer to the controller's specific manual for detailed indicator meanings.
- اختيار نوع البطارية: Ensure the correct battery type (Sealed, Gel, Flooded, or Lithium) is selected on the charge controller to optimize charging.
- الشحن Stagالعربية: The controller automatically manages 4-stage charging (bulk, boost, float, equalization) to maintain battery health and maximize lifespan.
6.2. 1000W Pure Sine Wave Inverter Operation
- تشغيل: After connecting the inverter to the battery and any AC loads, press the power button on the inverter or the wired remote control to turn it on. The indicator light will illuminate.
- استخدام منافذ التيار المتردد: Once the inverter is on, the AC outlets will provide 120V AC power. Plug your appliances into these outlets.
- باستخدام منفذ USB: The built-in 5V/2.1A USB port can be used to charge compatible USB devices.
- يراقب: Pay attention to the LED indicators on the inverter for any fault conditions (e.g., under-voltage, overload).
- إيقاف التشغيل: To turn off the inverter, press the power button again. Disconnect AC loads before prolonged shutdown.
7. الصيانة
Regular maintenance ensures the longevity and optimal performance of your solar power system.
- تنظيف الألواح الشمسية: Periodically clean the surface of the solar panels with a soft cloth and water to remove dirt, dust, and debris that can reduce efficiency. Avoid abrasive materials.
- فحوصات الاتصال: Annually inspect all electrical connections (solar panels to controller, controller to battery, inverter to battery) for tightness and corrosion. Tighten any loose connections.
- فحص البطارية: Check battery terminals for corrosion and clean if necessary. Ensure battery ventilation is not obstructed. For flooded batteries, check electrolyte levels and top up with distilled water as needed.
- Inverter Ventilation: Ensure the inverter's cooling fans and vents are free from dust and obstructions to prevent overheating.
- سلامة الكابل: Inspect all cables for signs of wear, fraying, or damage. Replace damaged cables immediately.
8. استكشاف الأخطاء وإصلاحها
This section addresses common issues you might encounter with your Renogy solar power system.
| مشكلة | السبب المحتمل | حل |
|---|---|---|
| الألواح الشمسية لا تشحن البطارية | No sunlight; loose connections; incorrect polarity; faulty charge controller. | Ensure panels are in direct sunlight. Check all wiring connections for tightness and correct polarity. Verify charge controller settings. |
| العاكس لا يعمل | انخفاض مستوى البطاريةtage; loose battery connections; faulty inverter. | التحقق من مستوى شحن البطاريةtage (should be above 11V). Ensure battery cables are securely connected. If issues persist, contact support. |
| Inverter shuts down under load | Overload; low battery voltage; overheating. | تقليل إجمالي الطاقةtage of connected appliances. Charge the battery. Ensure adequate ventilation around the inverter. |
| AC appliances not working | Inverter off; faulty appliance; inverter fault. | Ensure inverter is powered on. Test appliance with another power source. Check inverter's fault indicators. |
| Charge controller error indicator | Reverse polarity; overcharge; short circuit; overload. | Refer to the charge controller manual for specific error codes. Disconnect and re-check all connections for correct polarity. Reduce load or check battery health. |
9. المواصفات
9.1. Renogy 100W Monocrystalline Solar Panel
- الحد الأقصى للطاقة: 100 Watts per panel
- الحجم الأقصىtage: 12 فولت
- مادة: أحادي السليكون
- كفاءة: تصل إلى 22%
9.2. Renogy 30A PWM Wanderer Charge Controller
- تيار محول التيار المتردد: 30 Amps
- Ampسعة العصر: 30 Amps
- توافق البطارية: Sealed, Gel, Flooded, Lithium
- الشحن Stagالعربية: 4 ثانيةtage (Bulk, Boost, Float, Equalization)
9.3. Renogy 1000W Pure Sine Wave Inverter
- قوة مستمرة: 1000 واط
- ذروة الطاقة المندفعة: 2000 واط
- حجم الإدخالtage: 12 فولت تيار مستمر
- حجم الإخراجtage: 120 فولت تيار متردد
- الموجي: موجة جيبية نقية
- كفاءة التحويل: >90%
- مخرج يو اس بي: 5 فولت/2.1 أمبير
- نوع الموصل: USB, AC Outlets, AC Terminal Block
10. معلومات الضمان
Renogy products typically come with a limited warranty. For specific warranty terms and conditions applicable to your 200W Solar Panel Starter Kit and 1000W Pure Sine Wave Inverter, please refer to the warranty card included with your product or visit the official Renogy webالموقع. احتفظ بإثبات الشراء الخاص بك لتقديم مطالبات الضمان.
11. الدعم
If you require technical assistance or have questions regarding your Renogy product, please contact Renogy customer support. You can find contact information, FAQs, and additional resources on the official Renogy webموقع.
- الموارد المتاحة على الإنترنت: Visit the Renogy website for product manuals, FAQs, and support articles.
- خدمة العملاء: Contact Renogy customer service via phone or email for personalized assistance.