1. المقدمة
Thank you for choosing the COUGAR MX360 RGB Mid Tower Case. This manual provides essential information for the proper installation, operation, and maintenance of your new PC case. The MX360 RGB combines a sleek design with ARGB LED strips on the front panel, offering excellent cooling performance and support for a wide range of components, including up to a 360mm radiator, 315mm graphics cards, and 170mm CPU coolers. Its compact layout and full-length PSU shroud contribute to a clean and organized build.
2. معلومات السلامة
- افصل دائمًا مصدر الطاقة من مأخذ الحائط قبل تثبيت أو إزالة أي مكونات.
- Handle components with care to avoid damage from static electricity. Consider using an anti-static wrist strap.
- احتفظ بالأجزاء الصغيرة والبراغي بعيدًا عن متناول الأطفال.
- تأكد من وجود تهوية مناسبة حول الجهاز لمنع ارتفاع درجة الحرارة.
- لا تحاول تعديل الهيكل أو مكوناته، لأن ذلك قد يبطل الضمان الخاص بك ويشكل مخاطر على السلامة.
3. محتويات العبوة
يرجى التأكد من تضمين جميع العناصر التالية في الحزمة الخاصة بك:
- حقيبة COUGAR MX360 RGB Mid Tower
- صندوق الملحقات (يحتوي على براغي، وفواصل، وربطات كابلات، وما إلى ذلك)
- دليل المستخدم (هذا المستند)
4. انتهى المنتجview
The COUGAR MX360 RGB case features a minimalist design with integrated ARGB lighting and a tempered glass side panel for showcasing your build.

الشكل 4.1: الجانب الأمامي view of the COUGAR MX360 RGB case, showing the interior and active RGB lighting.
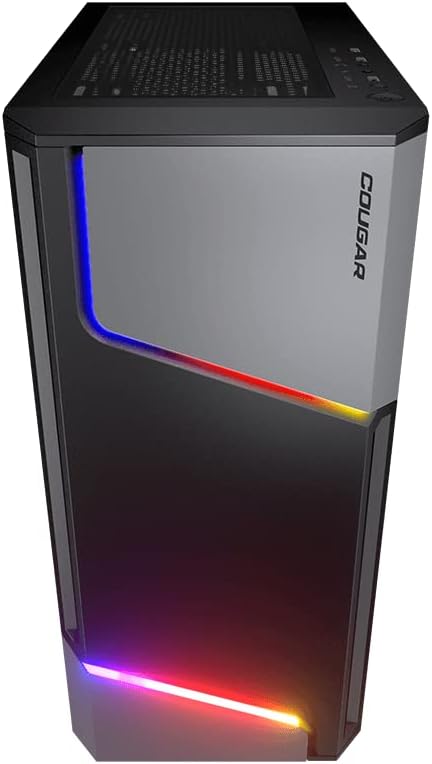
الشكل 4.2: الجبهة view of the COUGAR MX360 RGB case, highlighting the integrated ARGB LED strips.
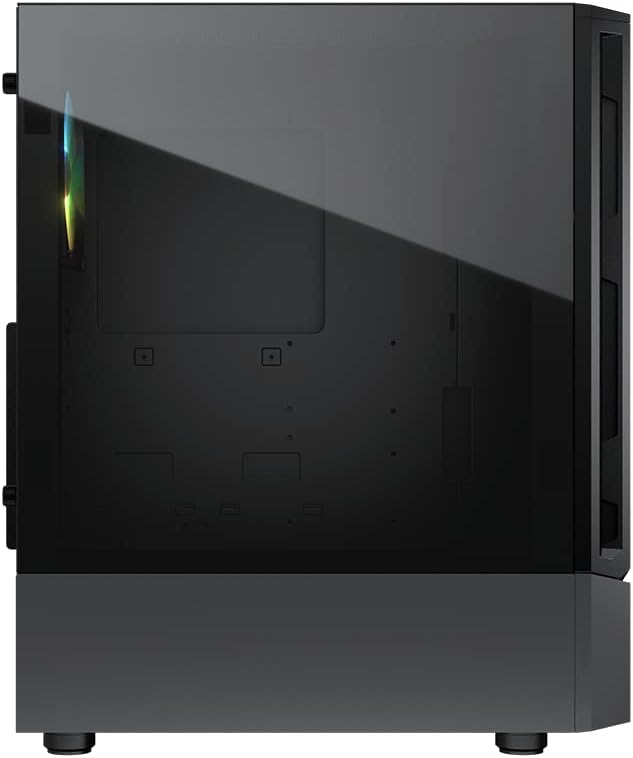
الشكل 4.3: الجانب view of the COUGAR MX360 RGB case, featuring the tempered glass panel.

الشكل 4.4: الجبهة بزاوية view of the COUGAR MX360 RGB case, showcasing its design and ARGB elements.
5. الإعداد والتثبيت
Follow these steps to install your components into the COUGAR MX360 RGB case.
5.1 إعداد القضية
- ضع العلبة على سطح مستوٍ وثابت.
- Remove the tempered glass side panel by unscrewing the thumb screws at the rear of the case and carefully sliding the panel off.
- Remove the opposite metal side panel by unscrewing the thumb screws and sliding it off.
5.2 تركيب اللوحة الأم
- قم بتركيب غطاء منافذ الإدخال/الإخراج (إذا لم يكن مثبتًا مسبقًا على اللوحة الأم) في الفتحة الخلفية للهيكل.
- Ensure the correct standoffs are installed for your motherboard form factor (ATX, Micro-ATX, Mini-ITX). Adjust or add standoffs as needed.
- قم بوضع اللوحة الأم بعناية على الحوامل، مع محاذاة فتحات البراغي.
- قم بتأمين اللوحة الأم باستخدام البراغي المتوفرة.
5.3 تركيب وحدة إمداد الطاقة (PSU)
- Locate the PSU shroud at the bottom of the case.
- أدخل وحدة تزويد الطاقة (PSU) في الحجرة المخصصة لها من الجزء الخلفي من الهيكل.
- قم بتأمين وحدة إمداد الطاقة باستخدام البراغي من الجزء الخلفي للعلبة.
- Route necessary cables through the cutouts in the PSU shroud for cable management.
5.4 تركيب محرك التخزين
The MX360 RGB supports various storage configurations.
- محركات الأقراص الصلبة مقاس 3.5 بوصة: Install into the drive cage located under the PSU shroud.
- محركات أقراص SSD/HDD مقاس 2.5 بوصة: Mount onto the dedicated trays or mounting points behind the motherboard tray.
5.5 تثبيت بطاقة الرسومات (GPU)
- قم بإزالة أغطية فتحة PCIe الضرورية من الجزء الخلفي للعلبة.
- قم بإدخال بطاقة الرسوميات في فتحة PCIe المناسبة على اللوحة الأم.
- Secure the graphics card with screws. The case supports graphics cards up to 315mm in length.
5.6 تركيب نظام التبريد (المراوح/المشعات)
The case supports up to six fans and a 360mm water cooling radiator.
- أمام: Supports up to 3 x 120mm or 2 x 140mm fans, or a 240/280/360mm radiator.
- قمة: Supports up to 2 x 120mm or 2 x 140mm fans, or a 240/280mm radiator.
- مؤخرة: يدعم مروحة واحدة مقاس 120 مم.
Install fans or radiators using the provided screws, ensuring proper airflow direction.
5.7 توصيلات اللوحة الأمامية
Connect the front panel cables (USB, Audio, Power, Reset, LED) to their corresponding headers on your motherboard. Refer to your motherboard manual for exact header locations.
5.8 ARGB Lighting Connection
The integrated ARGB LED strips on the front panel connect via a 5V/3Pin ARGB connector. Connect this cable to a compatible 5V/3Pin ARGB header on your motherboard to synchronize lighting effects with your system.
6. إدارة القضية
Once all components are installed and connected, replace the side panels. Power on your system using the power button on the top I/O panel. The ARGB lighting will illuminate, controlled by your motherboard's software or a dedicated ARGB controller if you have one installed.
7. الصيانة
تساعد الصيانة الدورية على ضمان الأداء الأمثل وطول عمر مكونات جهاز الكمبيوتر الخاص بك.
- فلاتر الغبار: The MX360 RGB includes removable dust filters (e.g., top, bottom). Periodically remove and clean these filters with compressed air or water (ensure they are completely dry before reinstallation).
- التنظيف الداخلي: Use compressed air to remove dust from internal components like fans, heatsinks, and the motherboard.
- التنظيف الخارجي: امسحي الأسطح الخارجية بقطعة ناعمة ، دamp قماش. تجنب المنظفات الكاشطة.
8. استكشاف الأخطاء وإصلاحها
إذا واجهت مشكلات، راجع خطوات استكشاف الأخطاء وإصلاحها الشائعة التالية:
- لا يوجد طاقة: Ensure all power cables (24-pin ATX, 8-pin CPU, GPU power) are securely connected. Check the PSU switch is in the 'ON' position. Verify front panel power button connection to the motherboard.
- إضاءة ARGB لا تعمل: Confirm the 5V/3Pin ARGB connector is correctly plugged into a compatible motherboard header. Check your motherboard's RGB software for control settings.
- ارتفاع درجة الحرارة: Ensure all case fans are spinning and oriented correctly for optimal airflow. Check for dust buildup on filters and components. Verify CPU cooler and GPU cooler are properly installed.
- الاتصالات الفضفاضة: Re-seat all components (RAM, GPU, storage drives) and check all power and data cables.
9. المواصفات
| ميزة | مواصفة |
|---|---|
| ماركة | أسد امريكي |
| اسم الموديل | MX360 رغب |
| رقم موديل العنصر | CGR-5CC6G-RGB |
| نوع الحالة | البرج الاوسط |
| الأبعاد (الطول × العرض × الارتفاع) | 14.88 × 8.27 × 18.11 بوصة (378 × 210 × 460 مم) |
| وزن العنصر | 10.56 جنيه (4.8 كيلوجرام) |
| مادة | Tempered Glass, Fine Metal |
| لون | أسود |
| دعم اللوحة الأم | ميني ITX / Micro ATX / ATX |
| الأعلى. طول بطاقة الرسومات | 315 ملم |
| الأعلى. ارتفاع مبرد وحدة المعالجة المركزية | 170 ملم |
| دعم PSU | معيار ATX PS2 |
| طريقة التبريد | ماء هواء |
| دعم المبرد | الواجهة الأمامية: 360 مم / 280 مم / 240 مم / 140 مم / 120 مم Top: 280mm / 240mm / 140mm / 120mm الخلفية: 120 ملم |
| دعم المشجعين | الجبهة: 3 × 120 ملم / 2 × 140 ملم الجزء العلوي: 2 × 120 ملم / 2 × 140 ملم الخلفية: 1 × 120 ملم |
| حجرات القيادة | 3.5" HDD: 2 2.5" SSD: 2+2 (converted from 3.5" drive bays) |
| لوحة الإدخال/الإخراج | منفذان USB 3.0، منفذ USB 2.0، منفذ ميكروفون، منفذ صوت، زر RGB |
| ميزة خاصة | ARGB LED Strips, Full-length PSU Cover for Cable Hiding and Improved Airflow |
10. الضمان والدعم
COUGAR products are designed and manufactured to the highest quality standards. For warranty information, please refer to the warranty card included with your product or visit the official COUGAR webالموقع. احتفظ بإثبات الشراء الخاص بك لتقديم مطالبات الضمان.
For technical support or further assistance, please visit the official COUGAR website or contact their customer service department. You can find more information and resources on the COUGAR Store on Amazon.