Flashpoint R2 XPro II
Flashpoint R2 XPro II 2.4GHz TTL Wireless Flash Trigger for Canon Cameras
Model: R2 XPro II | Brand: Flashpoint
1. المقدمة وما فوقview
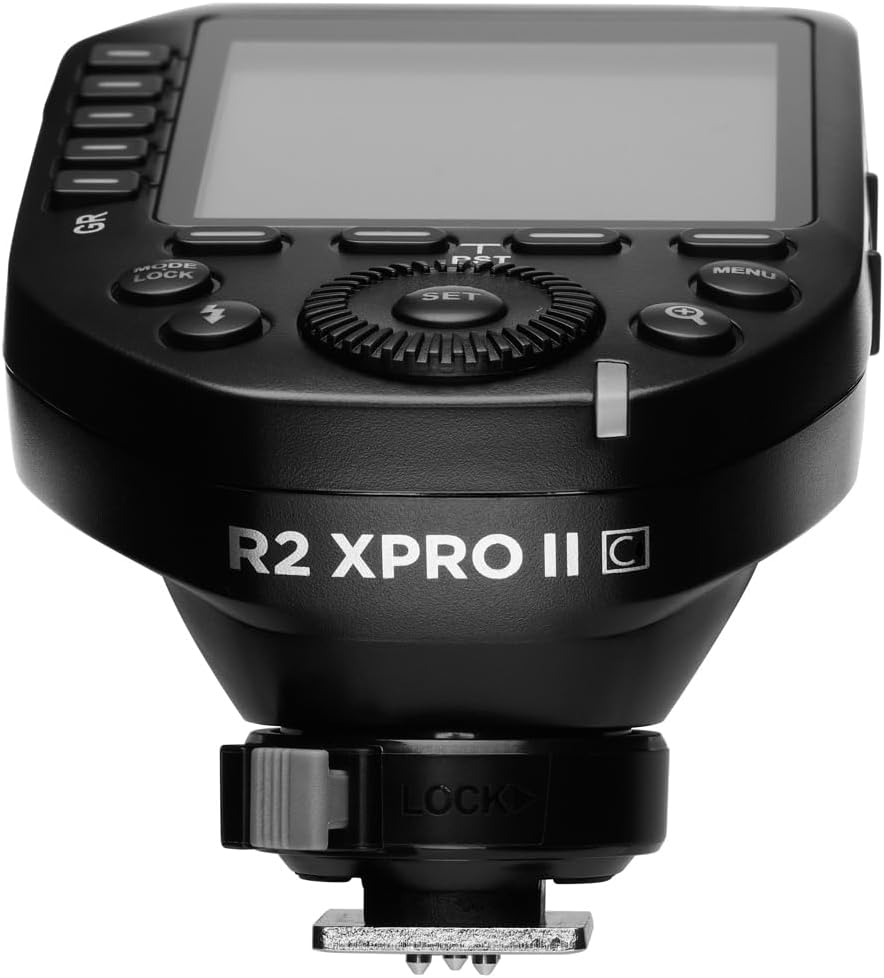
The Flashpoint R2 XPro II is a state-of-the-art 2.4GHz wireless flash trigger designed specifically for Canon cameras. It provides robust and reliable control over your Flashpoint R2 and Godox X-system flashes, enabling precise lighting adjustments for professional photography. This manual details the features, setup, operation, maintenance, and troubleshooting for your R2 XPro II trigger.

Image 1.1: The Flashpoint R2 XPro II Wireless Flash Trigger, showcasinبفضل تصميمه الصغير وشاشة LCD الواضحة.
2. ماذا يوجد في الصندوق
عند فتح العبوة، يرجى التأكد من تضمين جميع العناصر التالية:
- Flashpoint R2 XPro II Wireless Flash Trigger for Canon
- دليل المستخدم (هذا المستند)
- USB-C Cable (for firmware updates)
Note: AA batteries are required for operation and are not included.
3. مواصفات المنتج
The Flashpoint R2 XPro II offers a comprehensive set of features designed to enhance your flash photography:
- Reliable 2.4GHz Radio System: Ensures consistent flash firing with minimal misfires, offering a robust connection up to 300-400 feet (90-120 meters).
- نطاق نقل ممتد: Control your flashes from significant distances, ideal for complex studio setups or outdoor shoots.
- Versatile Multi-Channel Control: Features 32 channels and 5 dedicated TTL groups (A-E) plus 16 manual groups (0-9, A-F), providing extensive control and customization for multiple flash units.
- Full TTL Support: Automatically adjusts flash power for perfectly exposed images, adapting to changing light conditions with Canon cameras.
- المزامنة عالية السرعة (HSS): Achieve sync speeds up to 1/8000s, allowing you to freeze fast motion or use wide apertures in bright ambient light.
- Large Dot Matrix LCD Display: Provides clear visibility of settings with adjustable backlight.
- بلوتوث مدمج: Enables smartphone app control for convenient remote adjustments.
- تحديث البرامج الثابتة: Via USB-C port for future compatibility and feature enhancements.
- Instant Flip Locking Hot Shoe: Securely attaches the trigger to your camera.

Image 3.1: Key features of the Flashpoint R2 XPro II, highlighting its capabilities.
4. الإعداد
4.1. تركيب البطارية
The R2 XPro II uses two AA batteries. To install:
- Locate the battery compartment cover on the underside of the trigger.
- حرك الغطاء لفتحه.
- قم بإدخال بطاريتين AA، مع التأكد من القطبية الصحيحة (+/-) كما هو موضح داخل الحجرة.
- أغلق غطاء حجرة البطارية جيدًا.

Image 4.1: Battery compartment of the R2 XPro II, ready for AA battery insertion.
4.2. التركيب على الكاميرا
To mount the trigger on your camera's hot shoe:
- تأكد من إيقاف تشغيل جهاز الزناد.
- Slide the hot shoe foot of the R2 XPro II into your camera's hot shoe.
- Push the locking lever forward to secure the trigger firmly in place.
الصورة 4.2: الجانب السفلي view of the R2 XPro II, highlighting the hot shoe and locking lever.
4.3. التشغيل الأولي والإعدادات الأساسية
After mounting, power on the trigger using the ON/OFF switch located on the side. The LCD display will illuminate. You may need to set the channel and group to match your flash units. Refer to Section 5 for detailed operating instructions.
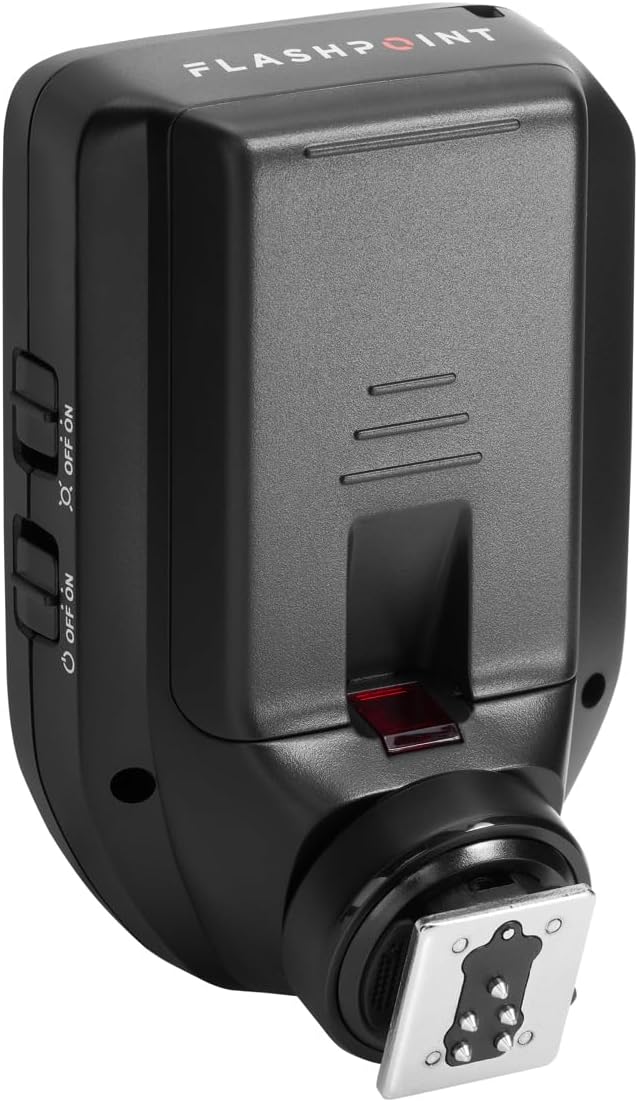
الصورة 4.3: الجانب view of the R2 XPro II, indicating the location of the power switch.
5. تعليمات التشغيل
5.1. تشغيل / إيقاف التشغيل
Use the dedicated ON/OFF switch on the side of the unit to power the trigger on or off.
5.2. Navigating the Display and Controls
The R2 XPro II features a large LCD display and intuitive buttons for easy navigation.

الصورة 5.1: من أعلى إلى أسفل view of the R2 XPro II display and control layout.
- شاشة LCD: Shows current channel, group settings, flash mode (TTL/M/Multi), power output, and battery status.
- GR Buttons (Left Side): Used to select and adjust individual groups (A-E).
- زر SET: يؤكد الاختيارات ويدخل إلى القوائم الفرعية.
- الاتصال الهاتفي: Rotates to change values (e.g., power output, channel number).
- زر الوضع/القفل: Cycles through flash modes (TTL, Manual, Multi) and locks/unlocks settings.
- زر الفلاش: Test fire button.
- زر القائمة: الوصول إلى إعدادات النظام.
- Magnifying Glass Button: Zoom function for detailed group view.
5.3. Setting Channels and Groups
To ensure proper communication, the trigger and your flash units must be set to the same channel and group.
- اضغط على قائمة طعام button to access system settings.
- Navigate to the Channel (CH) setting using the dial and press تعيين.
- Rotate the dial to select the desired channel (1-32) and press تعيين للتأكيد.
- To adjust groups, press the corresponding GR button (A-E) on the left side.
- Use the dial to change the flash mode (TTL/M/Multi) or power output for the selected group.
5.4. TTL Mode Operation
In TTL (Through-The-Lens) mode, the trigger automatically adjusts flash power based on the camera's metering. This is ideal for fast-paced shooting where lighting conditions change frequently.
- Ensure your flash unit is also set to TTL mode.
- On the R2 XPro II, press the الوضع/القفل button until "TTL" is displayed for the desired group(s).
- The trigger will communicate with your camera to determine the appropriate flash output.
5.5. عملية الوضع اليدوي
Manual mode provides precise control over flash power, allowing you to set the output from 1/1 to 1/256 in 1/3 stop increments.
- اضغط على الوضع/القفل button until "M" (Manual) is displayed for the desired group(s).
- Use the dial to adjust the power output for each group.
- The display will show the current power setting (e.g., M 1/128).
5.6. المزامنة عالية السرعة (HSS)
HSS allows you to use flash at shutter speeds faster than your camera's native sync speed (e.g., 1/250s), up to 1/8000s. This is useful for overpowering ambient light or using wide apertures in bright conditions.
HSS is typically enabled automatically when your camera's shutter speed exceeds the normal sync speed while the trigger is in TTL or Manual mode. Ensure your flash unit also supports HSS.
5.7. Using the Test Fire Button
اضغط على الزر المخصص فلاش button (lightning bolt icon) to test fire all active flash units. This is useful for checking flash readiness and light output before taking a picture.
5.8. Bluetooth and Smartphone App Control
The R2 XPro II features built-in Bluetooth for remote control via a smartphone application. Download the Flashpoint R2 app (or compatible Godox app) from your device's app store. Follow the app's instructions to pair your trigger and control flash settings remotely.
6. الصيانة
6.1. التنظيف
To clean the trigger, use a soft, dry cloth. For stubborn dirt, a slightly damp يمكن استخدام قطعة قماش، ولكن تأكد من عدم دخول الرطوبة إلى الجهاز. لا تستخدم مواد كيميائية قاسية أو منظفات كاشطة.
6.2. العناية بالبطارية
- قم بإزالة البطاريات إذا لم يتم استخدام الزناد لفترة طويلة لمنع التسرب.
- Use high-quality AA alkaline or NiMH rechargeable batteries.
- تخلص من البطاريات المستعملة بطريقة مسؤولة وفقًا للوائح المحلية.
6.3. التخزين
Store the R2 XPro II in a cool, dry place, away from direct sunlight, extreme temperatures, and high humidity. Keep it in its original packaging or a protective case to prevent damage.
6.4. تحديثات البرامج الثابتة
Flashpoint periodically releases firmware updates to improve performance, add features, or ensure compatibility with new camera models. To update the firmware:
- Visit the official Flashpoint webالموقع للحصول على أحدث البرامج الثابتة وتعليمات التحديث.
- Connect the R2 XPro II to your computer using the supplied USB-C cable.
- Follow the instructions provided on the Flashpoint website to complete the update process.

الصورة 6.1: الجانب view of the R2 XPro II, highlighting the USB-C port for firmware updates.
7. استكشاف الأخطاء وإصلاحها
If you encounter issues with your Flashpoint R2 XPro II, refer to the following common problems and solutions:
| مشكلة | السبب المحتمل | حل |
|---|---|---|
| لا يعمل جهاز التشغيل. | البطاريات الميتة أو المثبتة بشكل غير صحيح. | تحقق من قطبية البطارية، واستبدلها ببطاريات AA جديدة. |
| Flashes not firing. | Incorrect channel/group settings; trigger not securely mounted; flash unit issues. | Ensure trigger and flashes are on the same channel and group. Check trigger is fully seated on camera hot shoe. Verify flash units are powered on and ready. |
| Inconsistent firing or limited range. | Interference; low battery; obstructions. | Change channel. Replace batteries. Reduce distance or clear line of sight between trigger and flashes. |
| TTL exposure issues. | Flash exposure compensation set incorrectly; firmware outdated. | Check flash exposure compensation settings on both camera and trigger. Update firmware. |
| Display not working or frozen. | خلل برمجي؛ انخفاض مستوى البطارية. | Remove and reinsert batteries. Replace batteries. If issue persists, contact support. |
8. المواصفات
| يصف | قيمة |
|---|---|
| أبعاد المنتج | 5.25 × 4 × 2.8 بوصة |
| وزن العنصر | 9.3 أونصات |
| ASIN | B0BZ7PQ2PB |
| رقم موديل العنصر | R2 XPro II |
| تاريخ أول توفر | 21 مارس 2023 |
| الشركة المصنعة | نقطة الوميض |
| التردد اللاسلكي | 2.4 جيجاهرتز |
| القنوات | 32 |
| المجموعات | 5 TTL Groups (A-E), 16 Manual Groups (0-9, A-F) |
| سرعة المزامنة | سرعة تصل إلى 1/8000 ثانية (مزامنة عالية السرعة) |
| مصدر الطاقة | 2 بطاريات AA (غير متضمنة) |
9. الضمان والدعم
For information regarding warranty coverage and technical support for your Flashpoint R2 XPro II, please refer to the official Flashpoint webالموقع أو تواصل مع خدمة العملاء مباشرةً. احتفظ بإيصال الشراء كإثبات للشراء في حال وجود أي مطالبات بالضمان.
Flashpoint Official Webموقع: www.adorama.com/g/flashpoint
Ask a question about this manual
Ask about setup, troubleshooting, compatibility, parts, safety, or missing instructions. Manuals+ will review the question and use this page’s manual context to help answer it.