مقدمة
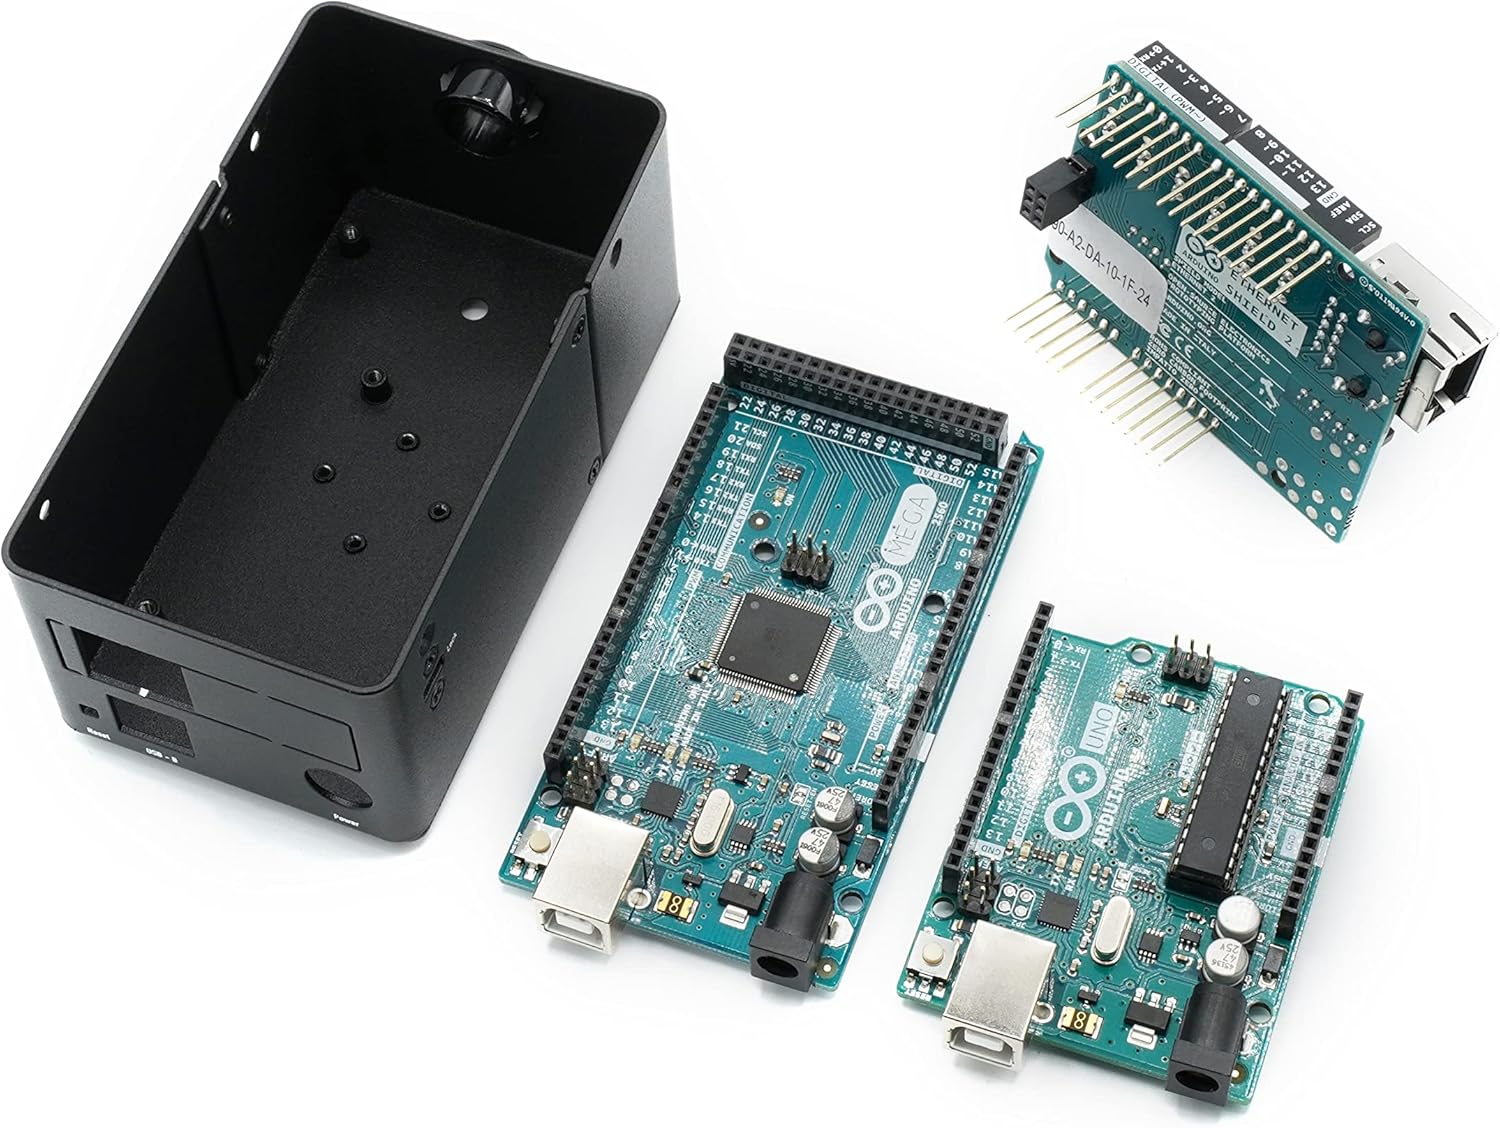
This manual provides detailed instructions for the assembly, installation, and proper use of the KKSB Case, designed for Arduino UNO Rev3 and Arduino Mega Rev3 boards. This robust steel enclosure offers protection and versatile mounting options for your Arduino projects, including space for an Arduino Shield.
محتويات الحزمة
Please verify that all components are present before proceeding with assembly.
- KKSB Case (Steel, black powder-coated)
- Mounting screws for Arduino board
- Rubber feet (adhesive)
- جروميت الكابل

الإعداد والتثبيت
Follow these steps to install your Arduino UNO Rev3 or Arduino Mega Rev3 board into the KKSB Case.
1. إعداد القضية
- Carefully remove the lid of the KKSB case by unscrewing the four corner screws. Note that some cases may have additional screws that do not need to be removed for lid access.
- If using, attach the adhesive rubber feet to the bottom of the case for stability.

2. Install the Arduino Board
- Align your Arduino UNO Rev3 or Arduino Mega Rev3 board with the mounting holes inside the case. Ensure that the USB and power ports align with the corresponding cutouts on the case.
- Secure the Arduino board to the case using the provided mounting screws. Do not overtighten.
- If you are using an Arduino Shield, install it onto your Arduino board before closing the case. The case provides sufficient vertical space for most standard shields.


3 أغلق ملف القضية
- Replace the lid and secure it with the four corner screws.
- If routing cables, use the provided cable grommet in the designated opening to protect wires from sharp edges.
اعتبارات التشغيل
The KKSB Case is designed to protect your Arduino board while providing access to essential ports and features.
- الوصول إلى المنفذ: All standard Arduino UNO/Mega ports, including USB-B, power jack, and reset button, are accessible through labeled cutouts.
- Shield Compatibility: The case accommodates an Arduino Shield, allowing for expanded functionality without requiring external modifications.
- إدارة الكابلات: Openings are provided for routing cables, and a grommet is included for protection.
- تهوية: The case features ventilation slots to aid in passive cooling of the internal components.

خيارات التركيب
The KKSB Case offers several mounting solutions for integration into various environments.
- تركيب السكك الحديدية DIN: The case supports DIN rail mounting for industrial or organized setups.
- Pre-cut Mounting Holes: Additional pre-cut mounting holes are available for custom installations.
- Kensington Lock Compatibility: A slot is included for a standard Kensington lock, providing a theft deterrent for public or shared environments.


صيانة
The KKSB Case requires minimal maintenance.
- تنظيف: امسح السطح الخارجي بقطعة قماش ناعمة وجافة. تجنب استخدام المنظفات الكاشطة أو المذيبات.
- تقتيش: Periodically check screws for tightness, especially if the case is subjected to vibrations or frequent movement.
- بيئة: Ensure the case is used in a dry environment, away from excessive dust or moisture, to protect the internal electronics.
استكشاف الأخطاء وإصلاحها
إذا واجهت مشاكل أثناء التثبيت أو الاستخدام، فضع في اعتبارك ما يلي:
- Board Not Fitting: Ensure you are using a compatible Arduino UNO Rev3 or Arduino Mega Rev3 board. Verify that no components on the board are obstructing the mounting posts or case edges.
- Port Misalignment: Double-check the orientation of the Arduino board before securing it. The ports should align perfectly with the case cutouts.
- غطاء لا يغلق: Ensure all internal components, especially shields, are seated correctly and not exceeding the case's internal height. Verify that no wires are pinched.
تحديد
| ماركة | قضايا KKSB |
| رقم الموديل | 7350001161273 |
| التوافق | Arduino UNO Rev3, Arduino Mega Rev3 (and compatible clones) |
| مادة | Steel, black powder-coated |
| الأبعاد (الطول × العرض × الارتفاع) | 2.99 × 4 × 4.5 بوصة (7.59 × 10.16 × 11.43 سم) |
| وزن العنصر | 9.1 أوقية (0.26 كجم) |
| سمات | Space for Arduino Shield, labeled cutouts, cable routing openings, Kensington lock slot, DIN Rail mounting support, pre-cut mounting holes. |
الضمان والدعم
For warranty information or technical support, please refer to the official KKSB Cases webالموقع أو تواصل مع بائع التجزئة. احتفظ بإيصال الشراء لأي مطالبات بالضمان.
Official KKSB Cases Webموقع: kksb-cases.com