OOYCYOO P 60A
OOYCYOO MPPT 60A Solar Charge Controller User Manual
Model: P 60A
1. المقدمة
This manual provides detailed instructions for the installation, operation, and maintenance of your OOYCYOO MPPT 60A Solar Charge Controller. This device is designed to efficiently manage power flow from your solar panels to your battery bank, ensuring optimal charging and system protection. It supports automatic 12V/24V system voltage identification and is compatible with various battery types.
Key features include a backlit LCD display, a 4-stage battery charging algorithm, and comprehensive protection functions.
2. تعليمات السلامة
- قم دائمًا بتوصيل البطارية أولاً، ثم اللوحة الشمسية، وأخيرًا الحمل. افصلها بترتيب عكسي.
- Ensure all wiring is correctly polarized to prevent damage.
- Do not connect inverters or inductive loads directly to the controller's load terminals.
- قم بتركيب وحدة التحكم في منطقة جيدة التهوية، بعيدًا عن المواد القابلة للاشتعال.
- The controller generates heat during operation; ensure adequate airflow. The integrated cooling fan activates when the temperature exceeds 45°C and turns off below 40°C.
- استخدم قواطع الدائرة والصمامات المناسبة لجميع التوصيلات.
- This device is for indoor use only. Protect it from water and moisture.
3. انتهى المنتجview
The OOYCYOO MPPT 60A Solar Charge Controller is designed for efficient solar power management. It features an LCD display for real-time data, multiple protection functions, and support for various battery types.
3.1 محتويات العبوة
- 1 x OOYCYOO MPPT 60A Solar Charge Controller
- 1 س استشعار درجة الحرارة
- 1 × دليل المستخدم (الإنجليزية)
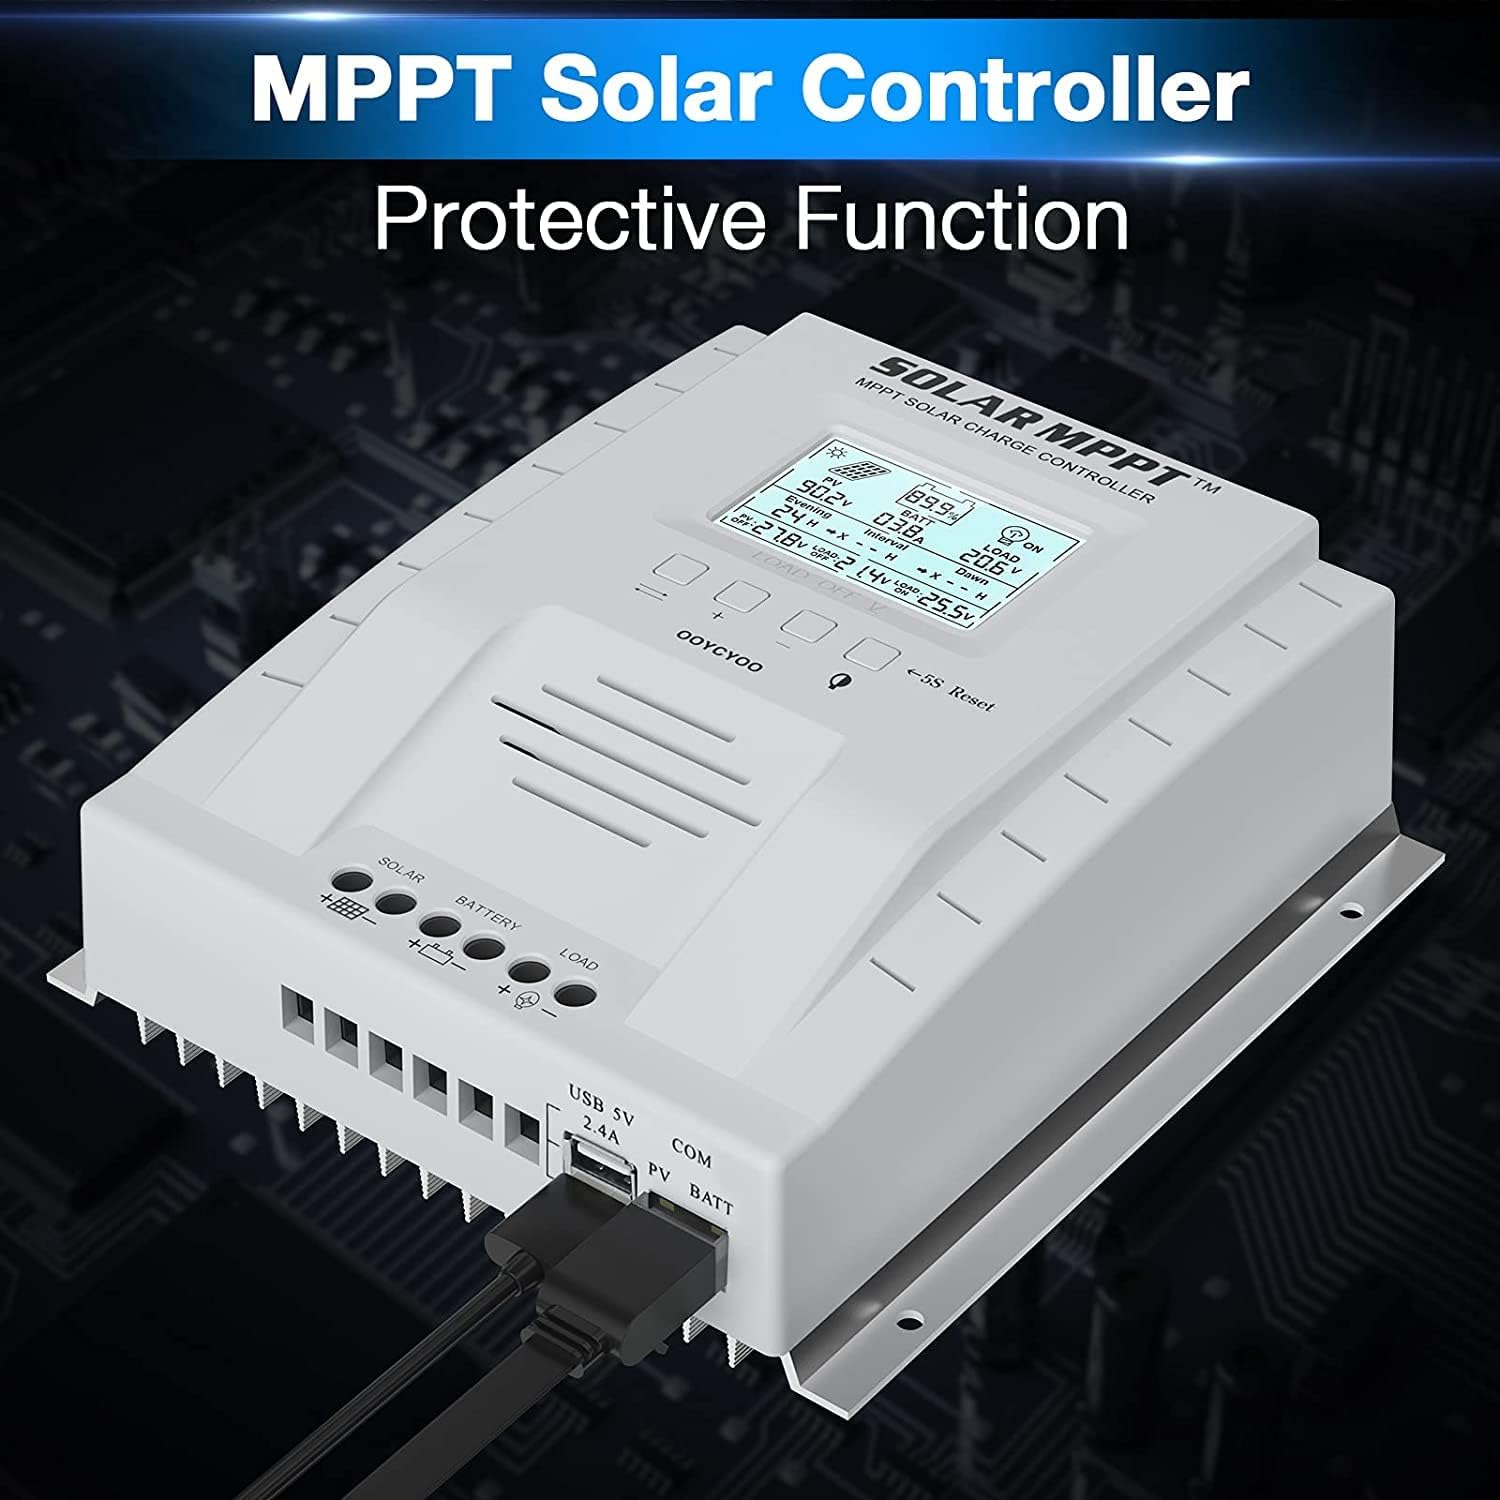
3.2 تحديد المكون

The controller features a clear LCD display on the front for monitoring system status. Below the display are control buttons for navigation and settings. Connection terminals for solar panels, battery, and load are located at the bottom. USB ports and an RS485 communication port are on the side.
4. الإعداد والتثبيت
يُعدّ التركيب الصحيح أمراً بالغ الأهمية لضمان التشغيل الآمن والفعّال لجهاز التحكم بشحن الطاقة الشمسية. اتبع هذه الخطوات بعناية.
4.1 تركيب وحدة التحكم
- Choose a dry, well-ventilated location, protected from direct sunlight, high temperatures, and water.
- تأكد من وجود مساحة كافية حول وحدة التحكم لتبديد الحرارة.
- Mount the controller vertically on a wall or stable surface using the provided mounting holes.
4.2 توصيلات الأسلاك
Follow the connection order precisely to avoid damage to the controller or other components.
- قم بتوصيل البطارية: Connect the positive and negative terminals of the battery to the corresponding battery terminals on the controller. Ensure correct polarity. The controller will automatically detect the system voltagهـ (12 فولت أو 24 فولت).
- قم بتوصيل الألواح الشمسية: Connect the positive and negative leads from your solar panel array to the corresponding PV terminals on the controller. Ensure correct polarity. Do not exceed the maximum PV input voltagه من 100V DC.
- توصيل الحمل (اختياري): Connect your DC loads to the load terminals on the controller. Note that the load output is for DC loads only. Do not connect inverters or inductive loads directly to these terminals.
- Connect the Remote Temperature Sensor: Plug the temperature sensor into its dedicated port. This sensor helps the controller optimize charging based on battery temperature.

ملاحظة هامة: Always connect the battery first and disconnect the solar panel last. Incorrect connection order can damage the controller.
5. تعليمات التشغيل
Once installed, the controller will begin operation automatically. The LCD display provides real-time system information.
5.1 شاشة LCD والأزرار

The backlit LCD displays critical system parameters such as PV voltagه ، حجم البطاريةtage, charging current, load current, and accumulated energy (KWH). The four buttons below the display are used for navigation and settings adjustment:
- تبديل المفتاح: Used to cycle through display screens or confirm selections.
- '+' (Plus) Key: يزيد القيم أو ينتقل إلى الأمام في القوائم.
- '-' (Minus) Key: يُقلل القيم أو يُرجع للخلف في القوائم.
- Manual Switch Load Key: Toggles the load output on/off manually.
- 5S Reset: اضغط مع الاستمرار لمدة 5 ثوانٍ لاستعادة إعدادات المصنع.
5.2 Battery Charging Algorithm
يستخدم جهاز التحكم 4 ثوانٍtage charging algorithm to optimize battery life and performance:
- الشحن بالجملة: يشحن البطارية بأقصى تيار حتى يصل الجهدtagيصل البريد إلى المجلد التعزيزtage.
- دفعة تهمة: الشحنات عند حجم ثابتtage for a set period to ensure full charge.
- تعويم المسؤول: يحافظ على مستوى شحن البطارية عند مستوى منخفضtage لمنع التفريغ الذاتي والشحن الزائد.
- Equalization (for specific battery types): يقوم دورياً بشحن البطارية بشكل زائد لموازنة حجم الخليةtages ومنع الكبرتة.
5.3 أنواع البطاريات المدعومة
يتوافق جهاز التحكم مع أنواع مختلفة من البطاريات، بما في ذلك:
- Lead-Acid (Sealed, Gel, Flooded)
- الليثيوم (LFP)
- User-defined parameters for other battery types.
Pre-set charging parameters are available for Sealed, Gel, Flooded, and LI (LFP) batteries. Users can customize parameters for other battery types as needed.
6. وظائف الحماية
The OOYCYOO MPPT 60A Solar Charge Controller incorporates multiple protection mechanisms to ensure system safety and longevity:
- PV Overcurrent/Overpower Protection
- حماية من قصر الدائرة في الألواح الكهروضوئية
- حماية القطبية العكسية الكهروضوئية
- Reverse Charging at Night Protection
- حماية البطارية عكس القطبية
- زيادة طاقة البطاريةtagالحماية
- Battery Over-discharge Protection
- Battery Overtemperature Protection
- Controller Overtemperature Protection
- حماية بطارية الليثيوم من درجات الحرارة المنخفضة
- حماية الدائرة القصيرة للحمل
- حماية الحمل الزائد
- TVS المجلد العاليtagه الحماية العابرة
7. الصيانة
تضمن الصيانة الدورية الأداء الأمثل وتطيل عمر جهاز التحكم في شحن الطاقة الشمسية.
- التحقق من الاتصالات: افحص جميع توصيلات الأسلاك بشكل دوري للتأكد من إحكامها وخلوها من التآكل. قم بربط أي توصيلات مفكوكة.
- تنظيف وحدة التحكم: Keep the controller clean and free of dust. Use a dry cloth to wipe the exterior. Ensure ventilation openings are not obstructed.
- فحص الضرر: Check for any signs of physical damage, overheating, or unusual odors.
- فحص البطارية: Follow the manufacturer's maintenance guidelines for your specific battery type.
8. استكشاف الأخطاء وإصلاحها
يتناول هذا القسم المشكلات الشائعة التي قد تواجهها مع جهاز التحكم في شحن الطاقة الشمسية.
| مشكلة | السبب المحتمل | حل |
|---|---|---|
| وحدة التحكم لا تعمل / شاشة LCD فارغة | لا توجد بطارية متصلة أو مستوى شحن البطاريةtagالجهد الكهربائي منخفض جدًا. توصيل عكسي القطبية. | تأكد أولاً من توصيل البطارية وأنها تتمتع بجهد كافٍtagهـ. تحقق من قطبية البطارية. |
| لا يتم الشحن من الألواح الشمسية | Solar panels not connected or reverse polarity. Insufficient sunlight. PV voltagه منخفضة جدا أو عالية جدا. | Check solar panel connections and polarity. Ensure adequate sunlight. Verify PV voltage is within operating range (e.g., 18V-96V for 12V system, 36V-96V for 24V system). |
| التحميل لا يعمل | Load output disabled. Load short circuit or overload. Battery voltagهـ منخفضة جدًا. | Check load output status on LCD. Disconnect load and check for short circuit. Ensure battery is sufficiently charged. |
| تحكم في ارتفاع درجة الحرارة | Poor ventilation. Excessive load or charging current. | Ensure adequate airflow around the controller. Reduce load or charging current if possible. |
| مجلد غير دقيقtagقراءات البريد | Loose connections. Faulty temperature sensor. | Check all wiring connections. Ensure temperature sensor is properly connected. |
9. المواصفات
Technical specifications for the OOYCYOO MPPT 60A Solar Charge Controller.
| المعلمة | قيمة |
|---|---|
| تيار الشحن المقدر | 60 أمبير |
| حجم النظامtage | 12V/24V Auto Identification |
| الأعلى. PV Open Circuit Voltage | 100 فولت تيار مستمر |
| أقصى طاقة إدخال للخلايا الكهروضوئية (نظام 12 فولت) | 750 واط |
| أقصى طاقة إدخال للخلايا الكهروضوئية (نظام 24 فولت) | 1500 واط |
| DC/DC Transfer Efficiency | تصل إلى 98.7% |
| درجة حرارة التشغيل | من -20 درجة مئوية إلى +55 درجة مئوية |
| حجم المحطة | 10 مقياس سلكي |
| الأبعاد (الطول*العرض*الارتفاع) | 8.3 × 8.4 × 3.4 بوصة (21.2 × 20.8 × 8.4 سم) |
| وزن | 3 رطل (1.28 كجم) |
| نوع العرض | الإضاءة الخلفية لشاشة LCD |
| رمز المنتج الموحد | 768461886785 |
| رقم الموديل | P 60A |


10. الضمان والدعم
For warranty information or technical support, please contact your retailer or the manufacturer directly. Refer to the product packaging or purchase documentation for specific contact details.
Ask a question about this manual
Ask about setup, troubleshooting, compatibility, parts, safety, or missing instructions. Manuals+ will review the question and use this page’s manual context to help answer it.