
1. انتهى المنتجview
The Xigmatek LUX S Arctic (Model EN48298) is a mid-tower PC case designed for computer enthusiasts and gamers. It features a distinctive triangular mesh front panel for optimal airflow and comes equipped with four 120mm X24A A-RGB fans to provide efficient cooling and customizable lighting. The case supports Micro ATX motherboards and is constructed with durable materials, including tempered glass for a clear view من المكونات الداخلية.
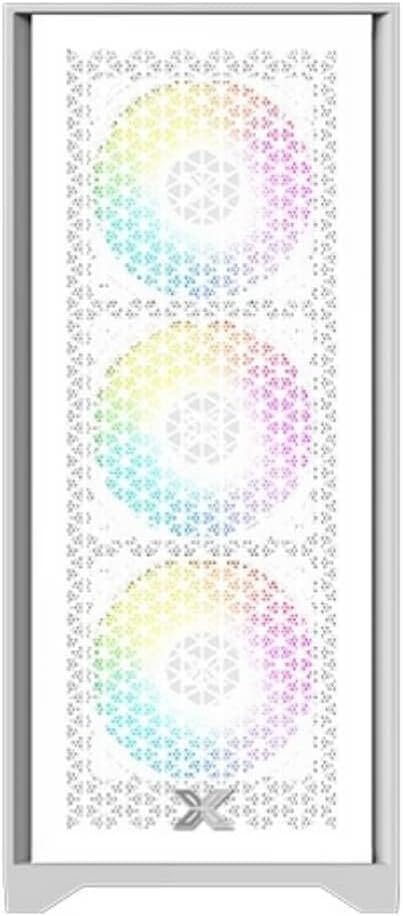
الشكل 1.1: أمام view of the Xigmatek LUX S Arctic PC case, showcasing the triangular mesh design and the pre-installed A-RGB fans.
2. محتويات العبوة
Before proceeding with installation, please ensure all components listed below are present in your package. If any items are missing or damaged, contact your retailer or Xigmatek support.
- Xigmatek LUX S Arctic Mid-Tower PC Case
- 4 x 120mm X24A A-RGB Fans (pre-installed)
- Accessory box (screws, cable ties, standoffs, user manual)
3. الإعداد والتثبيت
Follow these steps to install your computer components into the Xigmatek LUX S Arctic PC case. Ensure your system is powered off and unplugged before beginning any installation.
3.1. إعداد القضية
- ضع العلبة على سطح مستوٍ وثابت.
- Carefully remove the tempered glass side panel by unscrewing the thumb screws at the rear of the case and gently pulling the panel away.
- Remove the opposite side panel (metal) in a similar manner to access the cable management area.

الشكل 3.1: الداخلية view of the PC case, illustrating the spacious layout for component installation.
3.2. تركيب اللوحة الأم
- Install the I/O shield that came with your motherboard into the designated opening at the rear of the case.
- Align your Micro ATX motherboard with the pre-installed standoffs. Ensure all screw holes on the motherboard match the standoffs.
- ثبّت اللوحة الأم باستخدام البراغي المرفقة من علبة الملحقات. لا تفرط في إحكام ربطها.
3.3. تركيب وحدة إمداد الطاقة (PSU)
- Locate the PSU mounting area at the rear bottom of the case.
- Slide your PSU into the bay from the rear, ensuring the fan faces the bottom (if the case has a filtered intake) or upwards.
- قم بتثبيت وحدة تزويد الطاقة باستخدام البراغي من الجزء الخلفي الخارجي للهيكل.
3.4. تثبيت محرك التخزين
The case supports various storage configurations. Refer to the accessory box for specific mounting hardware.
- أقراص SSD مقاس 2.5 بوصة: Mount SSDs to the designated brackets behind the motherboard tray.
- محركات الأقراص الصلبة مقاس 3.5 بوصة: قم بتركيب محركات الأقراص الصلبة في قفص محركات الأقراص الموجود أسفل غطاء وحدة تزويد الطاقة.

الشكل 3.2: الجزء الداخلي الخلفي view, highlighting cable management cutouts and storage drive mounting locations.
3.5. Expansion Card Installation (GPU, etc.)
- قم بإزالة أغطية فتحة PCIe الضرورية من الجزء الخلفي للعلبة.
- Insert your expansion card (e.g., graphics card) into the corresponding PCIe slot on your motherboard until it clicks into place.
- قم بتثبيت البطاقة بمسمار في هيكل الجهاز.
3.6. إدارة الكابلات والوصلات
Connect all necessary cables from the PSU to your motherboard and components. Utilize the cable routing cutouts and tie-down points behind the motherboard tray for a clean build and improved airflow.
- Connect front panel headers (Power SW, Reset SW, HDD LED, Power LED) to the motherboard.
- Connect USB 2.0 and USB 3.0 headers to the motherboard.
- Connect audio header to the motherboard.
- Connect the pre-installed A-RGB fans to your motherboard's A-RGB header or a compatible controller. Ensure power is supplied to the fan hub/controller if applicable.
4. تعليمات التشغيل
بمجرد تثبيت جميع المكونات وتوصيل الكابلات، يمكنك تشغيل النظام.
- Replace both side panels and secure them with their respective screws.
- قم بتوصيل الشاشة ولوحة المفاتيح والماوس وكابل الطاقة بالجزء الخلفي من جهاز الكمبيوتر الخاص بك.
- قم بتحريك مفتاح الطاقة الموجود على وحدة تزويد الطاقة إلى وضع "التشغيل".
- اضغط على زر التشغيل الموجود على اللوحة الأمامية للجهاز.
- The pre-installed A-RGB fans will illuminate. You can control their lighting effects via your motherboard's software (if connected to an A-RGB header) or a dedicated controller (if included with the fans or purchased separately).
5. الصيانة
تساعد الصيانة الدورية على ضمان الأداء الأمثل وطول عمر مكونات جهاز الكمبيوتر الخاص بك.
- فلاتر الغبار: The Xigmatek LUX S Arctic case likely includes removable dust filters (e.g., top, bottom, front). Clean these filters every 1-3 months, depending on your environment, by gently brushing or washing them with water and allowing them to dry completely before reinstallation.
- التنظيف الداخلي: Periodically (every 6-12 months), open the case and use compressed air to remove dust buildup from fans, heatsinks, and other components. Hold fan blades gently to prevent them from spinning too fast during cleaning.
- التنظيف الخارجي: امسحي الأسطح الخارجية بقطعة ناعمة ، دamp cloth. Avoid harsh chemicals that may damage the finish or tempered glass.
6. استكشاف الأخطاء وإصلاحها
If you encounter issues with your PC build, refer to these common troubleshooting steps.
- النظام لا يعمل:
- تأكد من أن مفتاح PSU في وضع التشغيل.
- Check all power cables (24-pin ATX, 8-pin CPU, GPU power) are securely connected.
- Verify front panel power switch header is correctly connected to the motherboard.
- Fans Not Spinning/RGB Not Lighting Up:
- Check fan power connections to the motherboard or fan hub.
- Ensure A-RGB cables are correctly connected to the motherboard's A-RGB header or controller.
- Verify that any fan hub or controller is receiving power.
- لا يوجد إخراج للعرض:
- Ensure your monitor cable is connected to the graphics card (not the motherboard's integrated graphics ports, unless you are using integrated graphics).
- أعد تركيب بطاقة الرسومات في فتحة PCIe الخاصة بها.
- Check graphics card power connections.
For more complex issues, consult your motherboard manual or component manufacturer's support resources.
7. المواصفات
| ميزة | التفاصيل |
|---|---|
| ماركة | زيغماتيك |
| اسم الموديل | LUX S Arctic |
| رقم الموديل | EN48298 |
| نوع الحالة | برج متوسط |
| لون | القطب الشمالي الأبيض |
| مادة | زجاج مقسّى (لوحة جانبية) |
| التوافق مع اللوحة الأم | مايكرو ATX |
| مراوح مثبتة مسبقًا | 4 x 120mm X24A A-RGB Fans |
| طريقة التبريد | هواء |
| اللوحة الأمامية I / O | 2 x USB ports (type not specified, typically USB 2.0/3.0), Audio Jacks |
| تركيب مصدر الطاقة | التثبيت الخلفي (السفلي) |
| الاستخدام الموصى به | الألعاب |
8. الضمان والدعم
For information regarding warranty coverage, technical support, or replacement parts, please refer to the warranty card included with your product or visit the official Xigmatek webموقع.