JideTech 64H2UA
JideTech 4-Port HDMI KVM Switch User Manual
Model: 64H2UA
العلامة التجارية: جيديتك
1. انتهى المنتجview
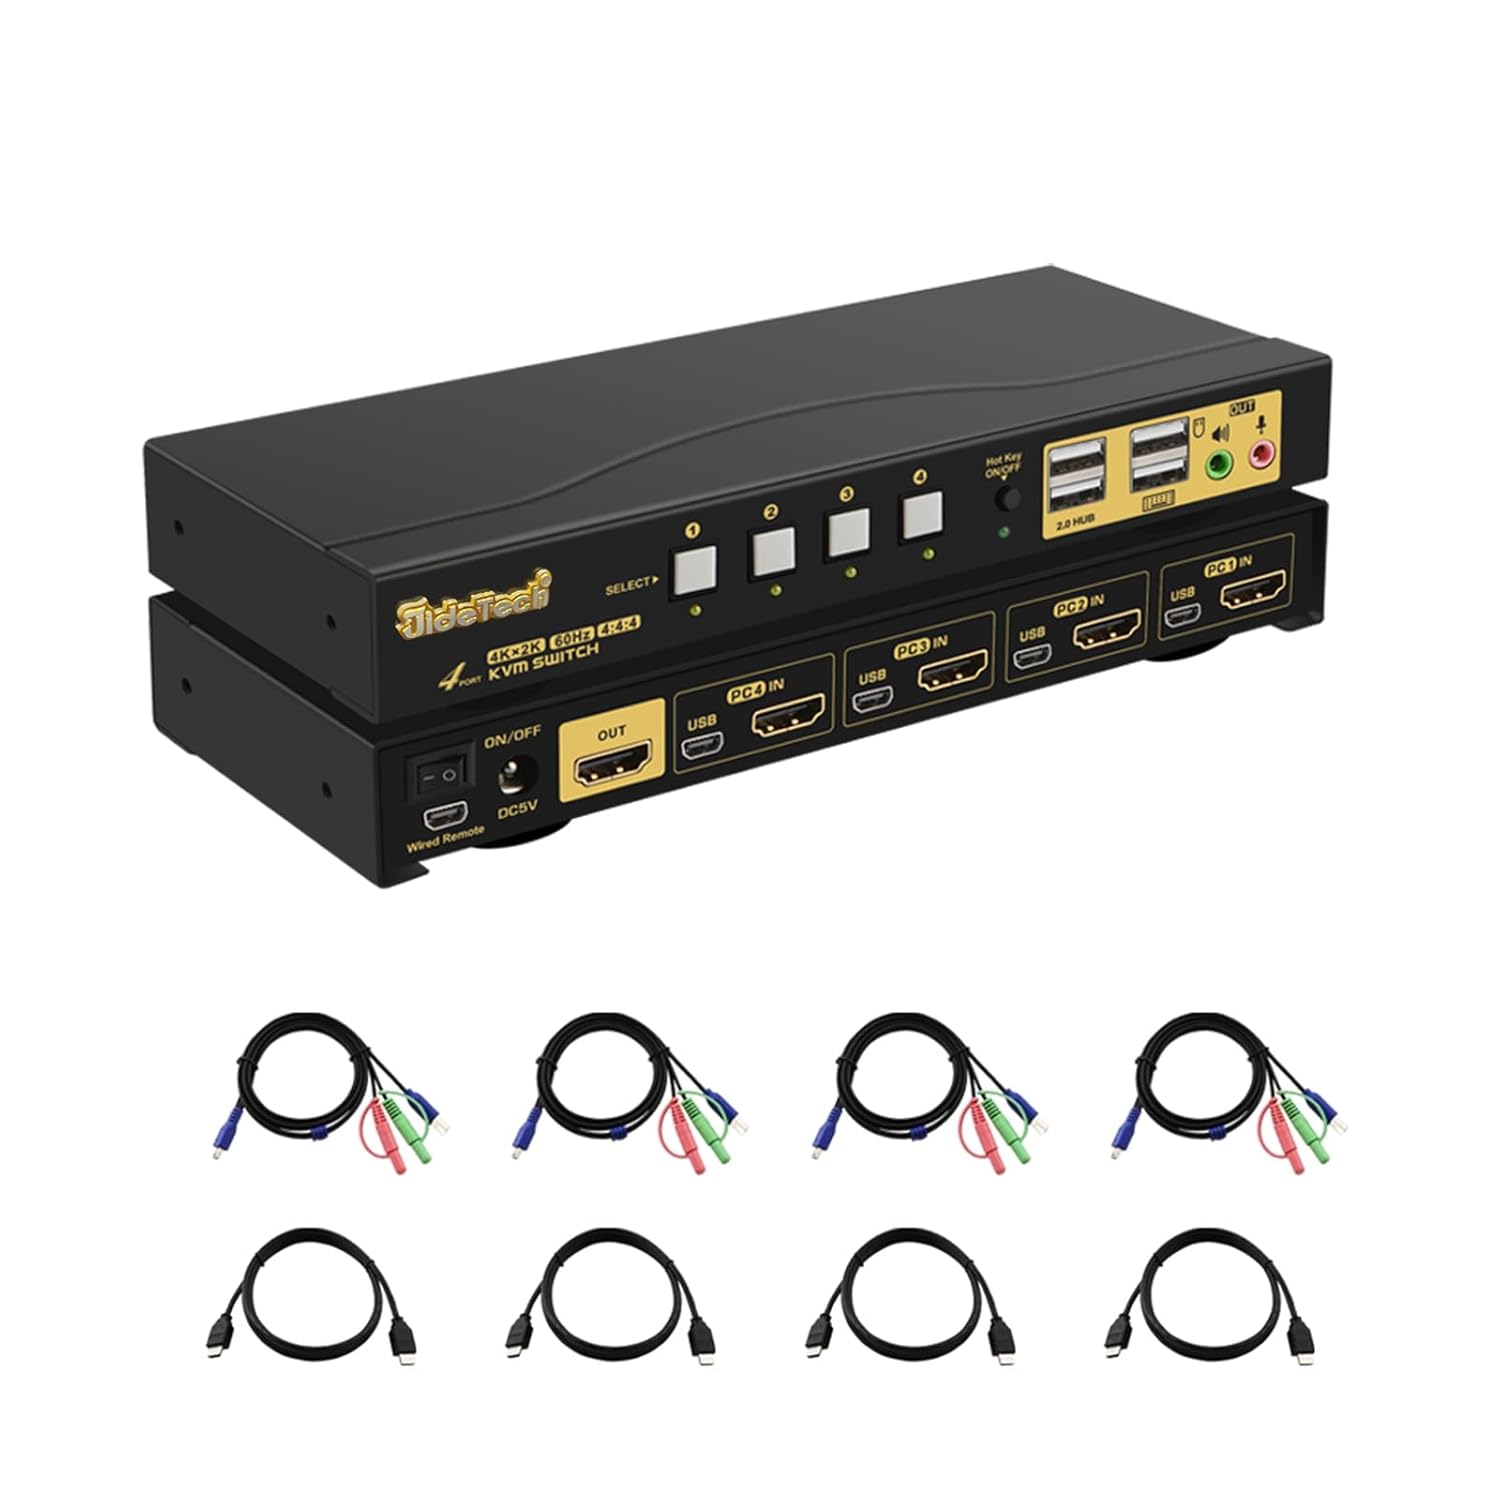
The JideTech 4-Port HDMI KVM Switch allows you to control up to four HDMI-enabled computers or devices using a single set of USB keyboard, USB mouse, and HDMI monitor. It supports Ultra HD 4K@60Hz resolution, ensuring high-quality video output. This switch is designed to streamline your workspace by reducing cable clutter and simplifying multi-system management.
المميزات الرئيسية:
- Supports 4 HDMI devices (PC, Servers, NVR, Game Consoles, AppleTV, etc.)
- Ultra HD 4K (4096x2160) @ 60Hz resolution support
- Compatible with HDMI 2.0, EDID, HDCP2.2, HDR10
- Integrated 2-port USB 2.0 hub for sharing peripherals (printers, scanners, USB drives)
- 3.5mm microphone and speaker ports for audio input/output
- Multiple switching methods: Front Panel Button, Wired Remote, Keyboard Hotkey, Mouse Switching
- Plug and Play functionality, driver-free for most operating systems
محتويات الحزمة:
- 1 x JideTech 4-Port HDMI KVM Switch
- 1 x USB محول الطاقة
- عدد 4 كابلات USB 3.0
- 4 × كابلات HDMI
- 1 × جهاز تحكم عن بعد سلكي
- 1 × دليل المستخدم (هذه الوثيقة)
2. الإعداد والتثبيت
Follow these steps to properly set up your KVM switch:
- أجهزة إيقاف التشغيل: Ensure all computers and the monitor are powered off before making any connections.
- توصيل الشاشة: Connect your HDMI monitor to the 'OUT' HDMI port on the KVM switch.
- Connect Computers (HDMI): Connect the HDMI output of each computer (PC1, PC2, PC3, PC4) to the corresponding 'PC IN' HDMI ports on the KVM switch.
- Connect Computers (USB): Connect the USB 3.0 cable from each computer's USB port to the corresponding 'USB IN' ports on the KVM switch. These cables transmit keyboard, mouse, and USB hub data.
- Connect Keyboard & Mouse: Plug your USB keyboard and USB mouse into the dedicated keyboard and mouse USB ports on the front panel of the KVM switch.
- توصيل الأجهزة الطرفية USB: If desired, connect additional USB devices (e.g., printer, USB drive) to the '2.0 HUB' ports on the front panel.
- توصيل الصوت: Connect your speakers or headphones to the green audio output port and your microphone to the pink microphone input port on the front panel.
- توصيل الطاقة: Plug the provided USB power adapter into the 'DC5V' port on the KVM switch and then into a power outlet.
- تشغيل الطاقة: Power on the KVM switch using the 'ON/OFF' switch, then power on your monitor and computers.


3. تعليمات التشغيل
The JideTech KVM Switch offers multiple convenient ways to switch between connected computers:
3.1. أوضاع التبديل

- Front Panel Button Switching:
Press the 'SELECT' buttons (1, 2, 3, 4) on the front panel of the KVM switch to directly switch to the corresponding computer input.

Figure 6: The Hotkey On/Off switch on the KVM. - Wired Remote Control Switching:
Use the included wired remote control to switch between inputs. Press the numbered buttons (1, 2, 3, 4) to select the desired computer. The 'AUTO' button can initiate an auto-scan function.
- Keyboard Hotkey Switching:
Ensure the 'Hot Key On/Off' switch on the front panel is in the 'ON' (green light) position. Use the following hotkey commands:
- Switch to PC1: Press CTRL الصحيح مرتين ، إذن 1، ثم يدخل.
- Switch to PC2: Press CTRL الصحيح مرتين ، إذن 2، ثم يدخل.
- Switch to PC3: Press CTRL الصحيح مرتين ، إذن 3، ثم يدخل.
- Switch to PC4: Press CTRL الصحيح مرتين ، إذن 4، ثم يدخل.
- Disable Beep Sound: Press CTRL الصحيح مرتين ، إذن B، ثم يدخل.
- Enable Loudspeaker (Audio): Press CTRL الصحيح مرتين ، إذن P، ثم يدخل.
Note: Hotkey functionality may vary with certain specialized keyboards (e.g., gaming or mechanical keyboards). If issues arise, try connecting the keyboard to a USB hub connected to the KVM's USB 2.0 hub port.
- تبديل الماوس:
Move the mouse cursor to the far right edge of the screen and quickly move it right again. This will switch to the next active input. Repeat to cycle through inputs.
3.2. Audio Capabilities
The KVM switch includes 3.5mm audio input and output ports, allowing you to share speakers and a microphone across all connected computers. Simply plug your audio devices into the corresponding ports on the front panel.

4. الصيانة
To ensure the longevity and optimal performance of your JideTech KVM Switch, follow these maintenance guidelines:
- تنظيف: استخدم قطعة قماش ناعمة وجافة لتنظيف الجزء الخارجي من مفتاح KVM. تجنب استخدام المنظفات السائلة أو البخاخات، فقد تتسبب في تلف الجهاز.
- تهوية: تأكد من وضع مفتاح KVM في مكان جيد التهوية لمنع ارتفاع درجة حرارته. لا تسد أي فتحات تهوية.
- إدارة الكابلات: Keep cables organized and untangled to prevent damage to ports and cables. Avoid excessive bending or pulling of cables.
- مزود الطاقة: Always use the original power adapter provided with the KVM switch.
- تخزين: في حال تخزين الجهاز لفترة طويلة، افصل جميع الكابلات وخزنه في مكان بارد وجاف.
5. استكشاف الأخطاء وإصلاحها
إذا واجهت مشاكل مع مفتاح KVM الخاص بك، فيرجى الرجوع إلى المشاكل والحلول الشائعة التالية:
- No Display or Flickering Screen:
- Ensure all HDMI cables are securely connected to both the KVM switch and the computers/monitor.
- تأكد من أن مفتاح KVM قيد التشغيل.
- Try using different HDMI cables, especially if they are not the ones provided.
- Check the display resolution settings on your computers. Ensure they are compatible with 4K@60Hz or a supported lower resolution.
- Power cycle the KVM switch and all connected devices.
- Keyboard or Mouse Unresponsive:
- Ensure the keyboard and mouse are plugged into the dedicated USB ports on the front panel.
- Try unplugging and replugging the keyboard/mouse.
- If using a specialized keyboard/mouse (e.g., gaming, mechanical, or wireless with a dongle), connect them to a powered USB 2.0 hub, then connect the hub to one of the KVM's '2.0 HUB' ports.
- Ensure the USB 3.0 cables from the computers to the KVM are securely connected.
- Disable hotkey switching if it interferes with your specific keyboard/mouse.
- لا يوجد صوت أو صوت مشوّه:
- Check that speakers/headphones and microphone are correctly plugged into the 3.5mm audio ports.
- Verify audio output settings on your computer.
- Ensure the 'Loudspeaker' hotkey (Right CTRL twice, then P, then Enter) is enabled if needed.
- Loud Beep Sound When Switching:
- The beep sound can be disabled using the hotkey command: Press CTRL الصحيح مرتين ، إذن B، ثم يدخل.
- Auto-Scan Not Working:
- Ensure all connected computers are powered on and sending a video signal.
- Check the wired remote control connection.
If the problem persists after trying these solutions, please contact JideTech customer support for further assistance.
6. المواصفات
| ميزة | وصف |
|---|---|
| رقم الموديل | 64H2UA |
| أبعاد المنتج | 2.95 × 0.97 × 8.07 بوصة |
| وزن | 2.93 رطل |
| دقة الفيديو | حتى دقة 4096x2160@60Hz (4K@60Hz) |
| معيار HDMI | اتش دي ام اي 2.0 |
| HDCP الدعم | بروتوكول حماية المحتوى عالي الوضوح 2.2 |
| دعم HDR | النطاق الديناميكي العالي 10 |
| منافذ USB | 2 x USB 2.0 Hub, Dedicated Keyboard/Mouse USB ports |
| منافذ الصوت | مخرج صوت ستيريو 3.5 ملم، مدخل ميكروفون 3.5 ملم |
| طرق التبديل | Front Panel Button, Wired Remote, Keyboard Hotkey, Mouse Switching |
| حجم التشغيلtage | 5 فولت |
| أنظمة التشغيل المتوافقة | Windows 10/7/2000/XP/Vista, Linux, Mac, Debian, Ubuntu, Fedora, Raspbian, etc. |


7. الضمان والدعم
For warranty information and technical support, please refer to the official JideTech webيمكنك زيارة الموقع الإلكتروني أو الاتصال بخدمة العملاء مباشرةً. عادةً ما تجد تفاصيل تسجيل المنتج، ومطالبات الضمان، والمساعدة التقنية على صفحات دعم الشركة المصنعة.
معلومات الاتصال: يرجى زيارة JideTech Store on Amazon أو الرسمية الخاصة بهم webللحصول على أحدث تفاصيل الاتصال بالدعم، يرجى زيارة الموقع.
Ask a question about this manual
Ask about setup, troubleshooting, compatibility, parts, safety, or missing instructions. Manuals+ will review the question and use this page’s manual context to help answer it.