
Makerbase MKS-MONSTER8
Makerbase MKS Monster8 V2 32-Bit Control Board Instruction Manual
Model: MKS-MONSTER8 | Brand: Makerbase
1. انتهى المنتجview
The Makerbase MKS Monster8 V2 is a 32-bit control board designed for advanced 3D printers, offering extensive features and compatibility. It is suitable for large 3D printers such as Voron 2.4 and Creality Ender-3 series (Ender-3, Ender-3 V2, Ender-3 Pro).
المميزات الرئيسية:
- 8 Stepper Drivers: Supports multiple motor drives including A4988, DRV8825, LV8729, TMC2208, TMC2209, TMC2225, TMC2226.
- 9 Motor Interfaces: Driver0, 1, 2-1, 2-2, 3, 4, 5, 6, 7 for flexible configurations.
- دعم البرامج الثابتة: Compatible with Marlin 2.0.x and Klipper (requires a Klipper host like Raspberry Pi or MKS PI).
- توافق العرض: Supports LCD2004, LCD12864, MKS MINI12864 V1.0/V3.0, and MKS touchscreens (MKS TFT24, MKS TFT28, MKS TFT32, MKS TFT35, MKS H43).
- Expansion Functions: 6 endstops with power select (X-, X+, Y-, Y+, Z-, Z+), 3D TOUCH (PA8) interface, DFU mode via Boot0 button, driver power select (5V or 3.3V), TMC UART and SPI mode, SENSORLESS_HOMING (Diag0-5), integrated SPI communication micro SD card, reserved SPI signal UDISK, and virtual USB device.
- مكو: STM32F407VET6, 168MHz, 512KB flash, 192KB RAM, built-in CAN transceiver and interface.
- مدخلات الطاقة: DC12-24V.
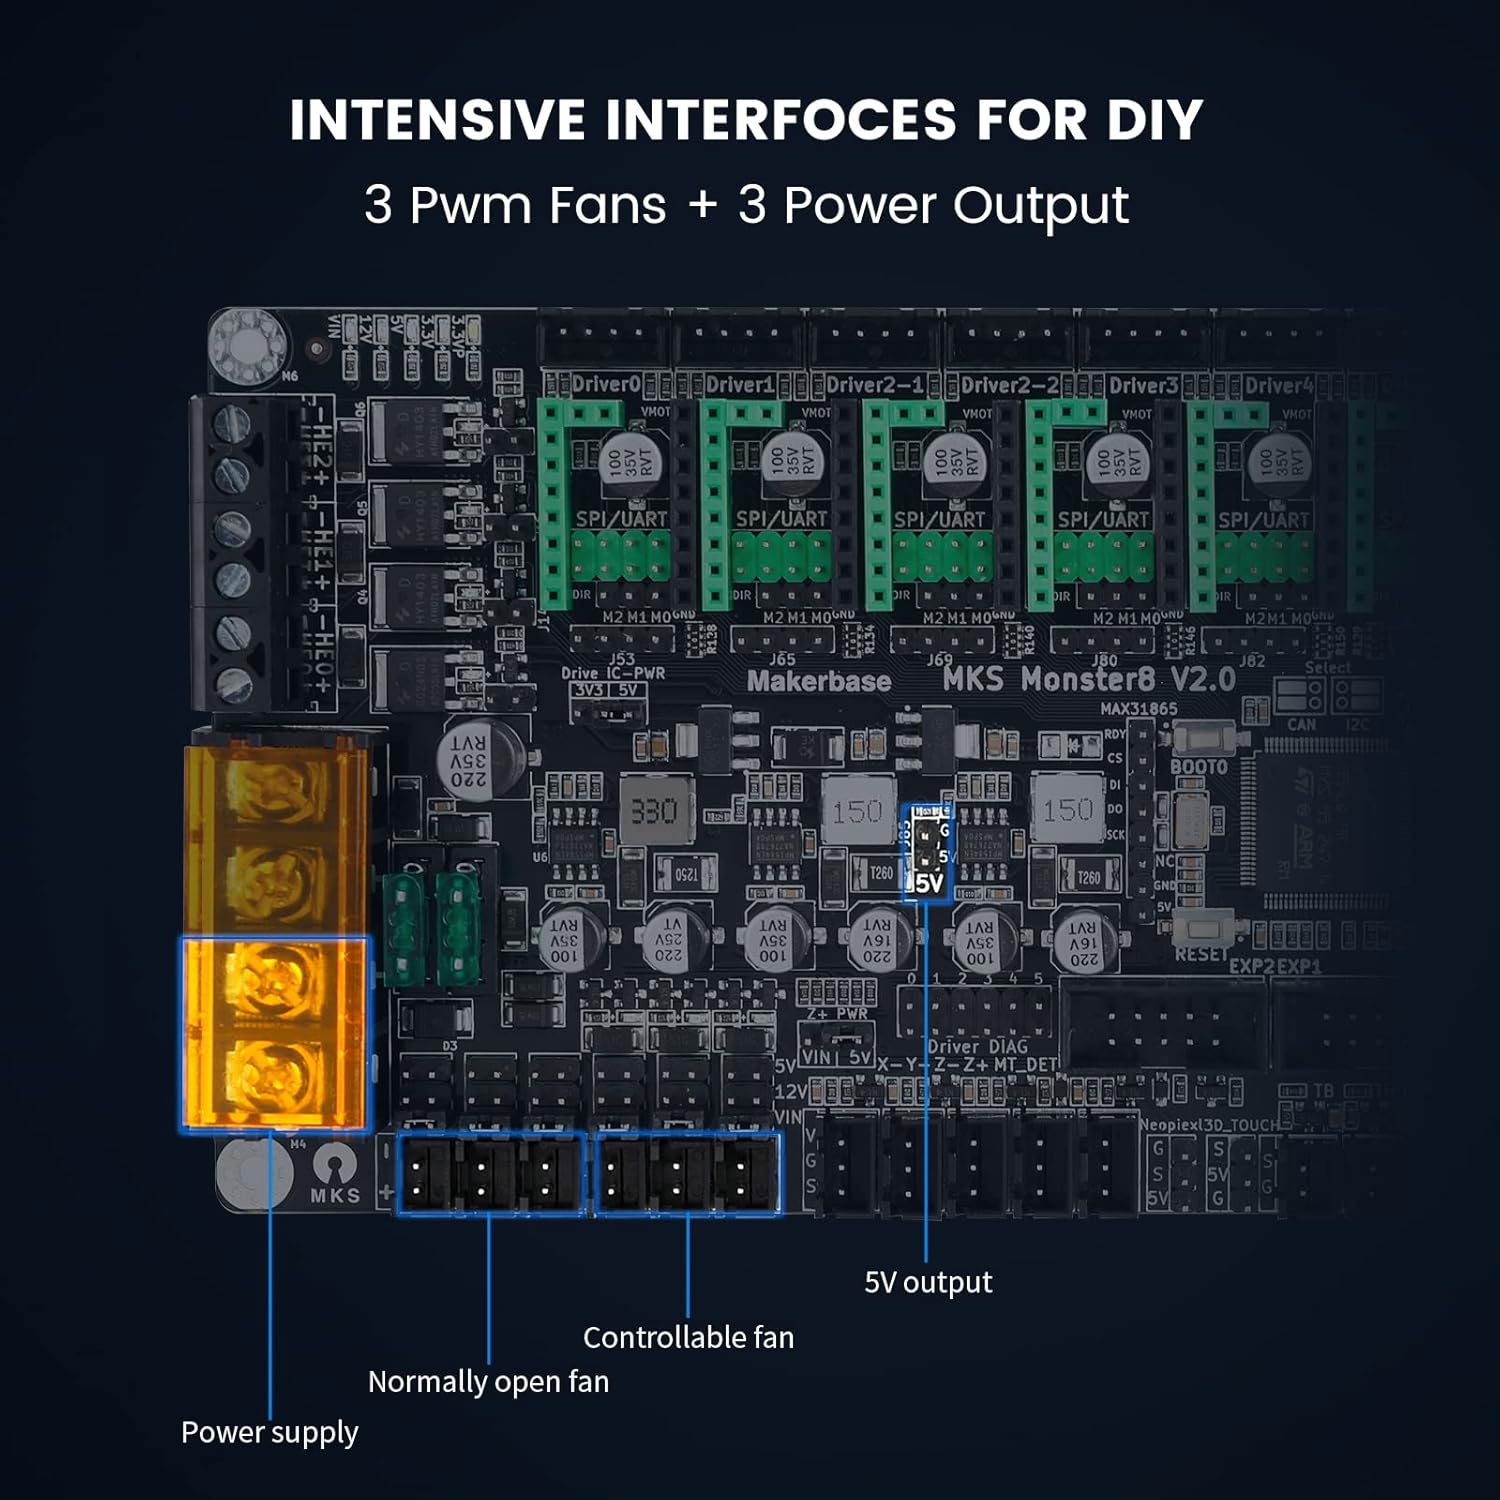
- انتاج الطاقة: 2 MP1584EN outputs (DC12V for fans and DC5V), 3 PWM fans + 3 power outputs (selectable VIN, DC12V, DC5V).
- حماية: TVS power spike processing, 4KB EEPROM on board.
- الاتصال: Type-C online serial port.



2. دليل الإعداد
2.1 تثبيت برنامج التشغيل
Before connecting any components, ensure the motor drivers are correctly installed. For Dir/Step mode, insert the jumper cap into the pins marked with a red box in the diagram. The video below demonstrates using the TMC2209 driver in Dir/Step mode as an exampليه.
2.2 توصيلات الأسلاك
Carefully follow the wiring diagram and instructions to connect all components. Pay close attention to positive and negative poles for power connections.
- مزود الطاقة: Connect the main power supply (+POWER+ 12/24V).
- سرير مُدفأ: Connect the heated bed, paying attention to the positive and negative poles (+HBED-).
- Hotend: Connect the hotend (-HE0+).
- المشجعين: Connect the always-on fan and controllable fan.
- Thermistors: Connect the hotend thermistor (TH0) and heated bed thermistor (TB).
- نقاط التوقف النهائية: Connect the X-axis endstop (X-), Y-axis endstop (Y-), and Z-axis endstop (Z-).
- المحركات: Connect the X-axis motor (Driver0), Y-axis motor (Driver1), Z-axis motor (Driver2-1), and Extruder motor (Driver3).
- عرض: Connect the MKS TS35 touchscreen display to EXP1 and EXP2 using DuPont wires.

2.3 Firmware Configuration (Marlin)
To ensure proper functionality, the Marlin firmware needs to be configured for the MKS Monster8 V2 board. Refer to the official Makerbase GitHub for the latest firmware and detailed instructions. Key configuration steps include:
- Set the mainboard name to
BOARD_MKS_MONSTER8inConfiguration.h. - تعيين
SERIAL_PORTل-1. - Set the user interface to
TFT_COLOR_UI. - يُمكَِن
SDSUPPORT. - يُمكَِن
SDCARD_CONNECTION_ONBOARDinpins_MKS_MONSTER8.h. - يُمكَِن
EEPROM_SETTINGSوEEPROM_CHITCHAT. - تعيين
default_envs = mks_monster8inplatformio.ini. - تعيين
EXTRUDERSالى 1. - تعيين
TEMP_SENSOR_0وTEMP_SENSOR_BEDالى 1. - يُمكَِن
USE_XMIN_PLUG,USE_YMIN_PLUG,USE_ZMIN_PLUG. - تعيين
X(Y,Z)_MIN_ENDSTOP_INVERTINGلtrue. - تعيين
X(Y,Z)_HOME_DIRل-1. - تعيين
X(Y)_BED_SIZEل200وZ_BED_SIZEل250. - تعيين
X_DRIVER_TYPEلTMC2209(adjust for other drivers as needed). - تعيين
INVERT_X(Y,E0)_DIRلfalseوINVERT_Z_DIRلtrue. - يُمكَِن
MESH_BED_LEVELINGوLCD_BED_LEVELING.
For detailed firmware configuration, please visit the official Makerbase GitHub repository: https://github.com/makerbase-mks/MKS-Monster8
2.4 تحديث البرنامج الثابت
After compiling the firmware, copy the "asset" folder and the .bin file generated after compilation to the root directory of the SD card. Insert the SD card into the mainboard's slot, then turn on the power to update the firmware. The display will show the update progress.

3. تعليمات التشغيل
Once the MKS Monster8 V2 board is installed and firmware updated, you can operate your 3D printer using the connected display. The display allows for control over various printer functions.
3.1 Basic Movement and Controls
Use the touchscreen or rotary encoder on your MKS display to navigate menus and control printer axes (X, Y, Z) and the extruder. This allows for manual positioning and filament loading/unloading.
3.2 Initiating a Print
After preparing your G-code file on an SD card, insert it into the display's SD card slot (if applicable) or the mainboard's slot. Navigate to the print menu on the display and select your file to begin printing. Ensure the heated bed and hotend reach the desired temperatures before printing starts.
4. الصيانة
Regular maintenance ensures the longevity and optimal performance of your MKS Monster8 V2 control board.
- حافظ على نظافة: Regularly clean the board and surrounding area to prevent dust and debris accumulation, which can lead to overheating or short circuits.
- تجنب الرطوبة: Ensure the control board is kept in a dry environment to prevent damage from moisture or humidity.
- التحقق من الاتصالات: Periodically inspect all wiring connections to ensure they are secure and free from wear or damage. Loose connections can cause intermittent issues or component failure.
- تحديثات البرامج الثابتة: Stay updated with the latest firmware releases from Makerbase to benefit from bug fixes, performance improvements, and new features.
5. استكشاف الأخطاء وإصلاحها
This section addresses common issues and their solutions for the MKS Monster8 V2 control board.
5.1 Power-Related Issues
- اللوحة لا تعمل: If the board does not power on, first check if the power supply wiring is reversed. The MKS Monster8 V2 includes TVS power supply anti-reverse and spike protection, preventing damage from incorrect polarity, but the board will not function until correctly wired.
- Raspberry Pi "Currently Throttled" Error: The MKS Monster8 V2 provides a stable DC 5.1V/3A power output specifically designed for Raspberry Pi. If you encounter a "Currently Throttled" error, ensure your Raspberry Pi is connected to this dedicated power interface on the Monster8 V2 to avoid voltage and current instability.
5.2 Motor and Sensor Protection
- Stepper Motor Damage: The board features a protection circuit for back electromotive force (EMF) generated by stepper motors. This significantly reduces potential damage to motor drivers, even if the print head is manually moved or obstructed.
- الضرر ESD: The motherboard's MOS drive circuit and temperature measurement circuit are protected by Schottky diodes, reducing damage from external static electricity spikes. The board has been tested to withstand 4kV of static electricity.
- PL08N Leveling Sensor Issues: The PL08N leveling sensor signal interface is protected by Schottky diodes with a withstand voltage of 40V. This ensures that the signal pin of the chip will not be burned out due to sensor-related issues.
6. المواصفات
| ميزة | التفاصيل |
|---|---|
| الشركة المصنعة | Makerbase Motherboard Monster8 |
| أبعاد الحزمة | 8.03 × 5.12 × 3.11 بوصة |
| وزن العنصر | 9.1 أونصات |
| ASIN | B09M3WKJS4 |
| رقم موديل العنصر | MKS-MONSTER8 |
| البطاريات المطلوبة | لا |
| المكونات المضمنة | PCBA |
| لون | أسود |
| ماركة | قاعدة صانع |
| المجلدtage | 24 فولت (تيار مستمر) |
| نوع العرض | LCD or Touchscreen |
| وحدة تحكم دقيقة | STM32F407VET6, 168MHz, 512KB Flash, 192KB RAM |
| Stepper Drivers | 8 (supports A4988, DRV8825, LV8729, TMC2208, TMC2209, TMC2225, TMC2226) |
| البرامج الثابتة | Marlin 2.0.x, Klipper |
| حماية الطاقة | TVS power spike processing, pluggable fuse |
| Raspberry Pi Power Output | تيار مستمر 5.1 فولت/3 أمبير |
7. الدعم والموارد
For further assistance, firmware updates, and community support, please refer to the following official Makerbase resources:
- مستودع GitHub الرسمي: https://github.com/makerbase-mks/MKS-Monster8 (for firmware and technical documentation)
- قناة اليوتيوب: https://www.youtube.com/@makerbaseteam4217 (for video tutorials and guides)
- صفحة الفيسبوك: https://www.facebook.com/Makerbase.mks/ (for community interaction and updates)

Ask a question about this manual
Ask about setup, troubleshooting, compatibility, parts, safety, or missing instructions. Manuals+ will review the question and use this page’s manual context to help answer it.