1. المقدمة
Thank you for choosing the Galax Quasar GX600-WH Gaming PC Case. This manual provides essential information for the proper installation, operation, and maintenance of your new PC case. Please read this manual thoroughly before beginning installation to ensure optimal performance and safety.
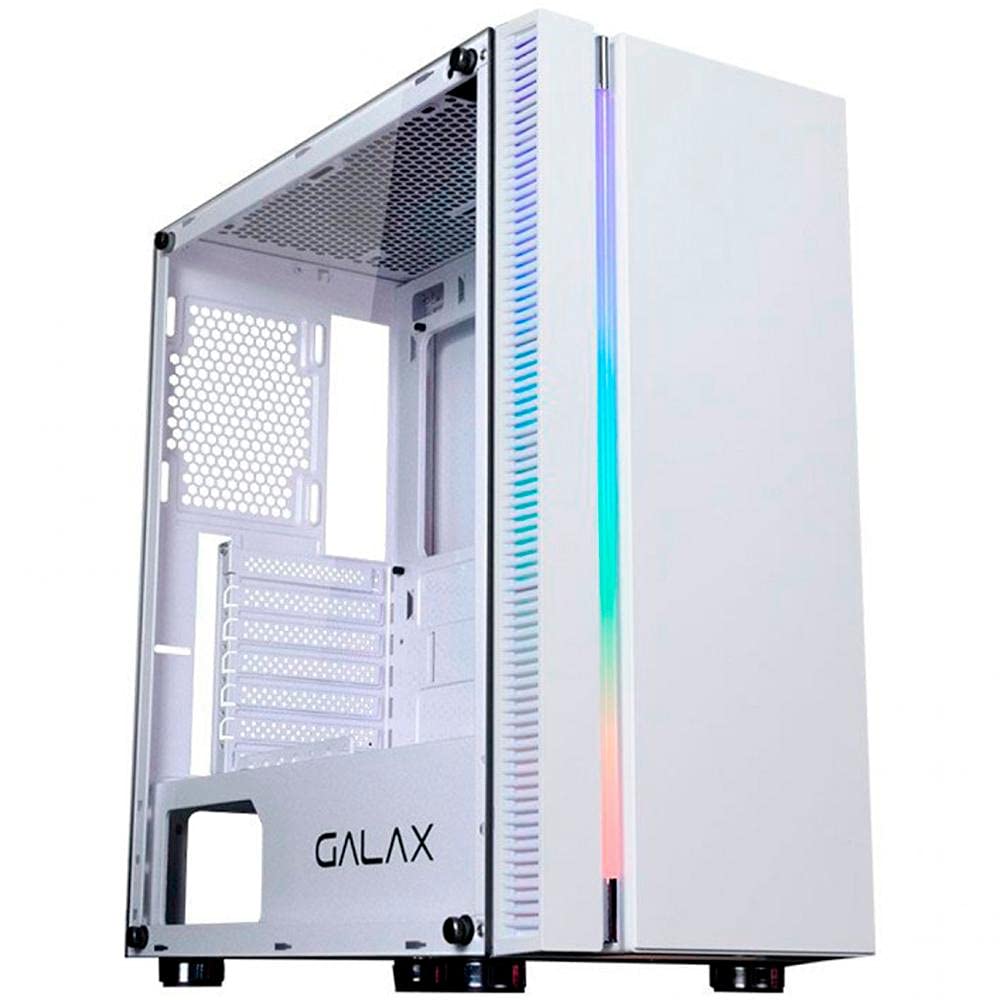
الشكل 1.1: أمام view of the Galax Quasar GX600-WH Gaming PC Case, showcasing its integrated RGB lighting and minimalist design.
2. معلومات السلامة
يرجى مراعاة احتياطات السلامة التالية لمنع تلف المنتج وضمان سلامة المستخدم:
- افصل دائمًا مصدر الطاقة من مقبس الحائط قبل تركيب أو إزالة أي مكونات داخل علبة الكمبيوتر.
- تعامل مع لوح الزجاج المقوى بحرص. فهو هش وقد ينكسر إذا سقط أو تعرض لصدمة.
- Avoid placing the PC case in direct sunlight, near heat sources, or in areas with high humidity.
- تأكد من التهوية المناسبة لمنع ارتفاع درجة الحرارة. لا تسد فتحات الهواء.
- احتفظ بالأجزاء الصغيرة والبراغي بعيدًا عن متناول الأطفال.
3. محتويات العبوة
تأكد من وجود جميع العناصر في العبوة:
- Galax Quasar GX600-WH Mid Tower PC Case
- صندوق الملحقات (البراغي، الفواصل، روابط الكابلات)
- دليل المستخدم (هذا المستند)
Note: Fans are not included with this product and must be purchased separately.
4. انتهى المنتجview
4.1. الميزات الرئيسية
- Integrated RGB lighting on the front panel.
- Simple and minimalist design.
- Tempered glass side panel for component display.
- Front panel connectivity: 1x USB 3.0, 2x USB 2.0, 1x 3.5mm Audio, 1x 3.5mm Microphone.
- Rubber grommets for cable management.
- PSU shroud cutout to display power supply model.
- Magnetic dust filter on the top panel.
4.2. تحديد المكون
Familiarize yourself with the main parts of the PC case:
- Front Panel with RGB Lighting
- لوحة جانبية من الزجاج المقسّى
- Steel Side Panel (right side)
- Top Panel with Magnetic Dust Filter
- Rear Panel (I/O shield cutout, PCI-E slots)
- Front I/O Ports (USB, Audio)
- كفن PSU
- Drive Bays (2.5" and 3.5")
الشكل 4.1: Internal layout of the GX600-WH case, highlighting motherboard tray, drive bays, and cable routing options.
5. الإعداد والتثبيت
Follow these steps to install your PC components:
5.1. إعداد القضية
- ضع العلبة على سطح مستوٍ وثابت.
- Remove the tempered glass side panel by unscrewing the thumb screws and carefully pulling it away. Set it aside on a soft, non-abrasive surface.
- Remove the steel side panel by unscrewing the thumb screws and sliding it backward.
5.2. تركيب اللوحة الأم
- Install the I/O shield into the cutout on the rear panel of the case.
- Align your ATX, Micro-ATX, or Mini-ITX motherboard with the pre-installed standoffs. Additional standoffs may be required for certain motherboard sizes; install them as needed.
- قم بتأمين اللوحة الأم باستخدام البراغي المتوفرة.
5.3. تركيب وحدة إمداد الطاقة (PSU)
- قم بوضع وحدة إمداد الطاقة في الحجرة المخصصة لها في الجزء الخلفي السفلي من العلبة.
- تأكد من أن مروحة وحدة التزويد بالطاقة موجهة للأسفل (إذا كان الهيكل يحتوي على فتحة تهوية سفلية) أو للأعلى (إذا لم تكن هناك فتحة تهوية سفلية).
- قم بتأمين وحدة إمداد الطاقة باستخدام البراغي من الجزء الخلفي للعلبة.
5.4. تثبيت محرك التخزين
- 2.5" Drives (SSDs): Locate the 2.5" drive mounts behind the motherboard tray or on the PSU shroud. Secure the SSDs using the provided screws.
- محركات الأقراص الصلبة (HDDs) مقاس 3.5 بوصة: Locate the 3.5" drive cage. Slide the HDDs into the trays and secure them, typically with tool-less clips or screws.
5.5. Expansion Card (GPU, etc.) Installation
- قم بإزالة أغطية فتحات PCI-E اللازمة من الجزء الخلفي من الهيكل.
- أدخل بطاقة التوسعة الخاصة بك (مثل بطاقة الرسومات) في فتحة PCI-E المناسبة على اللوحة الأم.
- ثبّت البطاقة بمسمار.
5.6. Fan and Radiator Installation (Optional)
The GX600-WH supports various fan and radiator configurations:
- قمة: Up to 2x 120mm fans or a 240mm radiator.
- أمام: Up to 2x 120mm fans, 1x 140mm fan, or a 240mm radiator.
- مؤخرة: 1x 120mm fan or a 120mm radiator.
Install fans/radiators using the appropriate screws, ensuring correct airflow direction.
5.7. إدارة الكابلات
Route all cables (PSU, data, front panel) through the rubber grommets and cable tie points behind the motherboard tray to maintain a clean interior and optimize airflow.
الشكل 5.1: Illustration of the cable routing space behind the motherboard tray, demonstrating the use of rubber grommets for neat cable management.
6. تعليمات التشغيل
6.1. توصيل الأجهزة الطرفية
Once all internal components are installed and secured, replace both side panels. Connect your monitor, keyboard, mouse, and other peripherals to the appropriate ports on your motherboard's I/O shield and graphics card.
6.2. تشغيل
- قم بتوصيل كابل الطاقة بوحدة تزويد الطاقة الخاصة بك ثم بمأخذ الحائط.
- Flip the power switch on the PSU to the "ON" position.
- Press the power button on the front panel of the GX600-WH case. The integrated RGB lighting should illuminate, and your system should begin to boot.
الشكل 6.1: مفصل view of the front I/O panel, showing the power button, USB 3.0, USB 2.0, and audio jacks.
7. الصيانة
تساعد الصيانة الدورية على إطالة عمر مكونات جهاز الكمبيوتر الخاص بك وتضمن الأداء الأمثل.
- فلاتر الغبار: The top panel features a magnetic dust filter. Regularly remove and clean it with water or a soft brush. Ensure it is completely dry before reattaching.
- التنظيف الداخلي: Periodically open the side panels and use compressed air to remove dust buildup from fans, heatsinks, and other components.
- التنظيف الخارجي: امسحي الأسطح الخارجية بقطعة ناعمة ، دamp cloth. Avoid abrasive cleaners or solvents. For the tempered glass, use a glass cleaner and a microfiber cloth.
8. استكشاف الأخطاء وإصلاحها
If you encounter issues with your PC case, refer to the following common problems and solutions:
| مشكلة | السبب المحتمل | حل |
|---|---|---|
| لا يتم تشغيل الكمبيوتر. | PSU switch off, power cables loose, front panel connector issue. | Ensure PSU switch is ON. Check all power connections (24-pin, 8-pin CPU, GPU). Verify front panel power button connector is correctly attached to the motherboard. |
| منافذ USB في اللوحة الأمامية لا تعمل. | USB header cable not connected or incorrectly connected to motherboard. | Check the USB 3.0 and USB 2.0 header cables are securely connected to the correct pins on your motherboard. |
| Front panel audio jacks not working. | HD Audio cable not connected or incorrectly connected to motherboard. | Ensure the HD Audio cable is securely connected to the correct audio header on your motherboard. |
| إضاءة RGB لا تعمل. | RGB cable not connected to motherboard or controller. | Verify the RGB cable from the front panel is connected to a compatible RGB header on your motherboard or an external RGB controller. |
9. المواصفات
| ميزة | التفاصيل |
|---|---|
| نوع الحالة | البرج الاوسط |
| مواد | فولاذ SGCC، زجاج مقسّى |
| لون | أبيض |
| دعم اللوحة الأم | ATX و Micro-ATX و Mini-ITX |
| فتحات التوسعة | 7 Horizontal PCI-E |
| حجرات القيادة | 2 × 2.5 بوصة، 2 × 3.5 بوصة |
| منافذ الإدخال / الإخراج الأمامية | 1x USB 3.0, 2x USB 2.0, 1x 3.5mm Audio, 1x 3.5mm Microphone |
| دعم الجماهير (أعلى الصفحة) | 2 × 120 مم |
| دعم المروحة (الأمامي) | 2x 120 مم أو 1x 140 مم |
| دعم المروحة (الخلفي) | 1 × 120 مم |
| دعامة المبرد (أعلى) | حتى 240 ملم |
| دعم المبرد (الأمامي) | حتى 240 ملم |
| دعامة المبرد (الخلفية) | 120 ملم |
| أقصى طول GPU | 345 ملم |
| أقصى ارتفاع لمبرد وحدة المعالجة المركزية | 160 ملم |
| الأبعاد (الطول × العرض × الارتفاع) | 474 مم × 257 مم × 488 مم |
| وزن العنصر | 6.25 كجم |
الشكل 9.1: Technical drawing illustrating the dimensions of the Galax Quasar GX600-WH case.
10. الضمان والدعم
The Galax Quasar GX600-WH PC Case comes with a ضمان لمدة 12 شهرًا من تاريخ الشراء. يغطي هذا الضمان عيوب التصنيع وأخطاء المواد في ظل الاستخدام العادي.
الضمان لا يشمل:
- Damage caused by improper installation, accident, abuse, misuse, natural disaster, or unauthorized modification.
- Cosmetic damage, including but not limited to scratches, dents, and broken plastic on ports, that does not affect functionality.
- التآكل والتلف الطبيعي.
For technical support or warranty claims, please contact your local Galax distributor or retailer with your proof of purchase.