
1. المقدمة
This manual provides comprehensive instructions for the installation, operation, and maintenance of your PANOEAGLE DS-7608NI-I2/8P 8-Channel 4K Network Video Recorder (NVR). Please read this manual thoroughly before using the product to ensure proper setup and functionality. Retain this manual for future reference.
The PANOEAGLE DS-7608NI-I2/8P is an embedded Plug and Play 4K NVR designed for robust 24/7 surveillance recording. It supports up to 8 cameras simultaneously, offering high-resolution recording up to 12MP and utilizing H.264+/H.264/H.265 video compression for efficient storage. Its Power over Ethernet (PoE) capability simplifies camera installation by providing both power and data through a single cable.
2. انتهى المنتجview
Familiarize yourself with the components and interfaces of your NVR.
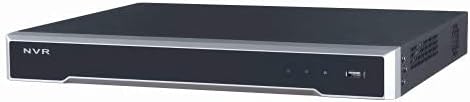
الشكل 2.1: اللوحة الأمامية View
This image displays the front panel of the NVR, featuring the 'NVR' branding, status indicators, and a USB port for peripheral connections.

الشكل 2.2: اللوحة الخلفية View
This image shows the rear panel of the NVR, highlighting the power input, cooling fan, 8 PoE ports, network port, USB ports, audio input/output, VGA, and HDMI video outputs, and alarm/control terminals.

الشكل 2.3: الجزء الخلفي المائل View
An angled perspective of the NVR's rear panel, providing a clearer view of the various connectivity options and ventilation.
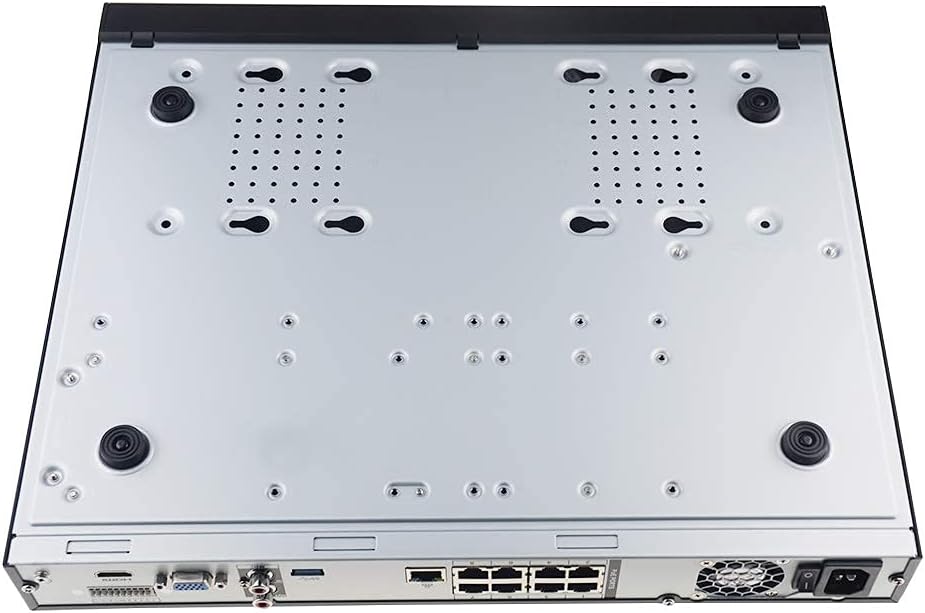
Figure 2.4: Bottom Panel View
This image displays the bottom of the NVR, showing mounting points and ventilation holes, along with rubber feet for stable placement.
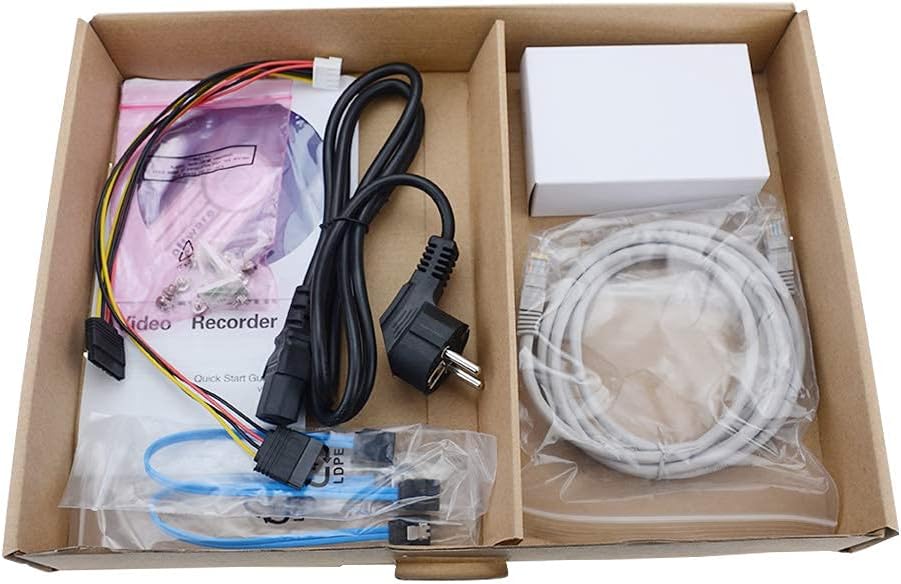
الشكل 2.5: محتويات العبوة
A view of the accessories included with the NVR, typically comprising a power cable, network cable, USB mouse, SATA cables for hard drive installation, and a quick start guide.
3. الميزات الرئيسية
- التسجيل بأربعة قنوات: Supports simultaneous recording from up to 8 IP cameras.
- دعم دقة 4K: Capable of recording and displaying video resolutions up to 12MP.
- PoE Easy Setup: Integrated Power over Ethernet (PoE) ports for direct connection and power supply to IP cameras via a single Ethernet cable.
- ضغط الفيديو المتقدم: Utilizes H.264+/H.264/H.265 codecs for efficient storage and bandwidth usage.
- تسجيل على مدار الساعة طوال أيام الأسبوع: Designed for continuous, reliable surveillance monitoring.
- مخرج HDMI: High-definition video output for connecting to monitors or TVs.
- دعم ساتا: Features 2 SATA interfaces for internal hard drive installation (HDDs not included).
4. دليل الإعداد
4.1. Hard Drive Installation (Optional)
إذا لم يكن جهاز تسجيل الفيديو الشبكي (NVR) الخاص بك مزودًا بقرص صلب مثبت مسبقًا، فاتبع الخطوات التالية:
- قم بإيقاف تشغيل جهاز تسجيل الفيديو الشبكي (NVR) وافصل جميع الكابلات.
- قم بفك وإزالة الغطاء العلوي لهيكل جهاز تسجيل الفيديو الشبكي (NVR).
- Connect the SATA data cable and power cable from the NVR to the hard drive.
- قم بتثبيت القرص الصلب على هيكل جهاز تسجيل الفيديو الشبكي باستخدام البراغي المرفقة.
- أعد تركيب الغطاء العلوي وثبته بالمسامير.
4.2. الاتصالات الأولية
- قم بتوصيل شاشة: قم بتوصيل شاشة بمنفذ إخراج HDMI أو VGA الخاص بجهاز NVR.
- قم بتوصيل فأرة: قم بتوصيل فأرة USB بأحد منافذ USB الخاصة بجهاز NVR.
- الاتصال بالشبكة: قم بتوصيل منفذ LAN الخاص بجهاز NVR بجهاز التوجيه أو محول الشبكة باستخدام كابل إيثرنت.
- ربط كاميرات IP: Connect your PoE IP cameras to the NVR's PoE ports using Ethernet cables. The NVR will provide power and data to the cameras.
- تشغيل الطاقة: قم بتوصيل محول الطاقة بجهاز التسجيل الشبكي (NVR) ثم قم بتوصيله بمأخذ كهربائي. سيتم تشغيل جهاز التسجيل الشبكي تلقائيًا.
4.3. التكوين الأولي
عند التشغيل لأول مرة، سيرشدك مسجل الفيديو الشبكي (NVR) خلال معالج الإعداد الأولي. يتضمن هذا عادةً ما يلي:
- إعداد كلمة مرور المسؤول.
- Configuring network settings (DHCP is usually default).
- تهيئة القرص الصلب (إذا تم تثبيته حديثًا).
- البحث عن كاميرات IP المتصلة وإضافتها.
- تحديد التاريخ والوقت.
اتبع التعليمات التي تظهر على الشاشة لإكمال الإعداد.
5. تعليمات التشغيل
5.1. حي View
After logging in, the NVR will typically display the live view من بين جميع الكاميرات المتصلة. يمكنك التبديل بين وضع الكاميرا الواحدة viewشبكة متعددة الكاميرات viewوتخصيص تخطيطات العرض.
5.2. التسجيل
- التسجيل المستمر: Records 24/7. Configure schedules in the NVR's menu.
- تسجيل كشف الحركة: Records only when motion is detected. Sensitivity and detection zones can be adjusted.
- التسجيل المجدول: حدد أوقاتًا محددة للتسجيل.
Access recording settings via the NVR's main menu, usually under "Record" or "Storage" settings.
5.3. التشغيل
لإعادةview تم تسجيل فوtage:
- من القائمة الرئيسية، اختر "تشغيل".
- Choose the camera(s) and date/time range you wish to review.
- Use the timeline to navigate through recorded events. Options for fast-forward, rewind, and pause are available.
5.4. الوصول عن بعد
The NVR supports remote viewing via a mobile app or web browser. Refer to the NVR's network settings for details on enabling P2P (peer-to-peer) or port forwarding for remote access. Download the official PANOEAGLE mobile application from your device's app store.
6. الصيانة
- التنظيف المنتظم: Keep the NVR free from dust. Use a soft, dry cloth for exterior cleaning. Ensure ventilation openings are clear.
- تحديثات البرامج الثابتة: Periodically check the PANOEAGLE official website for firmware updates. Updates can improve performance, add features, and enhance security. Follow update instructions carefully.
- حالة القرص الصلب: Monitor the health of your hard drive(s) through the NVR's system information. Replace failing drives promptly to avoid data loss.
- أمان كلمة المرور: Regularly change your administrator password and use strong, unique passwords.
7. استكشاف الأخطاء وإصلاحها
| مشكلة | السبب المحتمل | حل |
|---|---|---|
| لا يوجد إخراج فيديو على الشاشة. | وصلة كابل غير محكمة، مصدر إدخال غير صحيح على الشاشة، جهاز تسجيل الفيديو الشبكي غير مُشغّل. | تحقق من توصيلات كابل HDMI/VGA. تأكد من ضبط الشاشة على المدخل الصحيح. تحقق من تشغيل جهاز التسجيل الشبكي (NVR). |
| الكاميرات لا تعرض البث المباشر view. | Camera not powered, network issue, camera not added to NVR, incorrect IP address. | Check camera power and Ethernet cables. Ensure cameras are connected to PoE ports. Use NVR's camera management to search and add cameras. Verify camera IP addresses. |
| لا يوجد تسجيل أو طعام مفقودtage. | Hard drive not installed/initialized, recording schedule not configured, hard drive full, hard drive failure. | Install and initialize HDD. Configure recording schedules. Check HDD status and capacity. Replace faulty HDD. |
| لا يمكن الوصول إلى جهاز تسجيل الفيديو الشبكي (NVR) عن بُعد. | Network configuration issues, P2P disabled, incorrect app settings, firewall blocking. | Ensure NVR has internet access. Enable P2P service. Verify app settings and NVR's network configuration. Check router firewall settings. |
8. المواصفات
| ميزة | التفاصيل |
|---|---|
| نموذج | DS-7608NI-I2/8P |
| ماركة | PANOEAGLE (Compatible with Hi-k USA systems) |
| عدد القنوات | 8 |
| اقصي دقة | تصل إلى 12 ميجا بكسل |
| ضغط الفيديو | H.264+/H.264/H.265 |
| مخرج الفيديو | HDMI ، VGA |
| مدخل الصوت | ار سي ايه |
| واجهات SATA | 2 (for HDD) |
| تكنولوجيا الاتصال | HDMI، إيثرنت (PoE) |
| تاريخ أول توفر | 28 يوليو 2021 |
9. الضمان والدعم
For warranty information, please refer to the warranty card included with your product or visit the official PANOEAGLE webقد يتوفر الدعم الفني من خلال موقع الشركة المصنعة. webالموقع أو عن طريق الاتصال بقسم خدمة العملاء الخاص بهم.
Always ensure you are using official channels for support and firmware downloads to maintain product integrity and security.