
1. انتهى المنتجview
The KUIDAMOS DSO FNIRSI PRO is a portable digital oscilloscope designed for various measurement tasks. It features a 2.4-inch LCD display, a real-time sampling rate of up to 20MS/s, and an analog bandwidth of 5MHz. This device is equipped with a built-in 1200mAh rechargeable lithium battery, offering approximately 3 hours of continuous operation. It supports waveform storage and management, making it suitable for both maintenance and research and development applications.
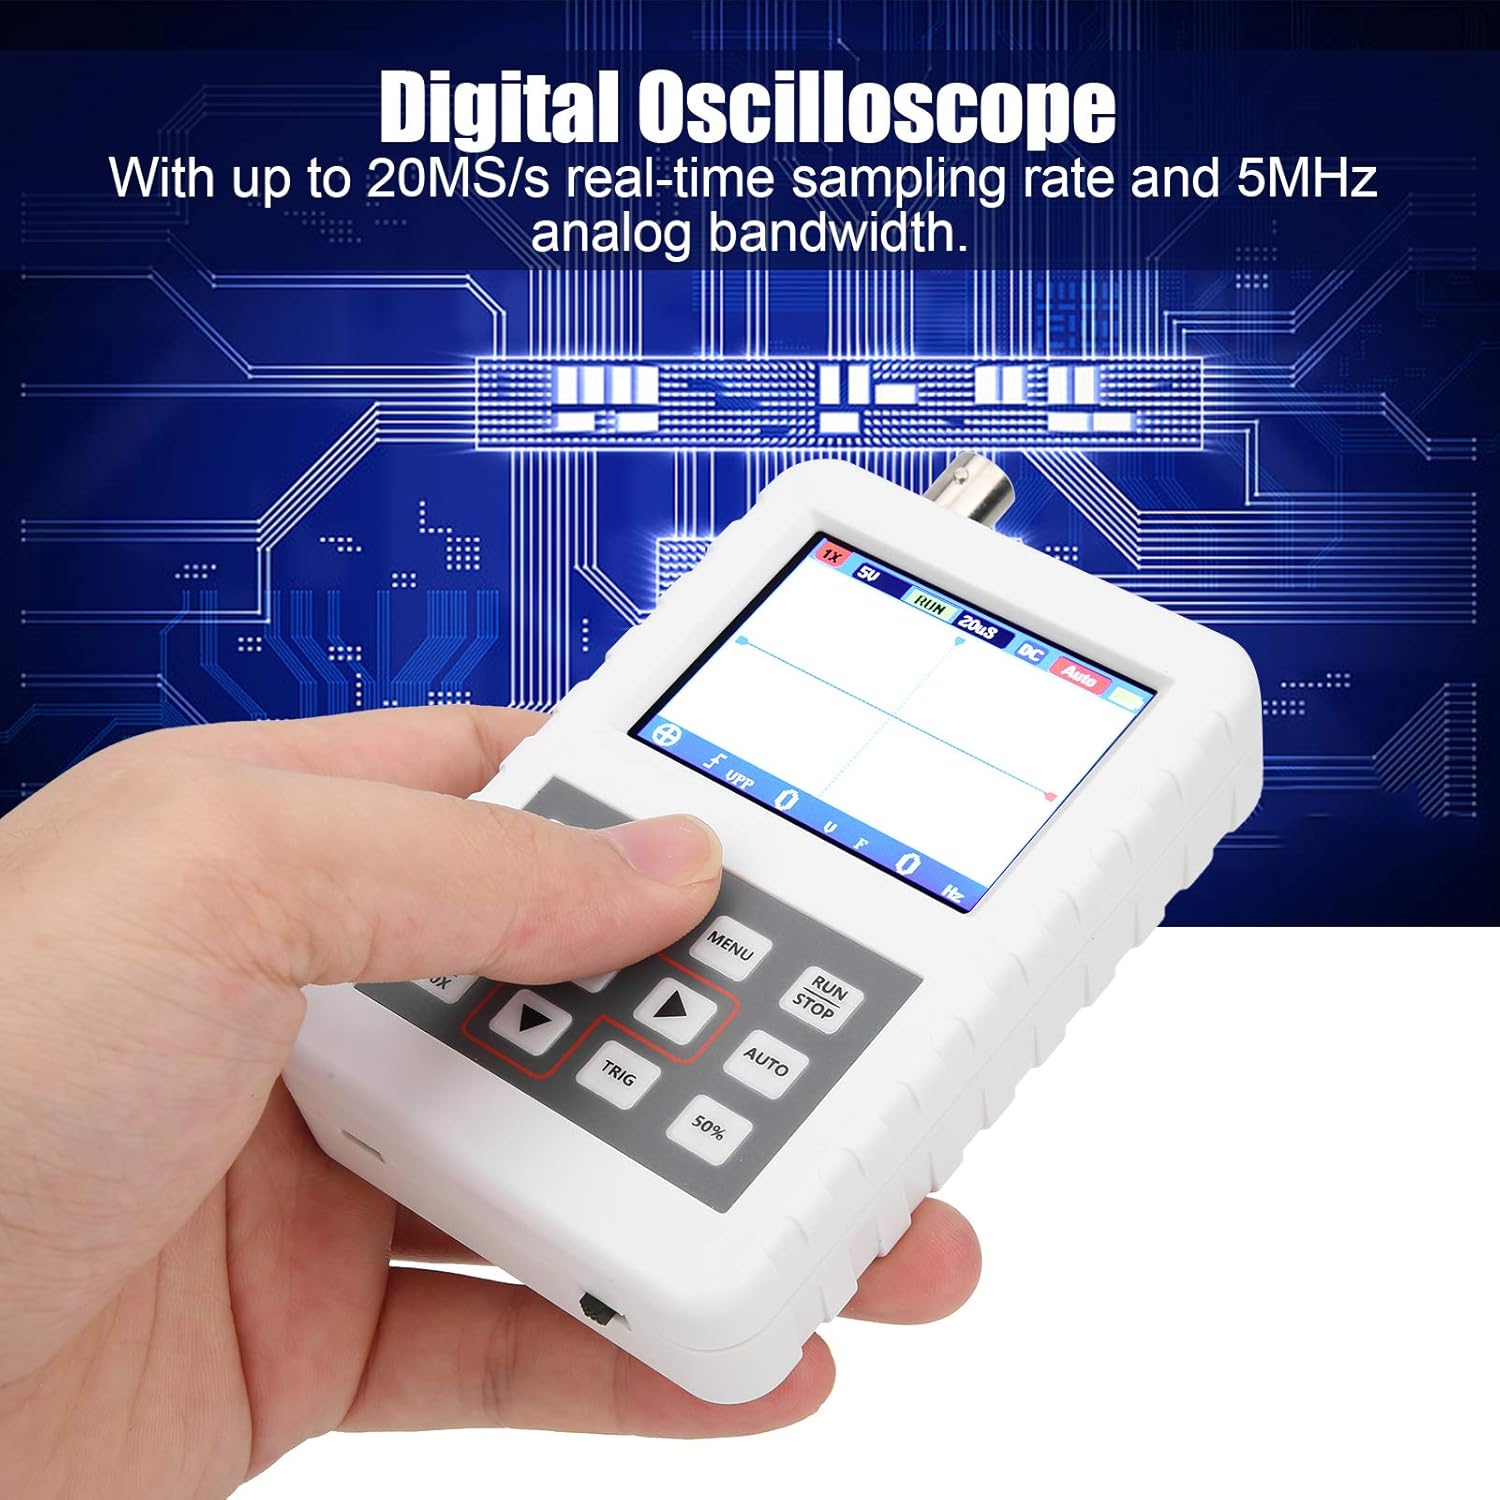
Image 1.1: The DSO FNIRSI PRO Digital Oscilloscope, highlighting its 20MS/s sampling rate and 5MHz analog bandwidth.

Image 1.2: The oscilloscope's 2.4-inch HD LCD screen with 320 x 240 resolution for clear waveform display.

الصورة 1.3: الأمام والخلف views of the DSO FNIRSI PRO, illustrating its physical layout.
2. محتويات العبوة
تأكد من تضمين جميع العناصر المدرجة أدناه في الحزمة الخاصة بك:
- 1 x DSO FNIRSI PRO Digital Oscilloscope
- 1 x Matching Probe
- 1 × خط بيانات USB
- 1 × دليل المستخدم (هذه الوثيقة)
3. الإعداد الأولي
3.1 شحن الجهاز
Before first use, fully charge the oscilloscope. Connect the provided USB data line to the device's charging port and to a 5V/1A, 2A, 3A, or 4A USB power adapter. The built-in 1200mAh lithium battery can be charged continuously for approximately 3 hours.
3.2 توصيل المسبار
Connect the matching probe to the BNC connector on the top of the oscilloscope. Ensure a secure connection by twisting the probe connector clockwise until it locks into place.
3.3 تشغيل/إيقاف التشغيل
To power on the device, press and hold the power button (usually located on the side or bottom) for a few seconds until the screen illuminates. To power off, press and hold the power button again until the device shuts down.
4. تعليمات التشغيل
4.1 عناصر التحكم والواجهة
The oscilloscope features a user-friendly interface with several buttons for navigation and function control.

Image 4.1: Operating the DSO FNIRSI PRO, showing the placement of control buttons.
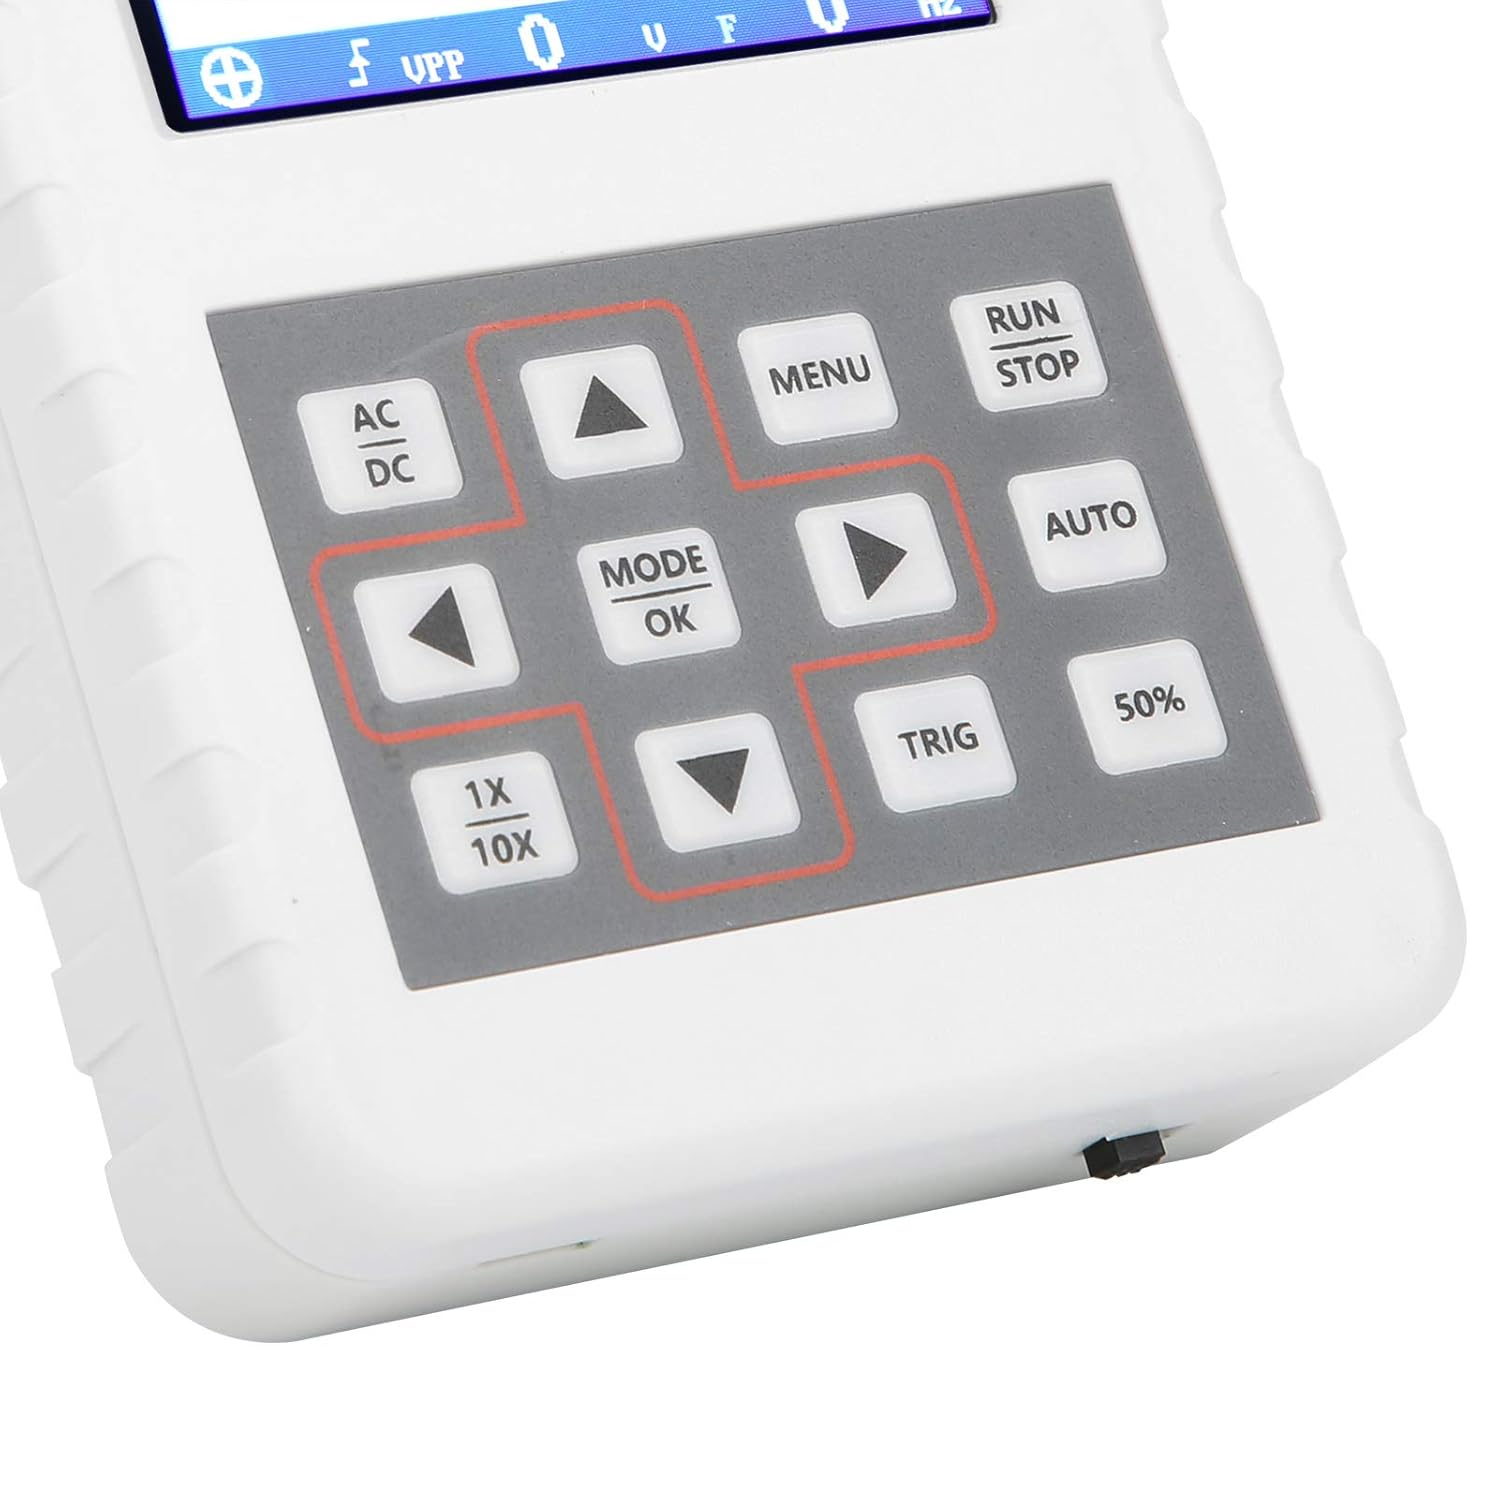
الصورة 4.2: تفصيلية view of the oscilloscope's control panel.
- MENU: يتيح الوصول إلى القائمة الرئيسية للإعدادات والوظائف.
- تشغيل/إيقاف: Starts or pauses waveform acquisition.
- تلقاءي: Automatically adjusts settings for optimal waveform display.
- علم حساب المثلثات: Adjusts trigger level.
- 50%: Sets the trigger level to 50% of the waveform ampخط الطول.
- التيار المتناوب/تيار مستمر: Toggles between AC and DC coupling modes.
- 1X/10X: Sets the oscilloscope's input attenuation to match the probe's setting.
- MODE/OK: Confirms selections or changes modes.
- أزرار الأسهم (أعلى، أسفل، يسار، يمين): Navigate menus and adjust parameters.
4.2 Probe Attenuation Settings
It is critical to match the probe's attenuation setting with the oscilloscope's input setting to ensure accurate measurements.
- ل 1X measurement (0-40V): Set both the physical switch on the probe and the 1X/10X button on the oscilloscope to the 1X موضع.
- ل 10X measurement (40-800V): Set both the physical switch on the probe and the 1X/10X button on the oscilloscope to the 10X موضع.
4.3 Measurement Modes and Triggering
The oscilloscope supports various trigger modes to stabilize waveform display:
- أعزب: Captures a single waveform event and then stops.
- طبيعي: Captures a waveform only when a trigger condition is met.
- آلي: Continuously acquires waveforms, even without a trigger, but will trigger if a signal is present.
استخدم علم حساب المثلثات button and arrow keys to adjust the trigger level, which determines the voltage point at which the oscilloscope begins to acquire data.
4.4 Waveform Storage and Management
The device includes 16MB of built-in storage, capable of storing up to 500 waveform images. Use the file manager function to browse, view, and manage saved waveforms. This includes viewing detailed information, flipping through images, and deleting unwanted files.

الصورة 4.3: مثالamples of sine wave measurements at various frequencies.

الصورة 4.4: مثالamples of square, triangular, and sawtooth wave measurements.
5. الرعاية والصيانة
5.1 التنظيف
Wipe the device with a soft, dry cloth. Do not use abrasive cleaners or solvents, as they may damage the casinأو الشاشة. تأكد من إيقاف تشغيل الجهاز وفصله عن أي مصدر طاقة قبل التنظيف.
5.2 العناية بالبطارية
لإطالة عمر البطارية، تجنب تفريغها بالكامل بشكل متكرر. إذا كنت ستخزن الجهاز لفترة طويلة، اشحنه إلى حوالي 50% وأعد شحنه كل بضعة أشهر.
5.3 التخزين
Store the oscilloscope in a cool, dry place, away from direct sunlight, extreme temperatures, and high humidity. Keep it protected from dust and physical impact.
6. استكشاف الأخطاء وإصلاحها
- Issue: Abnormal measured data.
حل: Check the probe's attenuation switch (1X or 10X) and ensure it matches the setting on the oscilloscope (using the 1X/10X button). If the probe is set to 10X and the oscilloscope is set to 1X, the device will not be damaged, but the data displayed will be incorrect. - Issue: Device does not power on.
حل: Ensure the battery is sufficiently charged. Connect the device to a power source using the USB data line and allow it to charge for at least 30 minutes before attempting to power it on again. - Issue: Screen is blank or frozen.
حل: Try performing a soft reset by pressing and holding the power button for an extended period (e.g., 10-15 seconds) until the device powers off, then power it back on. If the issue persists, ensure the battery is charged.
7. المواصفات الفنية
| ميزة | مواصفة |
|---|---|
| نموذج المنتج | DSO FNIRSI PRO |
| مادة المنتج | نظام ABS |
| عدد القنوات | 1 |
| حجم الشاشة | تقريبًا 6.1 سم / 2.4 بوصة |
| دقة الشاشة | 320 × 240 |
| نوع العرض | شاشة LCD |
| النطاق الترددي التناظري | 5 ميجا هرتز |
| الحد الأقصى Sampمعدل لينغ | 20 ميجا عينة في الثانية |
| وضع الزناد | Single/Normal/Auto |
| تخزين الشكل الموجي | 16MB (up to 500 waveform pictures) |
| بطارية مدمجة | بطارية ليثيوم 1200 مللي أمبير |
| وقت الاستعداد | 3 ساعات |
| مدخل الشحن | 5V/1A/2A/3A/4A |
| الشركة المصنعة | KUIDAMOS |
| بلد المنشأ | الولايات المتحدة الأمريكية |
| رقم جزء العنصر | KUIDAMOStgaix9hwck |
8. الضمان ودعم العملاء
For warranty information, technical support, or service inquiries, please refer to the documentation provided with your purchase or contact the seller directly. Keep your purchase receipt as proof of purchase for any warranty claims.