1. المقدمة
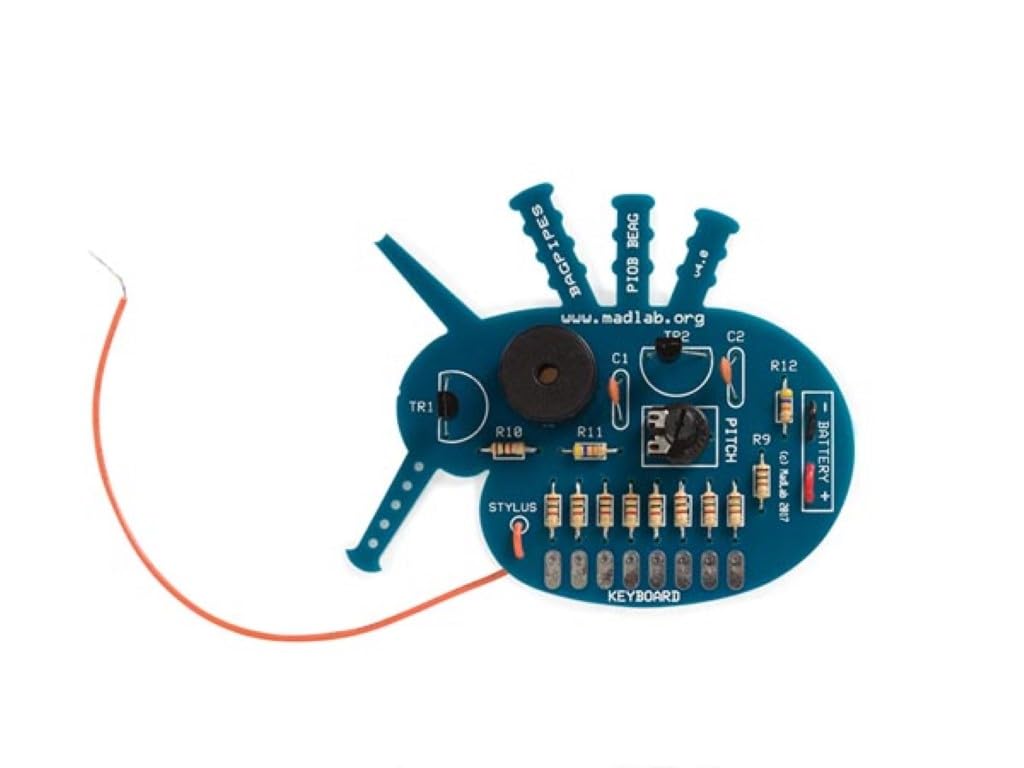
The Whadda MadLab Electronic Kit - Bagpipes (Model WSG104) is an engaging audio oscillator kit designed for electronics enthusiasts. This kit allows you to construct a device capable of producing eight distinct tones, ranging from approximately 300Hz to 5kHz. By moving a stylus wire across a network of resistors, you can interactively change the pitch, mimicking the sound of bagpipes. This manual provides detailed instructions for assembly, operation, and maintenance of your kit.
2. معلومات السلامة
Please read and understand all safety instructions before beginning assembly or operation. This kit involves soldering, which requires caution.
- السلامة أثناء اللحام: Always work in a well-ventilated area. Use appropriate eye protection. Avoid touching the hot tip of the soldering iron. Allow soldered joints to cool before handling.
- سلامة البطارية: Use only a 9V battery. Do not short-circuit the battery terminals. Remove the battery if the kit will not be used for an extended period. Do not attempt to recharge non-rechargeable batteries.
- إشراف الكبار: This kit contains small parts and requires soldering. Adult supervision is recommended for younger users.
- المعالجة العامة: Avoid contact with water or other liquids. Do not modify the circuit beyond the intended design.
3. محتويات العبوة
Before starting assembly, verify that all components listed below are present in your kit. If any parts are missing or damaged, please contact your supplier.
- لوحة الدوائر المطبوعة (PCB)
- Resistors (various values, including R1-R8 for the keyboard)
- Capacitors (C1, C2)
- Transistors (TR1, TR2)
- Potentiometer (VR1 - Pitch control)
- Piezo Buzzer/Speaker
- 9V Battery Clip
- Stylus Wire
- Assorted connecting wires

4. الإعداد والتجميع
Assembly of the Bagpipes kit requires basic soldering skills. Follow the instructions carefully and refer to the PCB markings for component placement.
- تحديد المكونات: Carefully identify each component using the provided component list and the markings on the PCB. Resistors are typically identified by color bands, while capacitors and transistors have specific markings.
- مقاومات اللحام: Begin by soldering the resistors (R1-R12) into their designated positions on the PCB. Ensure the correct resistor value is placed in each location.
- Solder Capacitors and Transistors: Solder the capacitors (C1, C2) and transistors (TR1, TR2) into place. Pay attention to the polarity of electrolytic capacitors (if present) and the orientation of transistors, matching them to the PCB silkscreen.
- Solder Potentiometer and Buzzer: Solder the potentiometer (VR1) and the piezo buzzer into their respective positions.
- Connect Battery Clip: Solder the red wire of the 9V battery clip to the '+' terminal and the black wire to the '-' terminal on the PCB, as indicated.
- Attach Stylus Wire: Solder one end of the stylus wire to the 'STYLUS' pad on the PCB. The other end will be used to interact with the keyboard.
- Inspect Soldering: After all components are soldered, carefully inspect all solder joints for bridges (solder connecting two points that should not be connected) or cold joints (dull, lumpy solder that indicates a poor connection). Re-solder any problematic joints.

5. تعليمات التشغيل
Once assembled, your Bagpipes kit is ready for operation. Follow these steps to produce sounds.
- توصيل البطارية: Connect a fresh 9V battery to the battery clip. Ensure the connection is secure.
- تشغيل الطاقة: The kit does not have an on/off switch. It will be active once the battery is connected.
- Play Tones: Use the stylus wire to touch the metal pads corresponding to resistors R1 through R8 on the 'KEYBOARD' section of the PCB. Each pad will produce a different tone.
- ضبط درجة الصوت: The potentiometer (VR1), labeled 'PITCH', allows you to fine-tune the overall pitch of the tones. Rotate it to experiment with different sound characteristics.
- تجربة: Move the stylus up and down the keyboard resistors to create melodies and explore the eight available tones. The kit can produce tones from approximately 300Hz to 5kHz.
- إيقاف التشغيل: To turn off the kit, simply disconnect the 9V battery from the battery clip.
6. الصيانة
The Whadda MadLab Electronic Kit - Bagpipes requires minimal maintenance to ensure long-lasting performance.
- تنظيف: Keep the PCB and components free from dust and debris. Use a soft, dry cloth for cleaning. Avoid using liquids or abrasive cleaners.
- تخزين: Store the kit in a dry, cool place away from direct sunlight and extreme temperatures. Disconnect the battery when not in use for extended periods.
- تقتيش: Periodically inspect solder joints and connections for any signs of damage or corrosion. Re-solder if necessary.
7. استكشاف الأخطاء وإصلاحها
If you encounter issues with your Bagpipes kit, refer to the following troubleshooting tips:
- لا يوجد صوت:
- Check if the 9V battery is connected correctly and is not depleted.
- Inspect all solder joints, especially those for the battery clip, buzzer, and transistors.
- Ensure the stylus wire is making good contact with the keyboard pads.
- Verify that the buzzer is correctly oriented and soldered.
- صوت ضعيف أو مشوه:
- Replace the 9V battery with a fresh one.
- Check for any cold solder joints or loose connections.
- Ensure all components are correctly placed and oriented.
- Incorrect Tones or No Tone Change:
- Verify that all keyboard resistors (R1-R8) are correctly placed and soldered.
- Check the potentiometer (VR1) for proper soldering and functionality.
- Ensure the stylus wire is making distinct contact with each individual keyboard pad.
8. المواصفات
| رقم الموديل | WSG104 |
| ماركة | وحدة |
| نوع المنتج | Electronic Audio Oscillator Kit |
| مزود الطاقة | بطارية 9 فولت (غير مرفقة) |
| Tones Produced | 8 نغمة مختلفة |
| نطاق التردد | Approximately 300Hz to 5kHz |
| الأبعاد (الطول × العرض × الارتفاع) | 60 × 60 × 16 ملم / 2.4 × 2.4 × 0.6 بوصة |
| وزن العنصر | Approx. 0.06 kg / 2.11 ounces |
9. الضمان والدعم
For warranty information, technical support, or inquiries regarding replacement parts, please contact the manufacturer, Whadda, or your point of purchase. Keep your proof of purchase for any warranty claims.