
لينك ستايل E066280-L002552825FBA
Linkstyle Joycon Joystick Replacement User Manual
Model: E066280-L002552825FBA
مقدمة
This manual provides comprehensive instructions for the installation and use of the Linkstyle 4PCS Joycon Joystick Replacement. Designed for Nintendo Switch and Switch Lite Joy-Con controllers, these 3D analog joysticks offer a high-quality solution for worn-out, broken, or drifting original joysticks, restoring precise control to your gaming experience.
Please read this manual carefully before proceeding with installation to ensure proper function and to avoid damage to your device.
محتويات المنتج
تأكد من وجود جميع المكونات في الحزمة الخاصة بك:
- 4 x Linkstyle 3D Analog Joystick Replacements
- 4 x "Y" Type Screws (Replacement)
- 2 x "+" Type Screws (Replacement)
- 1 x Storage Box for Thumb Sticks

Figure 1: Package Contents. This image displays the four joystick replacements, the included Y-type and cross-type screws, and the storage box, along with approximate dimensions of the joystick.
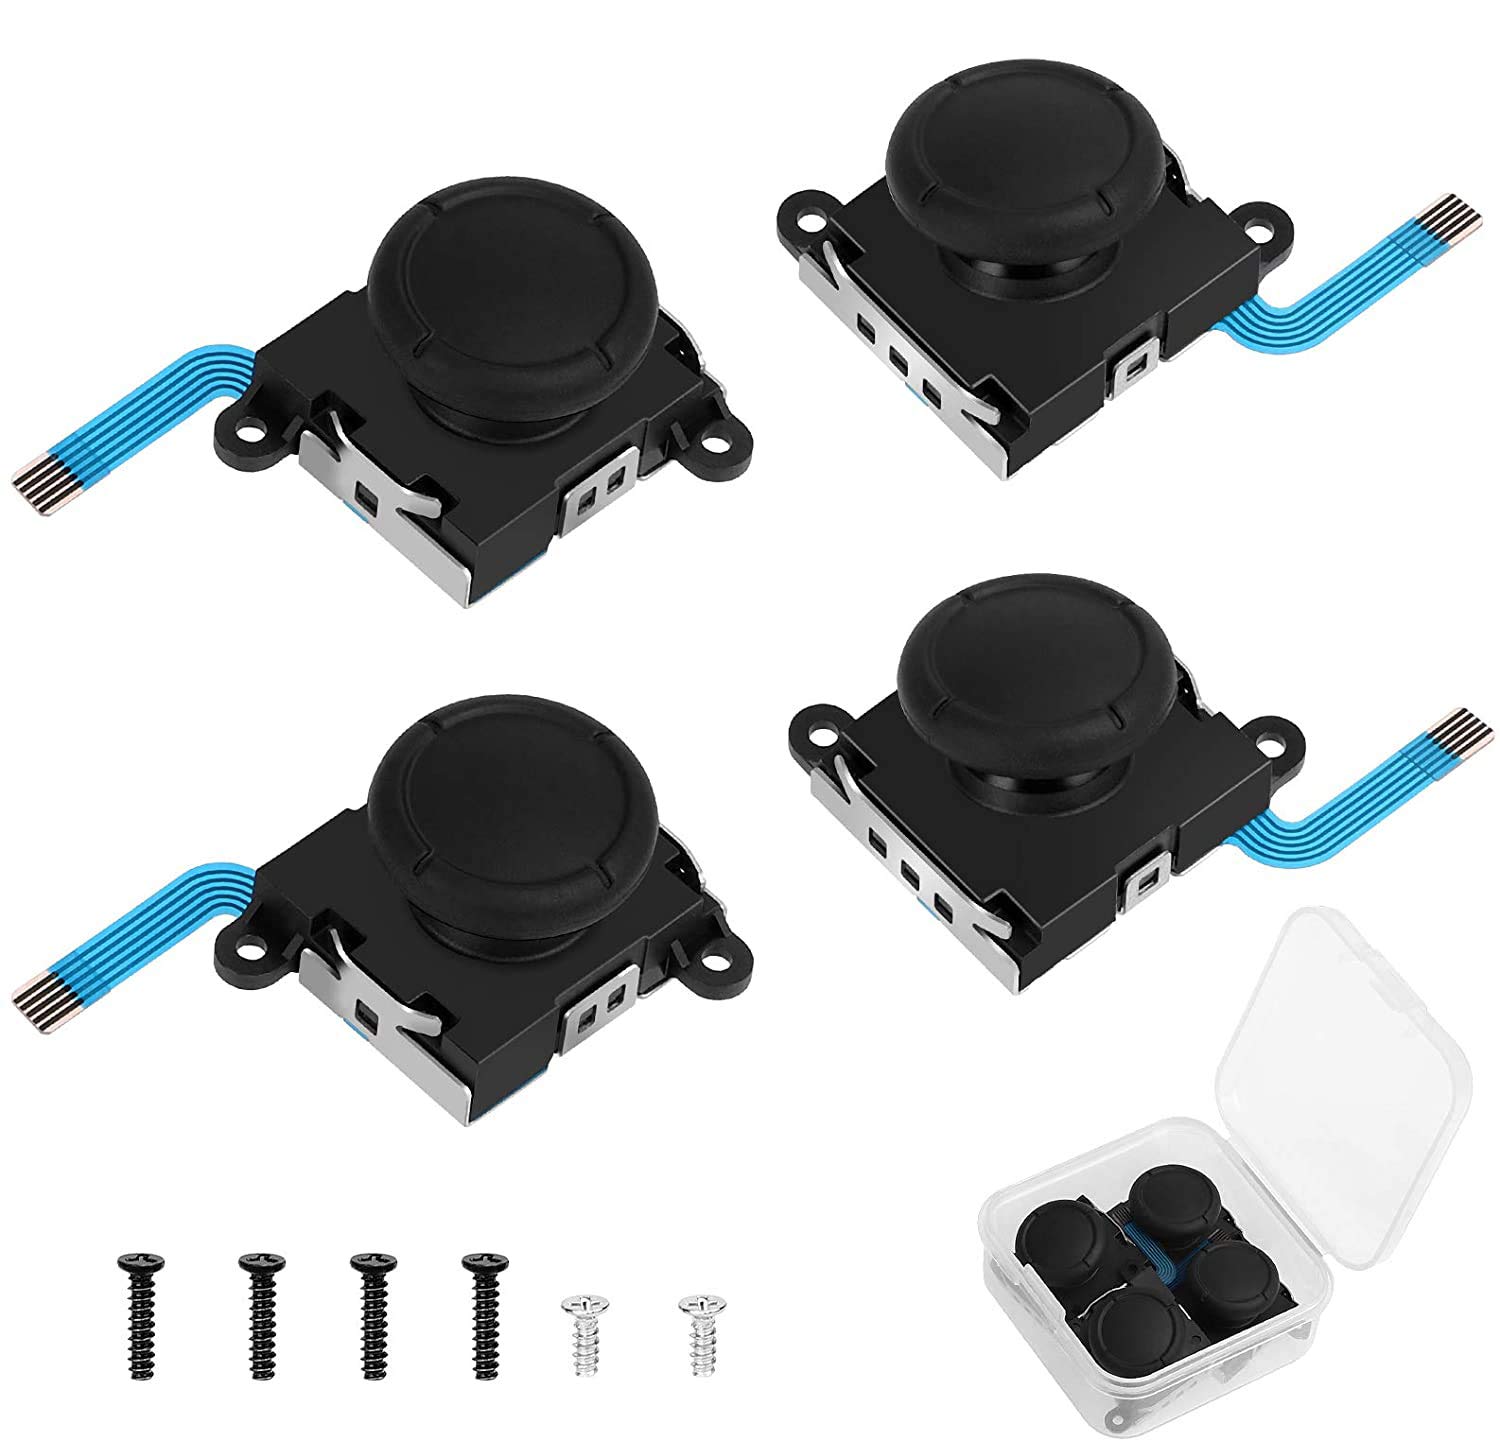
الشكل 2: انتهىview of the Linkstyle Joycon Joystick Replacement kit, showing the four joystick modules, various replacement screws, and a small container for thumb stick caps.
التوافق
The Linkstyle Joycon Joystick Replacements are compatible with the following Nintendo console controllers:
- Nintendo Switch Joy-Con (Left and Right)
- نينتندو سويتش لايت
- Nintendo Switch OLED Model Joy-Con (Left and Right)

Figure 3: Compatibility Chart. This image illustrates the compatibility of the joystick replacements with Nintendo Switch, Switch Lite, and Switch OLED consoles.
سمات
- متانة محسنة: Upgraded quality and wear-resistant materials for prolonged lifespan.
- التحكم الدقيق: 3D analog joysticks provide accurate and responsive input.
- بناء عالي الجودة: Made of durable plastic and metal components, ensuring stable contact and smooth 360-degree joystick control.
- Dustproof Cap Design: Includes a cap to protect the joystick from dust and scratches, contributing to longevity.
- المجموعة الكاملة: Comes with necessary replacement screws for convenient installation.

Figure 4: High-Quality Materials. This image highlights the metal construction of the joystick module and demonstrates the 360-degree range of motion for precise control.
دليل التثبيت
مهم: Joystick replacement requires opening the Joy-Con controller. This process involves small components and delicate connections. If you are not comfortable with electronic repairs, seek professional assistance. Linkstyle is not responsible for any damage incurred during installation.
الأدوات المطلوبة (غير متضمنة):
- Tri-wing (Y-type) screwdriver
- Phillips head (+) screwdriver
- Plastic prying tool or spudger
- ملاقيط
التثبيت خطوة بخطوة:
- إزالة الغطاء الخلفي: Using a tri-wing screwdriver, carefully remove the "Y" screws from the back of the Joy-Con controller. Gently pry open the back cover.
- افصل البطارية: Locate and carefully disconnect the battery connector. Remove the battery and any plastic separator.
- Remove Internal Screws: Using a Phillips head screwdriver, remove the internal "+" screws securing the joystick module.
- Disconnect Joystick Cables: Carefully use tweezers to disconnect the ribbon cables attached to the joystick. Be gentle to avoid tearing.
- Remove Old Joystick: Remove any remaining "+" screws specific to the joystick replacement. Carefully lift out the old, drifting, or broken joystick.
- Install New Joystick: Place the new Linkstyle joystick into position. Reconnect the ribbon cables and secure the joystick with the appropriate "+" screws.
- إعادة التجميع: Reinstall the battery and its separator, reconnect the battery connector, and carefully close the back cover, securing it with the "Y" screws.

Figure 5: Detailed Installation Steps. This image provides a visual walkthrough of the joystick replacement process, from opening the controller to installing the new module.
Operating and Calibration
After installing the new joystick, it is crucial to calibrate it within the Nintendo Switch system settings to ensure accurate performance and eliminate any potential drift.
خطوات المعايرة:
- من قائمة نينتندو سويتش الرئيسية، حدد إعدادات النظام.
- Scroll down the left-hand menu and select وحدات التحكم والمستشعرات.
- يختار معايرة عصي التحكم.
- Follow the on-screen prompts to calibrate the newly installed joystick. This typically involves tilting the stick in various directions and pressing it down.
Proper calibration will ensure the joystick responds correctly to your movements and prevents issues like unintended character movement or camera drift.

Figure 6: Joystick Calibration. This image illustrates the difference between a drifting joystick (top) and a properly calibrated joystick (bottom) on the Nintendo Switch calibration screen.
صيانة
To ensure the longevity and optimal performance of your Linkstyle Joycon Joystick Replacements:
- حافظ على نظافة: Regularly wipe the joystick and surrounding areas with a soft, dry cloth to prevent dust and debris buildup.
- تجنب القوة: Do not apply excessive force or pressure to the joystick during use or storage.
- تخزين بشكل صحيح: When not in use, store your controllers in a clean, dry environment away from extreme temperatures.
- Dustproof Cap: Ensure the dustproof cap is properly seated to protect the internal mechanism.
استكشاف الأخطاء وإصلاحها
If you encounter issues after installing the joystick replacement, consider the following:
المشاكل الشائعة والحلول:
| مشكلة | السبب المحتمل | حل |
|---|---|---|
| Joystick still drifts after replacement. | Improper calibration or faulty installation. | Perform joystick calibration in System Settings. Ensure ribbon cables are securely connected and not damaged. Re-check installation steps. |
| Joystick does not respond. | Ribbon cable not connected properly or damaged. | Re-open the Joy-Con and verify that the joystick's ribbon cables are fully seated in their connectors. Inspect cables for tears. |
| Buttons on Joy-Con not working. | Other internal ribbon cables disconnected during repair. | Carefully re-open the Joy-Con and check all other ribbon cable connections (e.g., for buttons, triggers). |
| Difficulty with screw removal/insertion. | Incorrect screwdriver size or stripped screws. | Ensure you are using the correct tri-wing and Phillips head screwdrivers. Apply gentle, consistent pressure. Use included replacement screws if originals are stripped. |

Figure 7: Applicable Situations. This image illustrates scenarios where joystick replacement is necessary, including joystick drift, slow response, and physical damage.
تحديد
| يصف | التفاصيل |
|---|---|
| اسم المنتج | Linkstyle 4PCS Joycon Joystick Replacement |
| رقم الموديل | E066280-L002552825FBA |
| التوافق | Nintendo Switch, Nintendo Switch Lite, Nintendo Switch OLED Joy-Con controllers |
| مادة | البلاستيك والمعادن |
| وزن العنصر | الوزن الإجمالي للعبوة حوالي 2.08 أونصة |
| أبعاد الحزمة | 1.93 × 1.69 × 1.65 بوصة |
| الشركة المصنعة | لينك ستايل |
الضمان والدعم
For warranty information or technical support regarding your Linkstyle Joycon Joystick Replacement, please refer to the seller's policy on the platform where the product was purchased or contact Linkstyle customer service directly.
You may find additional support resources and contact information on the official Linkstyle store page: Linkstyle Store on Amazon.
Ask a question about this manual
Ask about setup, troubleshooting, compatibility, parts, safety, or missing instructions. Manuals+ will review the question and use this page’s manual context to help answer it.