1. المقدمة
شكرا لك على الشراءasing the UHAPPY U18 Portable Mini HD LED Projector. This manual provides essential information for the safe and efficient operation of your device. Please read it thoroughly before use and retain it for future reference.
احتياطات السلامة
- لا تنظر مباشرة إلى عدسة جهاز العرض عندما يكون الضوءamp هو على.
- تأكد من التهوية المناسبة حول جهاز العرض لمنع ارتفاع درجة الحرارة.
- لا تعرض جهاز العرض للمطر أو الرطوبة.
- استخدم فقط محول الطاقة المرفق مع جهاز العرض.
- لا تحاول فتح جهاز العرض أو إصلاحه بنفسك. قم بإحالة جميع أعمال الصيانة إلى فنيين مؤهلين.
2. انتهى المنتجview
Familiarize yourself with the components and ports of your UHAPPY U18 projector.
محتويات الحزمة
The following items are included in your projector package:

Image: Contents of the UHAPPY U18 projector package, including the projector, power adapter, AV cable, remote control, and user manual.
- UHAPPY U18 Mini LED Projector
- محول الطاقة
- كبل AV
- جهاز التحكم عن بعد
- دليل المستخدم (هذا المستند)
Projector Components and Ports

Image: Angled top-down view of the UHAPPY U18 projector, highlighting the lens, focus adjustment, and control panel.

الصورة: أعلى view of the UHAPPY U18 projector, showing the integrated control buttons.

الصورة: الجبهة view of the UHAPPY U18 projector, focusing on the projection lens.
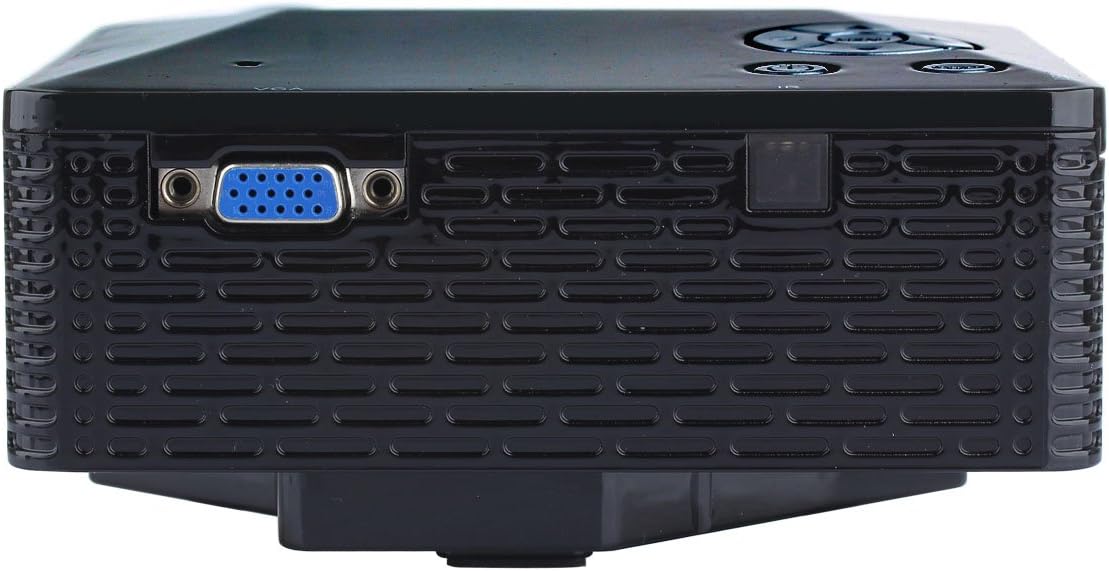
الصورة: الجانب view of the UHAPPY U18 projector, illustrating the VGA input port.
The projector features various input ports for connectivity:
- مدخلات HDMI: For connecting devices like laptops, gaming consoles, or media players.
- منفذ USB: For connecting USB storage devices to play media directly.
- فتحة بطاقة SD: For inserting SD memory cards to play media directly.
- مدخلات AV: For connecting older devices using the included AV cable.
- مدخل في جي ايه: For connecting computers or laptops with a VGA output.
- التيار المباشر الداخل: منفذ إدخال الطاقة.
- مخرج سماعة الرأس: لتوصيل أجهزة الصوت الخارجية أو سماعات الرأس.
- مقبض التركيز: Located near the lens for adjusting image clarity.
3. الإعداد
3.1 التنسيب
Place the projector on a stable, flat surface. Ensure there is adequate space around the projector for ventilation. The ideal projection distance is between 1 to 4 meters, yielding an image size of 20 to 80 inches.
3.2 توصيل الطاقة
- قم بتوصيل محول الطاقة بمنفذ DC-IN الموجود على جهاز العرض.
- قم بتوصيل محول الطاقة بمأخذ كهربائي مناسب.
3.3 توصيل أجهزة الإدخال
Choose the appropriate cable and port based on your source device:
- HDMI: Connect an HDMI cable from your device (e.g., laptop, DVD player) to the projector's HDMI port.
- VGA: Connect a VGA cable from your computer to the projector's VGA port.
- من: Use the provided AV cable to connect devices with AV output (e.g., older DVD players, set-top boxes) to the projector's AV port.
- بطاقة USB / SD: قم بإدخال محرك أقراص USB في منفذ USB أو بطاقة SD في فتحة بطاقة SD.
4. تعليمات التشغيل
4.1 تشغيل/إيقاف التشغيل
- لتشغيل: Press the power button on the projector or the remote control. The LED indicator will light up.
- لإيقاف التشغيل: Press the power button again. It is recommended to allow the projector to cool down for a few minutes before unplugging it.
4.2 اختيار المصدر
After powering on, you may need to select the input source:
- Press the 'Source' button on the projector or the remote control.
- Use the navigation buttons to select the desired input (HDMI, VGA, AV, USB, SD) and press 'OK' or 'Enter'.
4.3 تعديل التركيز
If the projected image appears blurry:
- Rotate the focus knob located near the projector lens until the image becomes clear and sharp.
4.4 تصفح القائمة
Use the 'Menu' button on the projector or remote to access settings. Use the navigation arrows to move through options and 'OK' or 'Enter' to confirm selections. The projector supports multiple languages including English, Czech, Slovak, Danish, German, Spanish, French, Croatian, Italian, Hungarian, Dutch, Norwegian, Polish, Portuguese, Romanian, Slovene, Serbian, Finnish, Swedish, Bulgarian, Greek, Russian, and Chinese.
4.5 تنسيقات الوسائط المدعومة
When playing media directly from USB or SD card, the projector supports the following formats:
- صورة: BMP, JPEG, PNG
- فيديو: MPEG1, MPEG2, MPEG4, RM, RMVB, AVI, FLV, WMV
5. الصيانة
5.1 تنظيف العدسة
استخدم قطعة قماش ناعمة وخالية من الوبر مصممة خصيصًا للعدسات البصرية لمسح عدسة جهاز العرض برفق. تجنب استخدام المواد الكاشطة أو المواد الكيميائية القاسية.
5.2 التنظيف العام
Wipe the projector's exterior with a soft, dry cloth. Do not use liquid cleaners directly on the device. Ensure ventilation openings are free from dust and obstructions.
5.3 التخزين
When not in use, store the projector in a cool, dry place, away from direct sunlight and extreme temperatures. It is advisable to cover the lens to protect it from dust.
6. استكشاف الأخطاء وإصلاحها
إذا واجهت مشكلات مع جهاز العرض الخاص بك، فراجع المشكلات والحلول الشائعة التالية:
| مشكلة | السبب المحتمل | حل |
|---|---|---|
| لا توجد صورة على الشاشة | تم تحديد مصدر إدخال غير صحيح اتصال كابل فضفاض الجهاز المصدر غير مُشغّل | حدد مصدر الإدخال الصحيح. تحقق من كافة توصيلات الكابلات. تأكد من أن الجهاز المصدر قيد التشغيل ويخرج إشارة. |
| الصورة ضبابية | لم يتم ضبط التركيز | Rotate the focus knob until the image is clear. |
| لا يوجد صوت | مستوى الصوت منخفض جدًا جهاز الصوت الخارجي غير متصل إعدادات الصوت لجهاز المصدر | قم بزيادة حجم جهاز العرض. Connect external speakers/headphones to the audio output. تحقق من إعدادات الصوت على جهازك المصدر. |
| يسخن جهاز العرض ويتوقف عن العمل | التهوية المسدودة الاستخدام لفترات طويلة في بيئة حارة | تأكد من أن فتحات التهوية واضحة. Allow the projector to cool down. Operate in a well-ventilated area. |
7. المواصفات
Technical specifications for the UHAPPY U18 Portable Mini HD LED Projector:
- نظام الصور: شاشة الكريستال السائل
- الدقة الأصلية: 320×240
- Lamp: قاد
- حياة LED: 20,000 ساعات
- سطوع: 60 لومن
- مقابلة: 300:1
- عدسة: ف=125
- حجم الصورة: 20-80 بوصة
- مسافة الإسقاط: 1-4 متر
- وضع الإسقاط: الإسقاط الأمامي
- وضع التشغيل: يدوي / ريموت كنترول
- أطراف الإدخال: AV, VGA, USB, SD, HDMI
- الإخراج: سماعة الرأس
- قوة: 24 واط
- لون: 16.77 مليون لون
- المتحدث: 1.0 وات*2
- درجة حرارة العمل: 10-35 درجة مئوية
- أبعاد: 135 × 132 × 52 ملم
- وزن: 0.44 كجم
8. الضمان والدعم
This product is manufactured by Generic. For warranty information and technical support, please refer to the documentation provided at the time of purchase or contact your retailer. Keep your purchase receipt as proof of purchase.