
1. المقدمة
This manual provides essential information for the safe and effective use of your Amcrest IP8M-2493EB Outdoor PoE Bullet Camera. Please read these instructions thoroughly before installation and operation to ensure optimal performance and to prevent damage to the device.
2. انتهى المنتجview
2.1 الميزات الرئيسية
- 2MP IP PoE Bullet Camera
- 1920x1080p @30fps Video Resolution
- Nightvision up to 98 feet (30 meters)
- تصنيف IP67 لمقاومة الطقس للاستخدام الخارجي
- Cloud Storage Capability
- Wall Mount Design
- 4K Video Capture Resolution (for recording)
- Motion Sensor Special Feature
2.2 محتويات العبوة
تأكد من وجود جميع المكونات في الحزمة الخاصة بك:
- Amcrest IP8M-2493EB Outdoor PoE Bullet Camera
- أدوات التثبيت (البراغي والمثبتات)
- دليل البدء السريع (هذا الدليل)
2.3 مكونات الكاميرا
Familiarize yourself with the camera's physical components:

الشكل 1: الجبهة view of the Amcrest IP8M-2493EB Bullet Camera, showing the lens, IR LEDs, and housing.
3. الإعداد
3.1 قبل أن تبدأ
Ensure you have the following items and conditions:
- A Power over Ethernet (PoE) switch or PoE injector (802.3af/at compliant)
- Cat5e or Cat6 Ethernet cable
- A stable internet connection (recommended for remote viewing and cloud features)
- A drill and screwdriver for mounting
3.2 التثبيت المادي
- اختر موقع التركيب: Select a suitable wall location that provides the desired viewزاوية الميل وفي متناول كابل الإيثرنت الخاص بك.
- تحديد أماكن حفر الثقوب: Use the provided mounting template (if included) or the camera base to mark the positions for drilling.
- ثقوب الحفر: قم بحفر ثقوب تجريبية وأدخل مثبتات الحائط إذا كنت تقوم بالتركيب على الجدران الجافة أو البناء.
- تأمين الكاميرا: Attach the camera base to the wall using the provided screws.
- ضبط الزاوية: Loosen the adjustment screws on the camera body to position the camera for optimal coverage, then tighten them securely.
3.3 اتصال الشبكة
Connect one end of the Ethernet cable to the camera's Ethernet port and the other end to a PoE port on your PoE switch or injector. The camera will power on automatically.
3.4 التكوين الأولي
For initial setup and configuration, download the Amcrest View Pro app on your mobile device or use the Amcrest web interface via a computer connected to the same network. Follow the on-screen instructions to discover and add your camera to your system.
4. تشغيل الكاميرا
4.1 الوصول إلى البث المباشر View
Access the live video feed through the Amcrest View Pro app or the web interface. This allows real-time monitoring of your surveillance area.
4.2 التسجيل والتخزين
تدعم الكاميرا خيارات تسجيل متنوعة:
- التخزين المحلي: If equipped with a microSD card slot (card sold separately), recordings can be stored directly on the camera.
- مسجل الفيديو الشبكي (NVR): Connect the camera to a compatible Amcrest NVR for continuous recording and extended storage.
- التخزين السحابي: Utilize Amcrest Cloud services for off-site storage of event-triggered recordings. Refer to the Amcrest website for subscription details.
4.3 اكتشاف الحركة
Configure motion detection settings via the camera's interface. You can define detection zones, sensitivity levels, and set up alerts (e.g., email notifications, push notifications to your phone) when motion is detected.
4.4 الرؤية الليلية
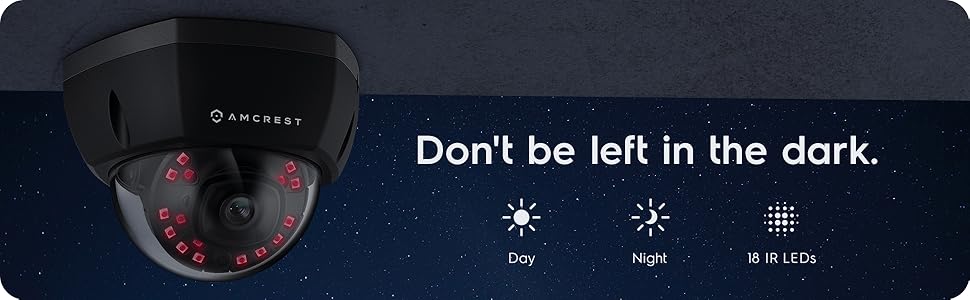
The camera features infrared (IR) LEDs for night vision, providing clear surveillance footage in low-light or no-light conditions up to 98 feet. The camera automatically switches between day and night modes.
الشكل 2: مثالample of night vision capability, illustrating clear image capture in dark conditions.
5. الصيانة
5.1 التنظيف
قم بتنظيف عدسة الكاميرا والغلاف بشكل دوري باستخدام قطعة قماش ناعمة.amp قطعة قماش. تجنب استخدام المواد الكيميائية القاسية أو المواد الكاشطة التي قد تخدش العدسة أو تتلف الطبقة الخارجية.
5.2 تحديثات البرامج الثابتة
Regularly check for and install firmware updates from the Amcrest webالموقع. غالبًا ما تتضمن تحديثات البرامج الثابتة تحسينات في الأداء وميزات جديدة وتحسينات أمنية.
5.3 حماية الطقس
The IP8M-2493EB camera has an IP67 weatherproof rating, meaning it is protected against dust ingress and can withstand immersion in water up to 1 meter for 30 minutes. While designed for outdoor use, ensure all cable connections are properly sealed to maintain water resistance.
6. استكشاف الأخطاء وإصلاحها
6.1 المشكلات والحلول الشائعة
- لا يوجد كهرباء/لا يوجد فيديو: Ensure the Ethernet cable is securely connected to both the camera and a functioning PoE port. Check the PoE switch/injector for power.
- ضعف جودة الصورة: Clean the camera lens. Check network bandwidth. Adjust resolution and compression settings in the camera interface. Ensure sufficient lighting for optimal image clarity.
- Night Vision Halo Effect: This can occur if the IR light reflects off nearby surfaces or the camera housing. Ensure there are no obstructions close to the lens.
6.2 Video Support
For visual guidance on resolving common issues, including potential IR reflection, please refer to the following video:
Video 1: This video from Amcrest Direct provides instructions on resolving IR reflection issues that can affect night vision clarity in Amcrest cameras.
7. المواصفات
| ميزة | مواصفة |
|---|---|
| اسم الموديل | IP8M-2493EB |
| الاستخدام الداخلي والخارجي | في الهواء الطلق |
| مصدر الطاقة | AC/DC (via PoE) |
| بروتوكول الاتصال | إيثرنت |
| نوع التركيب | حامل الحائط |
| دقة التقاط الفيديو | 4K |
| لون | أسود |
| عدد العناصر | 1 |
| عدد القنوات | 1 |
| تكنولوجيا الاتصالات اللاسلكية | POE (الطاقة عبر الإيثرنت) |
| عامل الشكل | رصاصة |
| نطاق الرؤية الليلية | 98 قدم (30 متر) |
| معدل الإطارات | 30 إطارًا في الثانية |
| أبعاد العنصر (الطول × العرض × الارتفاع) | 6.1 × 6.1 × 5.4 بوصة |
| وزن العنصر | 1.3 رطل |
| هل تحتاج إلى بطاريات؟ | لا |
| تقنية الإضاءة المنخفضة | لون الليل |
| تصنيف الحماية الدولية | IP67 |
| الحد الأقصى Webدقة صورة الكاميرا | 2 ميجا بكسل |
| طريقة التحكم | برنامج |
| الاستخدامات الموصى بها للمنتج | الأمن الخارجي |
| تكنولوجيا الاتصال | سلكي |
| ميزة خاصة | مستشعر الحركة |
8. الضمان والدعم
Amcrest products typically come with a limited warranty. For specific warranty terms, registration, and technical support, please visit the official Amcrest website or contact Amcrest customer service directly. Keep your purchase receipt for warranty claims.
Amcrest Support: https://amcrest.com/support