
معلومات هامة حول السلامة
تحذير: To avoid electric shock, always disconnect power at the main circuit breaker or fuse box before beginning installation or performing any maintenance. This product must be installed in accordance with the applicable installation code by a person familiar with the construction and operation of the product and the hazards involved. If you are unsure about any part of the installation process, consult a qualified electrician.
تحذير بشأن الاقتراح 65: قد يحتوي هذا المنتج على مواد كيميائية معروفة في ولاية كاليفورنيا بأنها تسبب السرطان والعيوب الخلقية أو غيرها من الأضرار التناسلية. يرجى مراجعة القوانين المحلية قبل الشراء.asinز هذا المنتج.
Always use a stable ladder and ensure all connections are secure. Do not exceed the maximum wattagتم تحديده للمصابيح.
محتويات الحزمة
Verify that all components are present before beginning installation. The package should include:
- Chandelier fixture body with adjustable arms
- Mounting bracket and hardware (screws, nuts, washers)
- المظلة
- Chain (if applicable for hanging height adjustment)
- دليل التعليمات
- معلومات الضمان
Note: Light bulbs are typically sold separately. This fixture requires eight medium G40 up to 100W bulbs.
تعليمات التثبيت
الأدوات المطلوبة (غير متضمنة):
- فيليبس رئيس مفك
- مفك براغي ذو رأس مسطح
- تقشير الأسلاك
- كماشة
- شريط كهربائي
- المجلدtagه اختبار
- سلم متدرج
الخطوة 1: التحضير للتثبيت
- فصل الطاقة: Locate the main circuit breaker or fuse box for your home and turn off the power to the circuit where you will be installing the chandelier.
- التحقق من إيقاف تشغيل الطاقة: استخدم مجلدtage tester to confirm that the power is completely off at the junction box where the fixture will be installed.
- إزالة التركيبات القديمة: Carefully remove any existing light fixture from the ceiling, disconnecting its wiring.
- فك التعبئة والتفتيش: Unpack the new Kichler Armstrong Chandelier and all its components. Inspect for any damage or missing parts.
الخطوة 2: تثبيت كتيفة التركيب
- قم بتثبيت دعامة التثبيت على صندوق التوصيل الموجود في السقف باستخدام البراغي المرفقة. تأكد من تثبيتها بإحكام.
- Thread the fixture's wires through the mounting box and prepare them for connection.
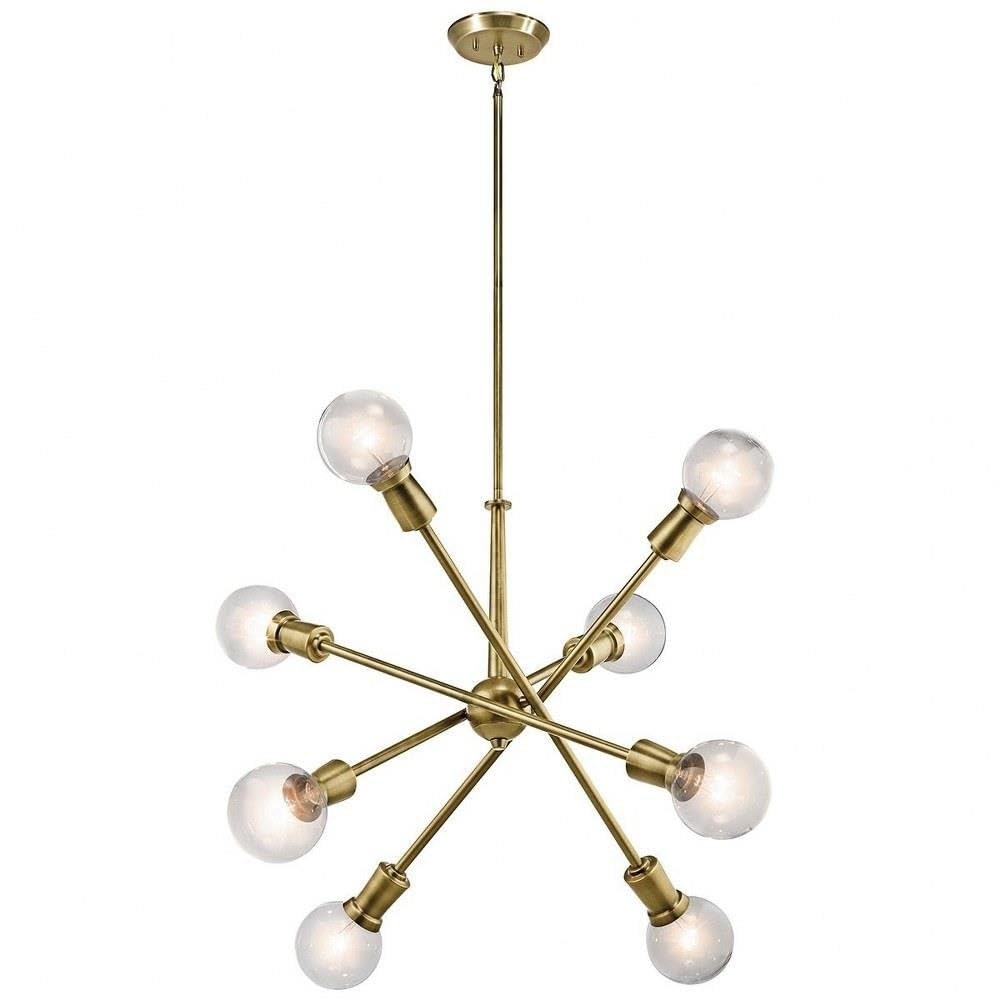
Image: The Kichler Armstrong 8-Light Chandelier in Natural Brass finish, showcasing its adjustable arms and exposed bulbs.
الخطوة 3: اتصالات الأسلاك
- سلك ارضي: Connect the bare copper ground wire from the fixture to the ground wire from the junction box (usually bare copper or green) using a wire nut. If your junction box has a ground screw, wrap the ground wire around it before connecting.
- السلك المحايد: قم بتوصيل السلك الأبيض من التركيبات بالسلك الأبيض (المحايد) من صندوق الوصلات باستخدام صمولة السلك.
- Hot Wire: قم بتوصيل السلك الأسود من التركيبات بالسلك الأسود (الساخن) من صندوق الوصلات باستخدام صمولة الأسلاك.
- اتصالات آمنة: Ensure all wire nuts are tightly secured. Wrap electrical tape around each wire nut and connection for added safety.
- أسلاك الطي: قم بإدخال جميع الأسلاك المتصلة بعناية في صندوق التوصيل، مع التأكد من عدم انضغاط أي سلك.
الخطوة 4: تركيب التركيبات
- Raise the canopy of the chandelier to the ceiling, aligning it with the mounting bracket.
- Secure the canopy to the mounting bracket using the provided hardware (e.g., decorative nuts or screws).
- Adjust the arms of the chandelier to your desired horizontal or vertical configuration.

Image: The Kichler Armstrong Chandelier configured with its arms spread horizontally, ideal for wider spaces.

Image: The Kichler Armstrong Chandelier configured with its arms clustered vertically, suitable for narrower or taller spaces.
الخطوة الرابعة: تركيب المصابيح الكهربائية
- Carefully screw the eight medium G40 bulbs (up to 100W each) into the sockets. Do not overtighten.
دليل فيديو التثبيت:
Video: A step-by-step guide on how to install Kichler Chandeliers and Pendants. This video demonstrates general installation procedures for Kichler lighting fixtures.
تعليمات التشغيل
Once installation is complete and verified, restore power at the main circuit breaker. Operate the chandelier using your wall switch. The adjustable arms allow for customization of light direction and aesthetic. Gently reposition the arms as desired, ensuring not to apply excessive force.
صيانة
- تنظيف: To clean the fixture, ensure power is off. Wipe with a soft, dry cloth. Do not use abrasive cleaners or solvents as they may damage the finish.
- استبدال المصباح: Always turn off power before replacing bulbs. Allow bulbs to cool before handling. Replace with eight medium G40 bulbs, not exceeding 100W per bulb.
- تقتيش: قم بفحص جميع التوصيلات وأجهزة التثبيت بشكل دوري للتأكد من إحكامها.
استكشاف الأخطاء وإصلاحها
| مشكلة | السبب المحتمل | حل |
|---|---|---|
| الضوء لا يضيء |
|
|
| أضواء متقطعة |
|
|
تحديد
| رقم الموديل | 43118نبر |
| ماركة | كيتشلر |
| لون | نحاس طبيعي |
| مادة | الفولاذ السبائكي، الزجاج |
| أسلوب | Modern, Contemporary/Mid-Century Modern |
| شكل تركيبات الإضاءة | الثريا |
| نوع الغرفة | Living Room, Dining Room, Kitchen, Foyer |
| الاستخدام الداخلي والخارجي | داخلي |
| مصدر الطاقة | كهرباء سلكية |
| مصدر الضوء | ساطع |
| عدد مصادر الضوء | 8 |
| المجلدtage | 120 فولت |
| واتtage | 100 واط (لكل مصباح) |
| قاعدة المصباح | إي26 |
| أبعاد المنتج الطول × العرض × الارتفاع | 30 بوصة طول × 30 بوصة عرض × 26 بوصة ارتفاع |
| وزن العنصر | 8 رطل |
| التجميع المطلوب | نعم |
الضمان والدعم
ضمان الشركة المصنعة: This Kichler product comes with a limited warranty of one (1) year from the date of purchase.
For additional support, troubleshooting, or to explore coordinating products, please visit the official Kichler Store: متجر كيتشلير على أمازون.