
مقدمة
This manual provides detailed instructions for the installation, operation, and maintenance of your Zmodo PKD-DK4216-500GB H.264 4-Channel DVR System. This system is designed for security surveillance, offering remote access capabilities and night vision cameras. Please read this manual thoroughly before using the product to ensure proper setup and functionality.
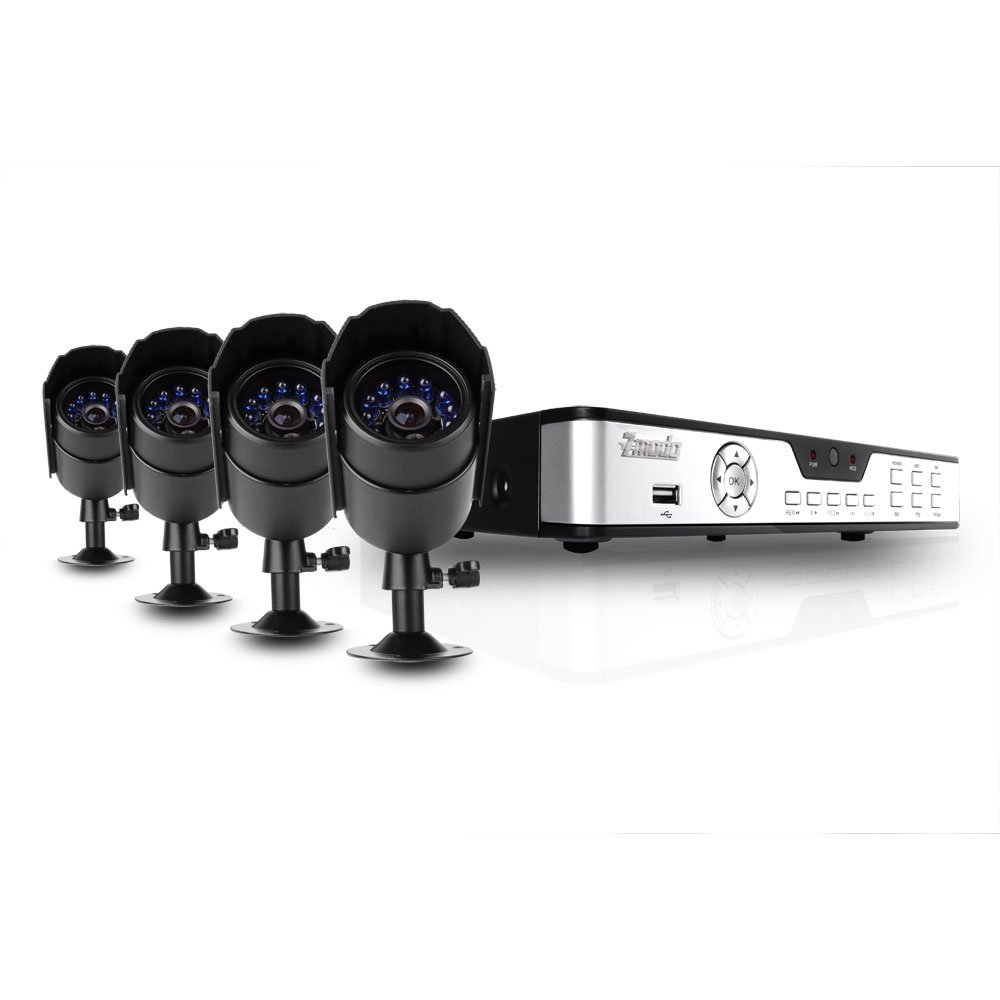
Figure 1: Zmodo PKD-DK4216-500GB DVR System components, including the DVR unit, four night vision cameras, power adapters, cables, a USB mouse, and a remote control.
الإعداد والتثبيت
1. التفريغ والتحقق من المكونات
قم بفك جميع المكونات بعناية وتأكد من تضمين العناصر التالية:
- 1 x Zmodo 4-Channel DVR Unit with 500GB Hard Drive
- 4 x Night Vision Security Cameras
- 4 x Camera Power/Video Cables (60ft each)
- 1 x DVR Power Adapter
- 1 x Camera Power Splitter
- شنومكس x أوسب الماوس
- 1 × جهاز التحكم عن بعد
- 1 × دليل المستخدم (هذه الوثيقة)
2. DVR Connections
Before powering on the DVR, connect all necessary peripherals.
- قم بتوصيل شاشة: Use a VGA or BNC cable to connect your monitor to the corresponding port on the DVR's rear panel.
- توصيل الماوس: Plug the USB mouse into one of the USB ports on the DVR (front or rear).
- ربط الكاميرات: Connect each camera's video cable (BNC connector) to an available video input port on the DVR's rear panel.
- Connect Camera Power: Use the camera power splitter to connect all four cameras to a single power adapter. Plug the power adapter into an electrical outlet.
- قم بتوصيل مصدر طاقة جهاز التسجيل الرقمي: Plug the DVR power adapter into the DVR and then into an electrical outlet. The DVR should power on automatically.
- اتصال الشبكة (اختياري): لجهاز التحكم عن بعد viewing, connect an Ethernet cable from your router to the LAN port on the DVR's rear panel.
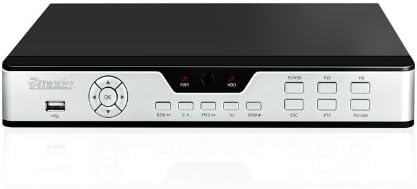
Figure 2: Front panel of the DVR, showing the USB port, navigation buttons, and status indicators.

Figure 3: Rear panel of the DVR, displaying BNC video inputs, VGA output, audio inputs/outputs, LAN port, and power input.
3. تركيب الكاميرا
Mount the cameras in desired locations, ensuring a clear field of view and protection from direct weather exposure. The cameras are designed for both indoor and outdoor use and feature night vision capabilities.
- Securely mount each camera using the provided hardware.
- قم بضبط زاوية الكاميرا لتغطية منطقة المراقبة المطلوبة.
- Route the camera cables to the DVR, ensuring they are protected from damage and moisture.

الشكل 4: الجبهة view of a Zmodo camera, showing the lens and infrared (IR) LEDs for night vision.

الشكل 5: الجانب view of a Zmodo camera, illustrating its bullet design and adjustable mounting bracket.
4. التكوين الأولي لجهاز التسجيل الرقمي
Upon first power-up, the DVR will guide you through initial setup steps, including setting the date, time, and administrator password. Follow the on-screen prompts using the USB mouse.
تعليمات التشغيل
1. التنقل الأساسي
The DVR interface is primarily controlled using the USB mouse. Right-click to access the main menu, and left-click to select options and navigate through menus.
2. أوضاع التسجيل
يدعم جهاز التسجيل الرقمي أوضاع تسجيل متنوعة:
- التسجيل المستمر: التسجيلات متاحة على مدار الساعة طوال أيام الأسبوع.
- تسجيل كشف الحركة: لا تسجل الكاميرا إلا عند اكتشاف حركة في نطاقها الزمني. view. This conserves hard drive space.
- التسجيل المجدول: Records during specific times of the day or week.
Configure recording settings for each camera through the DVR's main menu under 'Record Settings'.
3. تشغيل الفيديو
لإعادةview تم تسجيل فوtage:
- من القائمة الرئيسية، اختر "تشغيل".
- اختر التاريخ وقناة الكاميرا المطلوبين.
- Use the timeline to navigate through recordings. Motion-triggered events are often marked for easier identification.
4. Remote Access (Internet & 3G Phone)
يدعم جهاز التسجيل الرقمي التحكم عن بعد viewing via Internet Explorer on a PC or through dedicated applications on 3G-enabled smartphones (Blackberry, Android, iPhone, iPad).
- تكوين شبكة: Ensure the DVR is connected to your router via Ethernet. You may need to configure port forwarding on your router and set up a Dynamic DNS (DDNS) service if you do not have a static IP address. Refer to your router's manual and Zmodo's online support for detailed network setup instructions.
- الوصول إلى الكمبيوتر الشخصي: Open Internet Explorer and enter the DVR's IP address. You may be prompted to install an ActiveX control.
- الوصول عبر الهاتف المحمول: Download the appropriate Zmodo application from your smartphone's app store. Follow the in-app instructions to add your DVR using its IP address or DDNS hostname.
صيانة
1. إدارة القرص الصلب
The 500GB hard drive will automatically overwrite the oldest recordings when full. Regularly back up important footage to an external USB drive if needed. You can configure hard drive settings and format the drive through the DVR's system menu.
2. التنظيف
Periodically clean the camera lenses and the DVR unit with a soft, dry cloth. Avoid using harsh chemicals or abrasive materials that could damage surfaces.
3. تحديثات البرامج الثابتة
Check the Zmodo official website for any available firmware updates for your DVR model. Firmware updates can improve performance, add features, or fix bugs. Follow the instructions provided with the update carefully.
استكشاف الأخطاء وإصلاحها
- No image on monitor:
- Ensure the monitor is powered on and correctly connected to the DVR's VGA or BNC output. Verify the DVR is powered on and its power adapter is securely connected.
- Cameras not displaying video:
- Check that all camera power and video cables are securely connected to both the cameras and the DVR. Ensure the camera power adapter is functioning.
- لا يعمل الوصول عن بُعد:
- Verify the DVR is connected to your network. Check your router's port forwarding settings and DDNS configuration. For PC access, ensure ActiveX controls are enabled in Internet Explorer. Consult Zmodo's online support for detailed network troubleshooting guides.
- جودة الرؤية الليلية رديئة:
- Ensure there are no obstructions directly in front of the camera lens that could reflect the infrared light. The effective night vision range is up to 50 feet; objects beyond this distance may appear less clear.
- DVR not recording:
- Check recording schedules and motion detection settings. Verify the hard drive status in the DVR's system menu. Ensure the hard drive is not full (though it should overwrite automatically).
مواصفات المنتج
| ماركة | زمودو |
| رقم الموديل | PKD-DK4216-500GB |
| تكنولوجيا الاتصال | سلكي |
| عدد القنوات | 4 |
| سعة تخزين الذاكرة | 500 GB (Hard Drive Installed) |
| مصدر الطاقة | كهرباء سلكية |
| أبعاد العنصر (الطول × العرض × الارتفاع) | 17.13 × 11.14 × 6.85 بوصة |
| نظام التشغيل (متوافق) | Android (for mobile app) |
| الأجهزة المتوافقة | الهواتف الذكية |
| تقنية الإضاءة المنخفضة | نعم |
| نطاق الرؤية الليلية | 50 أقدام |
| معدل الإطارات | 30 إطارًا في الثانية |
| وضع التسجيل | الكشف المستمر عن الحركة |
| إجمالي منافذ USB | 1 |
| واجهة الأجهزة | Ethernet, BNC, VGA |
معلومات الضمان
This Zmodo product is covered by a manufacturer's warranty. For specific details regarding warranty duration, coverage, and claims procedures, please refer to the warranty card included with your product or visit the official Zmodo webالموقع. احتفظ بإيصال الشراء كإثبات للشراء.
دعم العملاء
For technical assistance, troubleshooting, or further inquiries, please contact Zmodo customer support through their official website. Online resources, FAQs, and support forums may also be available to help resolve common issues.
Zmodo Official Webموقع: www.zmodo.com