
The Beadsmith KUMIKIT1
The Beadsmith Kumihimo Starter Kit User Manual
Learn and create beautiful braided projects with ease.
Introduction to Kumihimo Braiding
Kumihimo is a traditional Japanese art form of making braids and cords, literally meaning "gathered threads." This beginner kit provides all the essential tools and materials to start your Kumihimo journey, allowing you to create intricate and beautiful braided designs for jewelry and other crafts.
محتويات الطقم
Your Beadsmith Kumihimo Starter Kit includes the following components:
- Kumihimo Braiding Disk: A round foam disk with 32 slots, essential for creating various braid patterns.
- ZAP Jewelry Gel: An adhesive for securing braid ends and attaching findings.
- Bob-Eez No-Tangle Thread Bobbins (8 pieces): 2.25-inch diameter bobbins to keep your threads organized and tangle-free during braiding.
- Findings & Finished Accessories: Includes one toggle clasp, two jump rings, two end clasps, and one pendant slide for finishing your braided creations.
- Colorful Kumihimo Braid (Rattail Cord): A mix of 3 yards x 4 strands of 2mm cord to get you started on your first project.
- تعليمات صampهليت: Detailed instructions for creating 8-warp and 16-warp braids, whipping, and finishing braid ends, along with directions for three specific projects (Ivy Leaf Necklace, Seahorse Necklace, and Hearts Necklace).

الصورة: أكثر منview of the Kumihimo Starter Kit components, showing the braiding disk, Zap Jewelry Gel, Bob-Eez bobbins, various metal findings, and a bundle of colorful rattail cord.
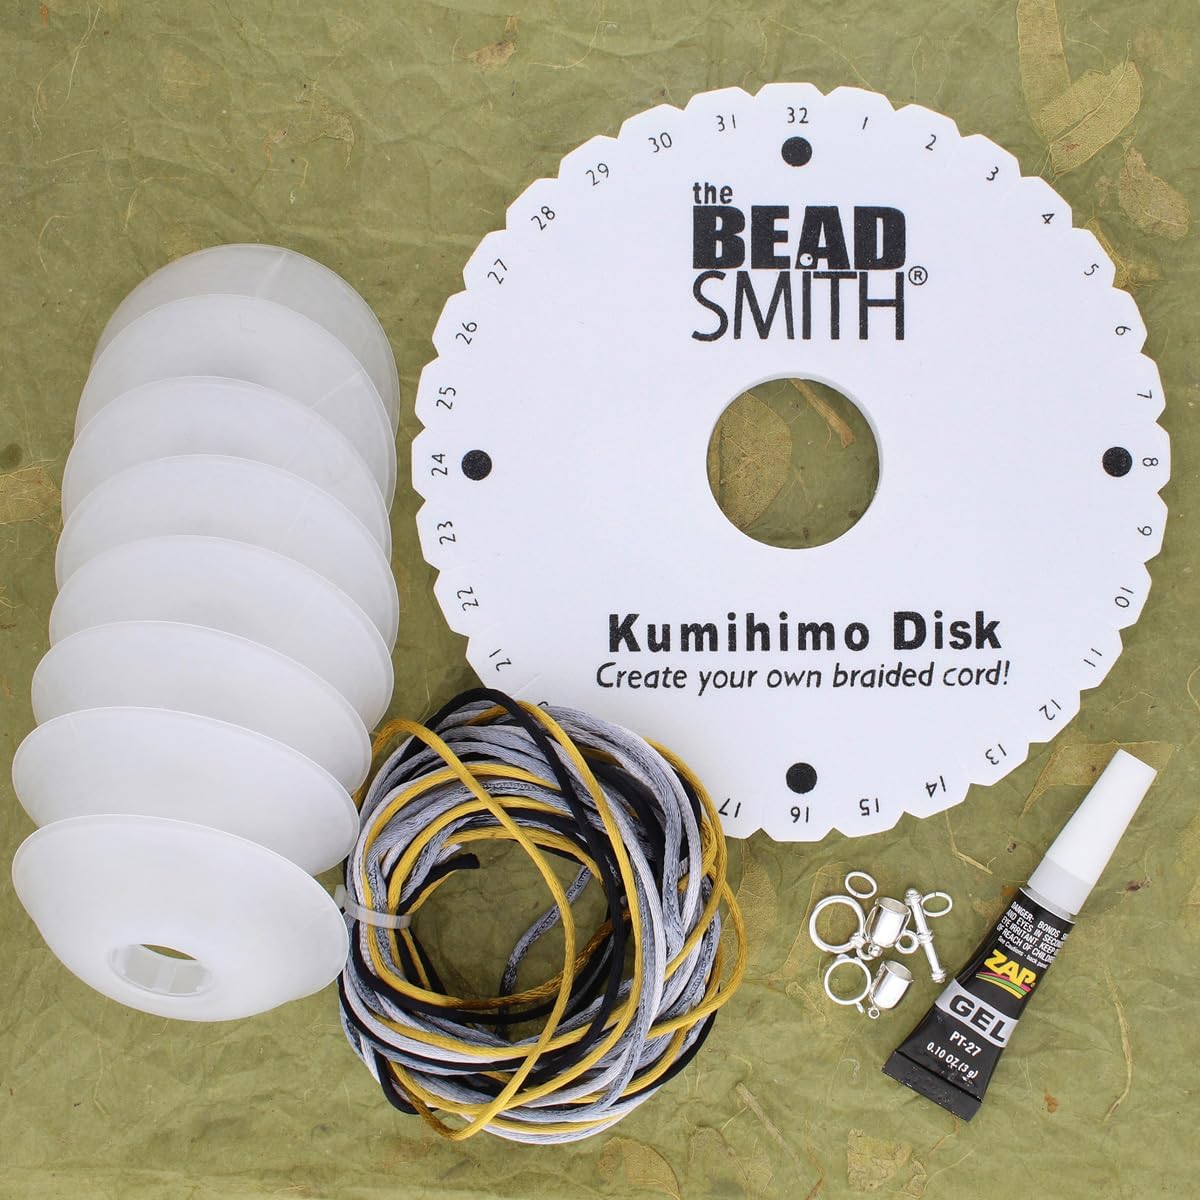
Image: A complete display of the kit's contents, including the Kumihimo disk, eight bobbins, a coil of multi-colored cord, a tube of jewelry gel, and a small assortment of metal findings like clasps and jump rings, all arranged on a textured green surface.

Image: The packaging for the Kumihimo Braiding Kit for Beginners, showing the kit's contents partially visible and labeled with letters (a-e) to indicate the braiding disk, bobbins, cord, accessories, and jewelry gel.
Setup and Basic Braiding Instructions
يقدم هذا القسم أكثر من عامةview of setting up your Kumihimo disk and performing a basic 8-warp braid. For detailed, step-by-step instructions and project ideas, please refer to the included instruction pampهليت.
Video Tutorial: Kumihimo Braiding for Beginners
Video: An official tutorial from The Beadsmith demonstrating the step-by-step process of setting up the Kumihimo disk and performing a basic braid. This video is 1 minute and 21 seconds long and provides a visual guide to the braiding technique.
General Setup Steps:
- Prepare Your Cords: Cut your chosen cords to the desired length. The kit provides enough material for an 18-inch braid.
- Load Bobbins: Wind each cord onto a Bob-Eez No-Tangle thread bobbin to keep them organized and prevent tangling during braiding.
- Initial Knot: Tie all cords together in an overhand knot at one end.
- Position on Disk: Place the knot through the center hole of the Kumihimo disk. Distribute the cords into the designated slots around the disk according to the braid pattern you wish to create (e.g., 8-warp braid uses 8 slots).
Basic 8-Warp Braiding Steps (Refer to pamphlet for diagrams):
The fundamental principle involves moving cords from one slot to another in a specific sequence. For an 8-warp braid, you typically work with four pairs of cords.
- وضع البداية: Ensure cords are positioned correctly on the disk (e.g., two cords at the top, two at the bottom, two on the left, two on the right, with empty slots between pairs).
- Move Top-Right Cord: Take the cord from the top-right slot and move it down to the bottom-right empty slot.
- Move Bottom-Left Cord: Take the cord from the bottom-left slot and move it up to the top-left empty slot.
- Rotate Disk: Rotate the disk a quarter turn counter-clockwise.
- يكرر: Continue steps 2-4 until your braid reaches the desired length. The braid will emerge from the center hole of the disk.
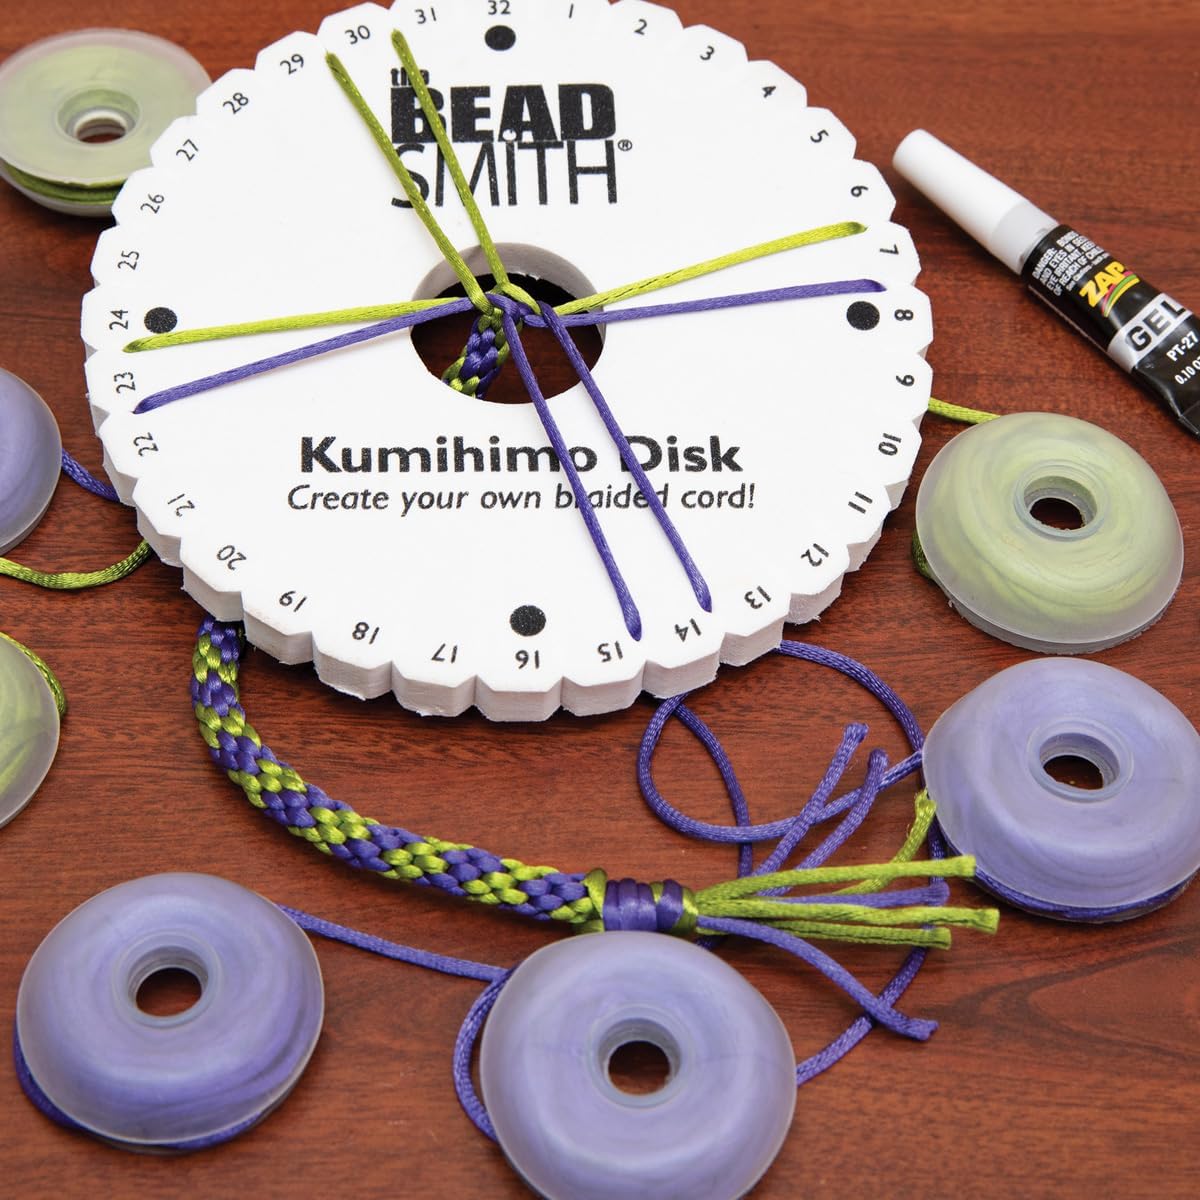
Image: A close-up of the Kumihimo disk in use, with green and purple cords threaded through its slots and attached to Bob-Eez bobbins. A partially completed braid is visible emerging from the center, demonstrating the braiding process.
Finishing Your Braids
Once your braid reaches the desired length, you will need to finish the ends to prevent unraveling and attach findings.
- Remove from Disk: Carefully remove the cords from the disk slots.
- نهايات آمنة: Apply a small amount of ZAP Jewelry Gel to the ends of your braid to secure the threads. Allow it to dry completely.
- Attach Findings: Use the provided end clasps, jump rings, and toggle clasp to create a wearable piece of jewelry. For necklaces, a pendant slide can be used to attach a charm or focal bead.
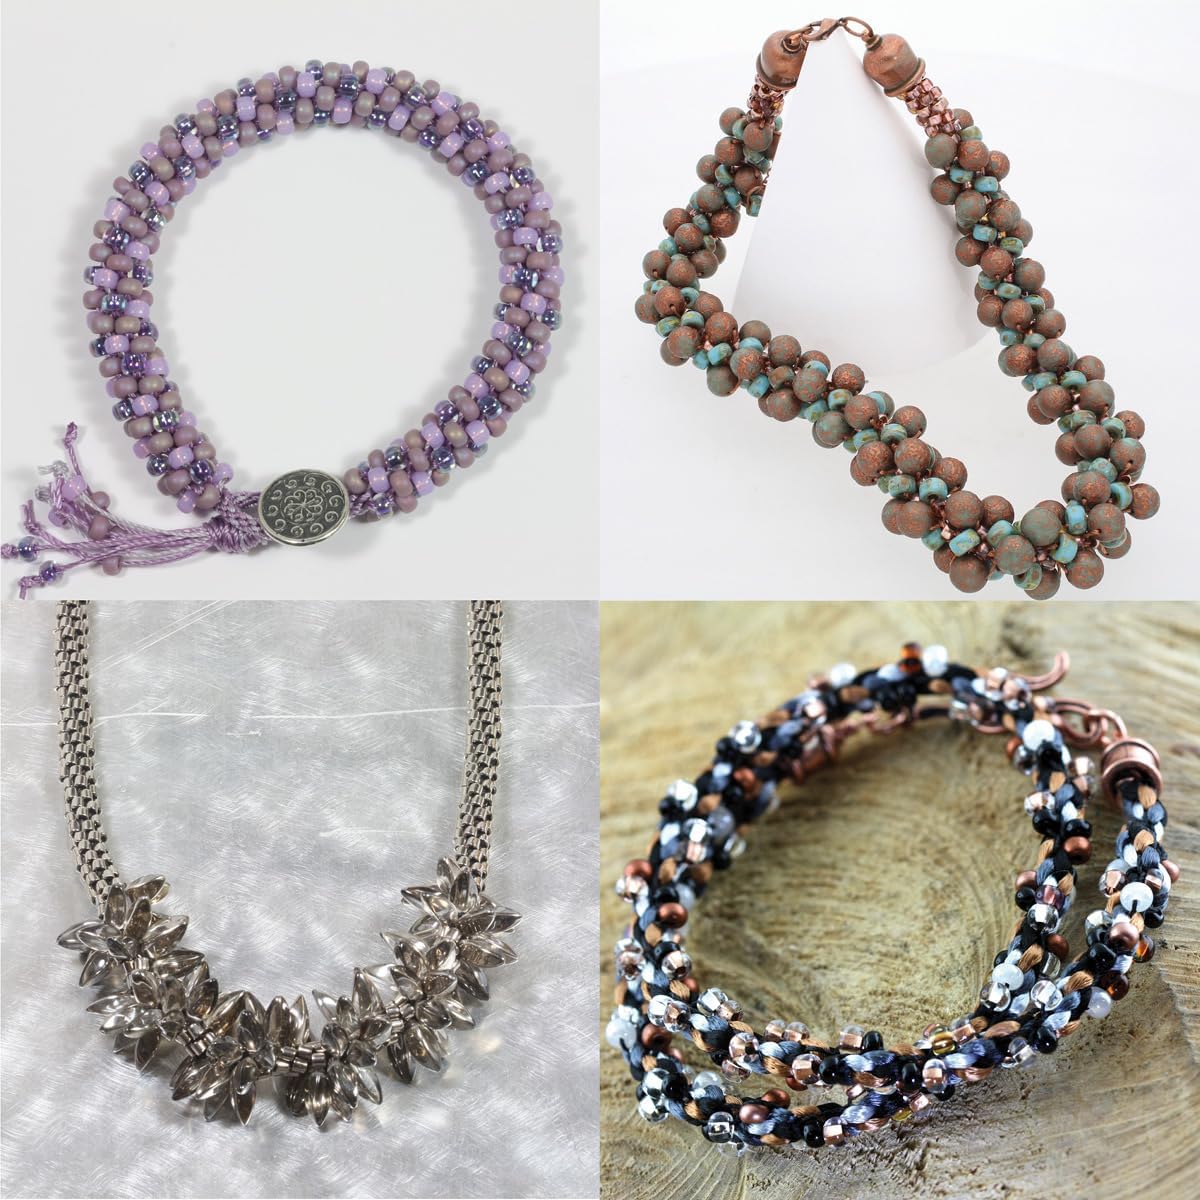
الصورة: عرض الكولاجasing various finished Kumihimo projects, including beaded necklaces and bracelets, demonstrating the versatility and creative potential of the braiding technique.
الصيانة والعناية
To ensure the longevity of your Kumihimo kit and creations:
- Clean the Disk: Wipe the Kumihimo disk with a soft, dry cloth after use to remove any dust or residue. Avoid harsh chemicals.
- Store Cords Properly: Keep unused cords and bobbins organized to prevent tangling and damage.
- Jewelry Care: Finished Kumihimo jewelry should be stored away from direct sunlight and moisture. Clean gently with a soft cloth as needed. Avoid exposing jewelry to harsh chemicals or excessive force.
استكشاف الأخطاء وإصلاحها
If you encounter issues while using your Kumihimo kit, consider the following common solutions:
- Cords Tangling: Ensure all cords are properly wound onto the Bob-Eez bobbins. Maintain consistent tension while braiding.
- Uneven Braid: This often results from inconsistent tension or incorrect cord movement. Review the braiding steps in the instruction pamphlet or the video tutorial to ensure accuracy. Practice helps achieve uniform tension.
- Braid Not Forming: Double-check that your initial cord setup on the disk matches the pattern diagram. Ensure you are moving the correct cords in the specified sequence.
- مشاكل اللصق: If the ZAP Jewelry Gel is not holding, ensure the braid ends are clean and dry before application. Allow sufficient drying time.
مواصفات المنتج
| يصف | التفاصيل |
|---|---|
| ماركة | The Beadsmith |
| رقم الموديل | KUMIKIT1 |
| أبعاد العنصر (الطول × العرض × الارتفاع) | 7.5 × 2 × 9.75 بوصة |
| وزن العنصر | 0.32 أونصة (حوالي 9.07 جرامًا) |
| مادة | Gel (for adhesive), Foam (for disk), Plastic (for bobbins), Cord (for braiding) |
| عدد القطع | 1 (عدة) |
| نوع مجموعة الحرف الفنية | Kumihimo |
| الفئة العمرية (الوصف) | بالغ |
الضمان والدعم
The Beadsmith is committed to providing quality products. For any questions regarding your Kumihimo Starter Kit, including missing components or issues with materials, please contact The Beadsmith customer support directly. While specific warranty details are not provided in this manual, The Beadsmith aims for customer satisfaction.
You can often find contact information or additional resources on the official Beadsmith website or through the retailer where you purchased the kit.
Ask a question about this manual
Ask about setup, troubleshooting, compatibility, parts, safety, or missing instructions. Manuals+ will review the question and use this page’s manual context to help answer it.