1. المقدمة
This manual provides essential information for the safe and efficient operation of your Technaxx Wireless CarPlay & Android Car Monitor TX-361. Please read this manual thoroughly before using the device and retain it for future reference. The TX-361 is designed to integrate modern smartphone connectivity, including Apple CarPlay and Android Auto, into your vehicle without requiring a complex car radio replacement. It also features an integrated DAB digital radio for enhanced audio experience.
2. معلومات السلامة
- استخدم الجهاز دائمًا بمسؤولية ووفقًا لقوانين المرور المحلية. فالقيادة المشتتة قد تؤدي إلى حوادث.
- لا تحاول تفكيك الجهاز أو تعديله. قد يؤدي ذلك إلى إلغاء الضمان ويشكل مخاطر على السلامة.
- احتفظ بالجهاز بعيدًا عن درجات الحرارة العالية وأشعة الشمس المباشرة والرطوبة.
- تأكد من تثبيت الجهاز بإحكام وعدم إعاقته لـ view أو التدخل في التحكم في السيارة.
- استخدم فقط كابل الطاقة والملحقات المتوفرة.
- If the device malfunctions, disconnect it from the power source and contact customer support.
3. محتويات العبوة
تأكد من تضمين جميع العناصر المدرجة أدناه في الحزمة الخاصة بك:
- DAB 7-inch CarPlay with Touch Screen TX-361
- Power Supply (USB-A to USB-C, 1.5m cable)
- AUX Cable (1m)
- هوائي DAB
- Holder (Mounting Bracket)
- دليل المستخدم
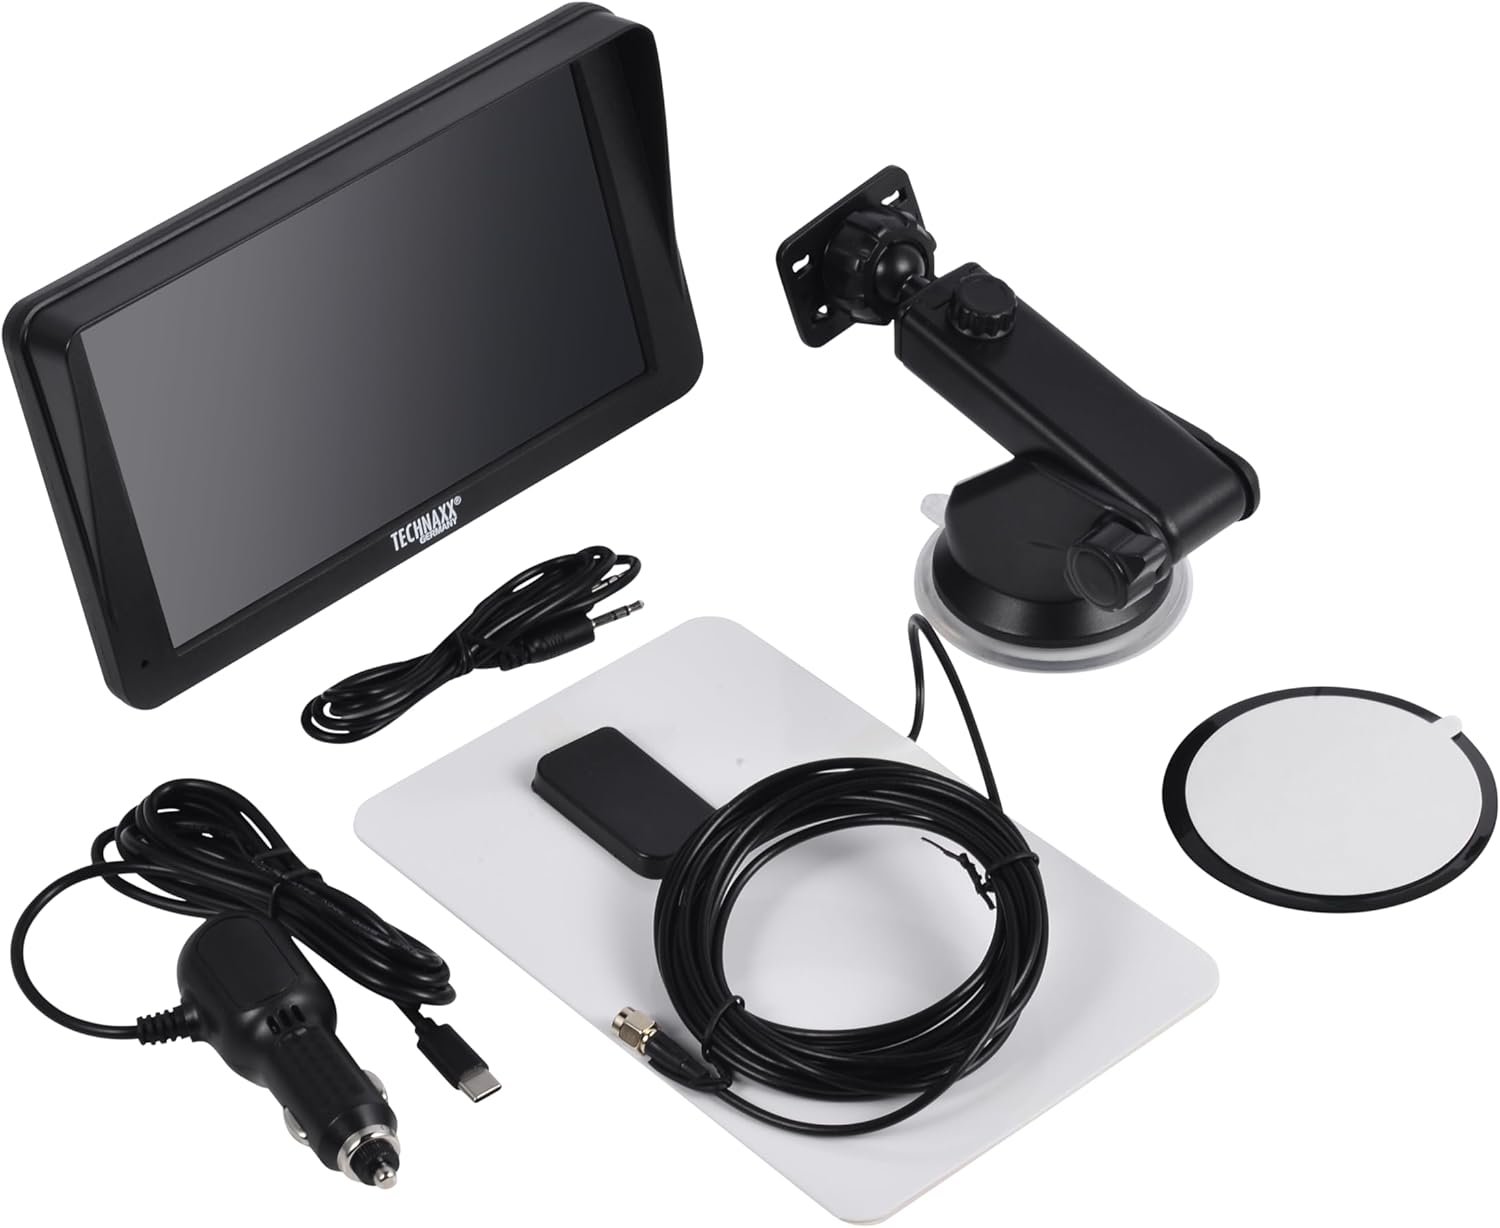
Image: All components included in the Technaxx TX-361 package, neatly laid out.
4. انتهى المنتجview
Familiarize yourself with the main components of your TX-361 monitor.
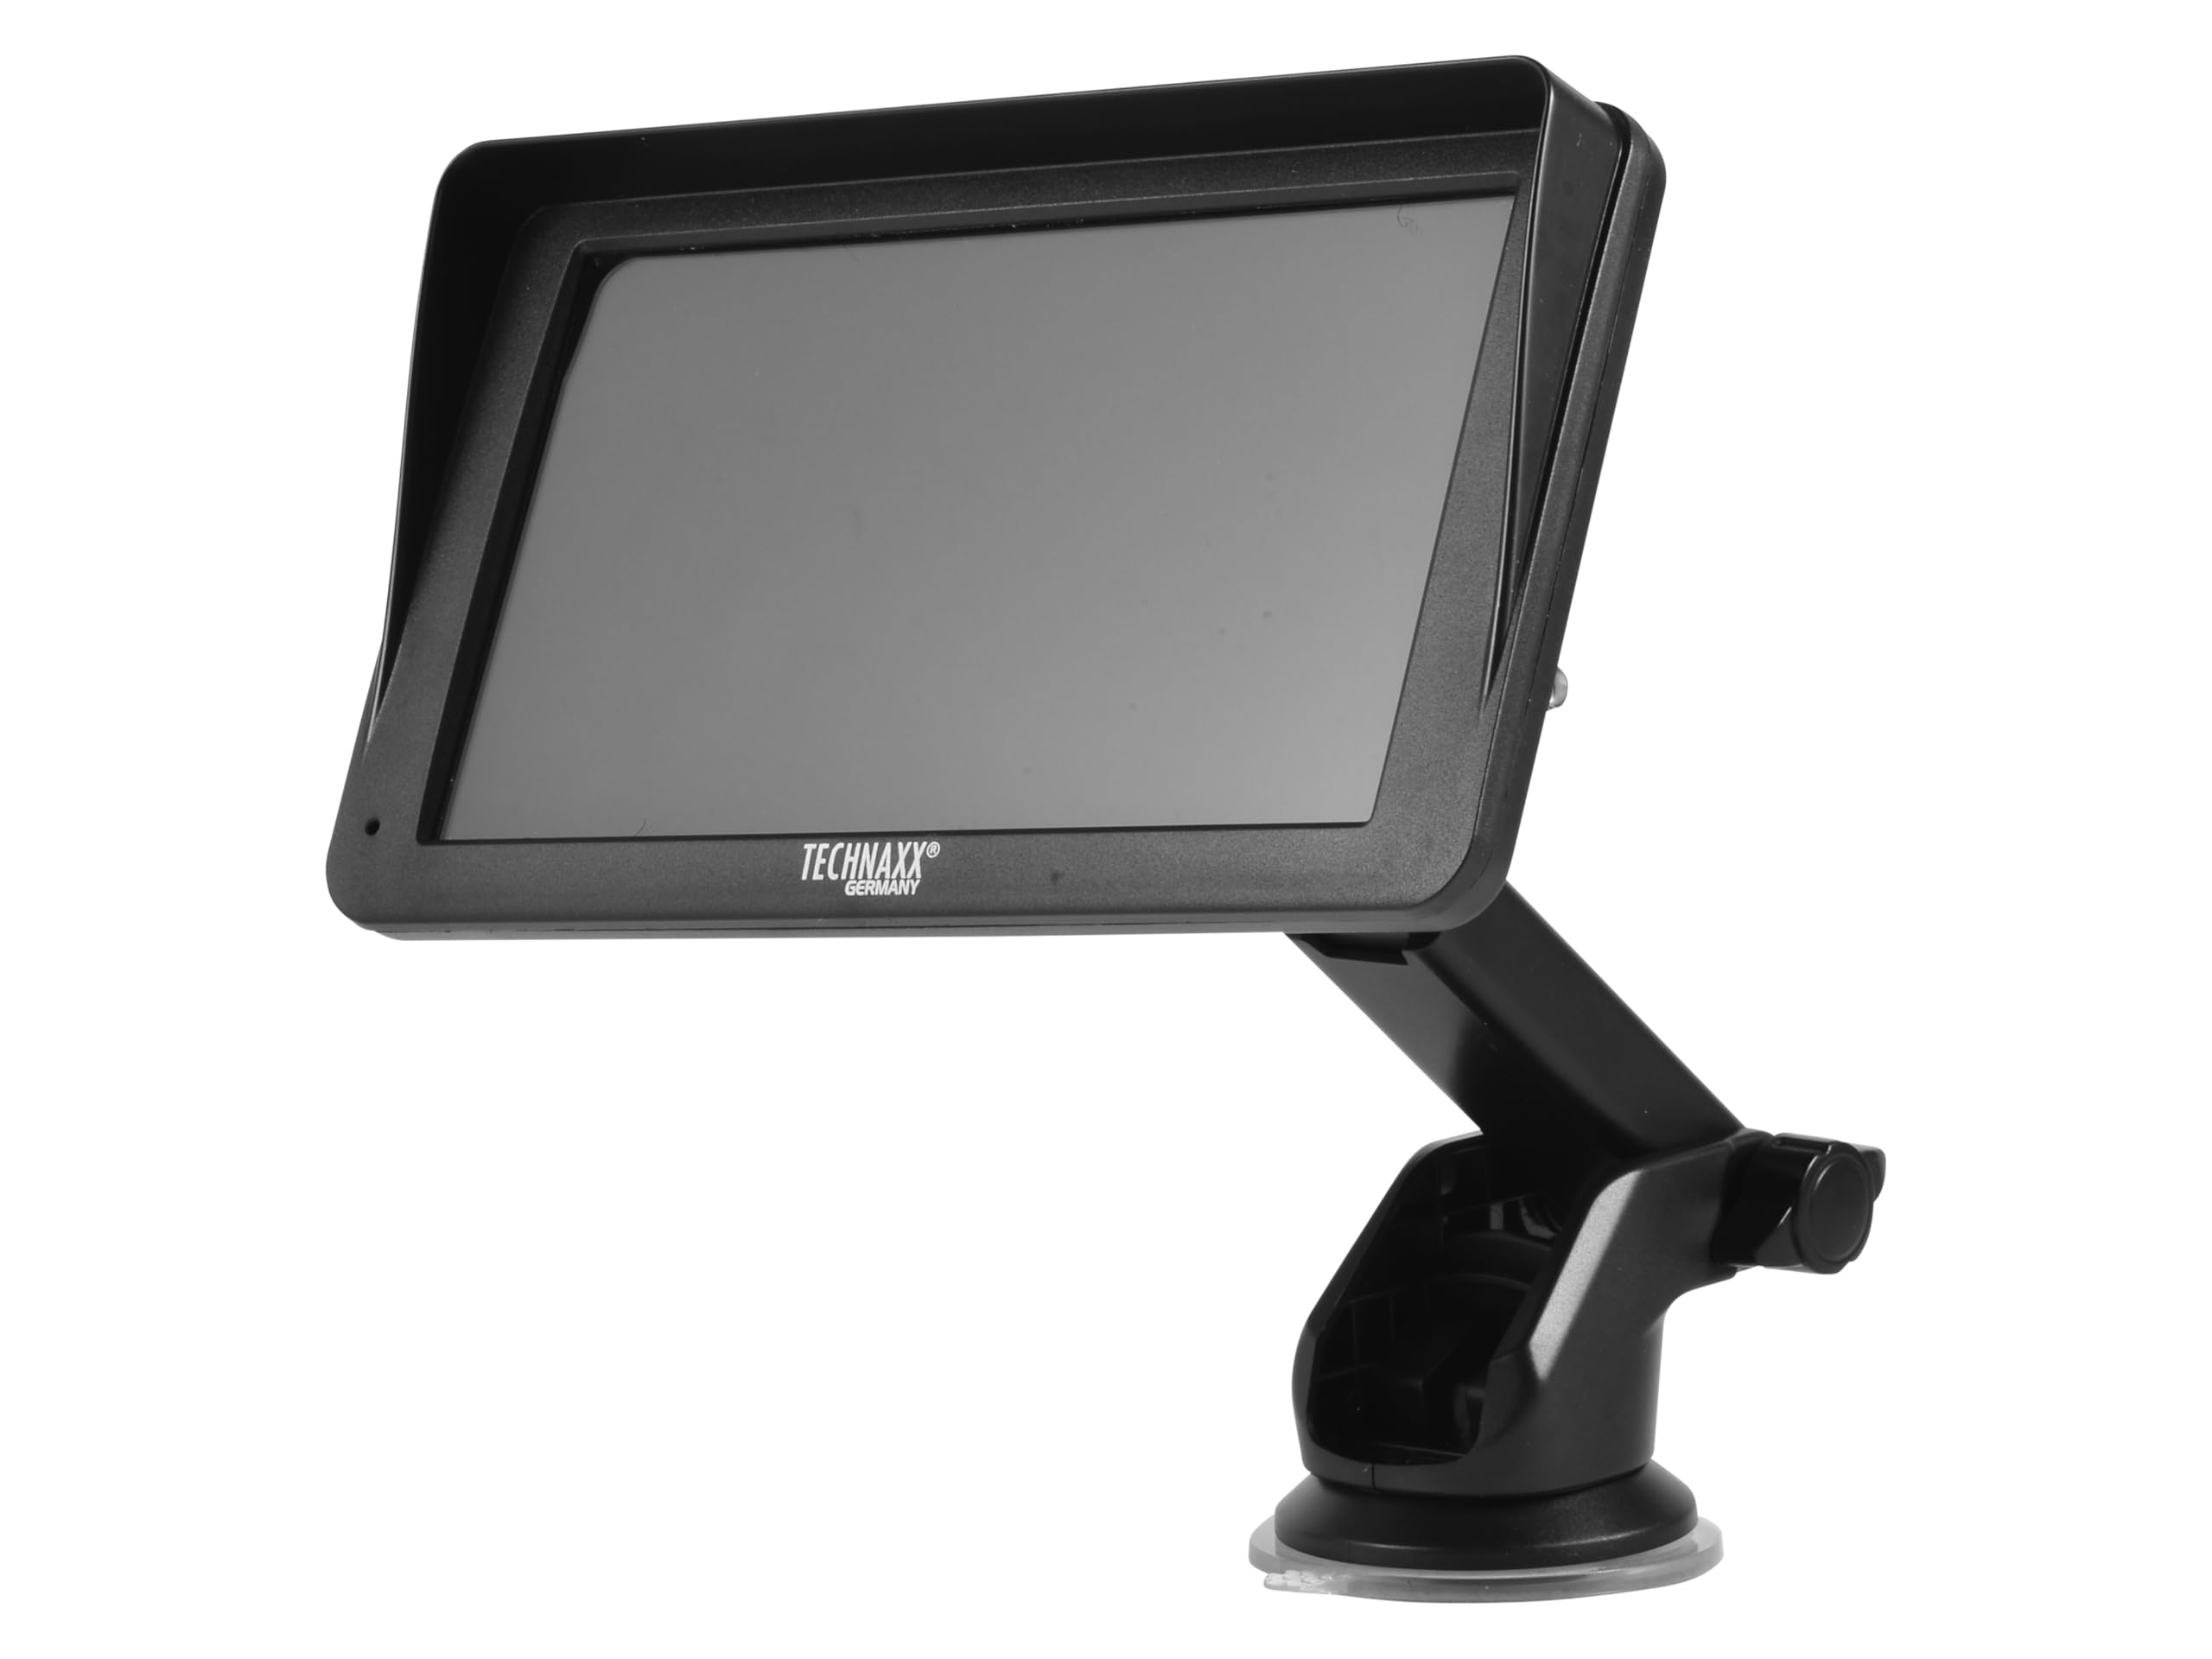
الصورة: الجبهة view of the TX-361 monitor with its 7-inch display and 'TECHN AXX GERMANY' branding, attached to the adjustable mounting stand.

الصورة: الخلفية view of the TX-361 monitor, highlighting the ventilation grilles and the attachment point for the mounting bracket.

الصورة: مفصلة view of the right side of the TX-361 monitor, showing the power button, reset button, USB-C power input, AUX output, and USB-A port.
4.1. مكونات الجهاز
- شاشة لمس سعوية مقاس 7 بوصة: الشاشة الرئيسية لجميع الوظائف.
- زر الطاقة: يقع في أعلى الجانب الأيمن.
- زر إعادة الضبط: Small pinhole button for system reset.
- منفذ USB-C: لإدخال الطاقة.
- إخراج AUX: 3.5mm jack for wired audio transmission.
- منفذ USB-A: For media playback or charging external devices.
- DAB Antenna Input: Connector for the external DAB antenna.
- مكبر صوت متكامل: For direct audio playback.
5. الإعداد
5.1. تركيب الجهاز
The TX-361 can be mounted on your vehicle's windscreen or dashboard using the provided holder.
- قم بتثبيت الشاشة على حامل التثبيت.
- For Windscreen Mounting: Clean the desired area on the windscreen. Press the suction cup firmly against the glass and engage the lever to secure it.
- For Dashboard Mounting: Clean the desired area on the dashboard. If necessary, use the adhesive disc provided for a more secure attachment point for the suction cup. Press the suction cup firmly and engage the lever.
- اضبط زاوية الشاشة بالشكل الأمثل viewالقيادة دون إعاقة قيادتك view.

Image: The TX-361 monitor securely mounted on a car dashboard, showing its position relative to the driver's view.

Image: The TX-361 monitor mounted on a car windscreen, demonstrating an alternative placement option.
5.2. توصيل الطاقة
- Connect the USB-C end of the power cable to the USB-C port on the monitor.
- Plug the USB-A end of the power cable into the provided 12V/24V cigarette lighter adapter.
- Insert the cigarette lighter adapter into your vehicle's 12V/24V power socket. The device will power on automatically or can be turned on using the power button.
5.3. DAB Antenna Connection
For optimal DAB radio reception, connect the included DAB antenna:
- Connect the DAB antenna cable to the dedicated DAB antenna input on the monitor.
- Mount the DAB antenna on your windscreen or another suitable location, ensuring it has clear line of sight for best signal reception.
6. تعليمات التشغيل
6.1. تشغيل / إيقاف التشغيل
- تشغيل الطاقة: The device typically powers on automatically when connected to the vehicle's power. If not, press and hold the power button on the top right side.
- إيقاف التشغيل: Press and hold the power button until the device shuts down. A short press will turn the screen off/on.
6.2. Initial Setup and Smartphone Connection
The TX-361 supports wireless Apple CarPlay and Android Auto via Wi-Fi and Bluetooth 5.0.
- تأكد من تفعيل خاصية الواي فاي والبلوتوث في هاتفك الذكي.
- On the TX-361 monitor, navigate to the CarPlay or Android Auto section.
- The monitor will display a Bluetooth name. On your smartphone, search for and connect to this Bluetooth device.
- Once connected via Bluetooth, the device will prompt you to enable Wi-Fi for CarPlay/Android Auto functionality. Confirm the connection on your phone.
- After successful pairing, Apple CarPlay or Android Auto will launch automatically on the monitor.
6.3. تشغيل شاشة اللمس
The 7-inch capacitive touchscreen allows for intuitive control:
- مقبض: Select items or confirm actions.
- انتقاد: Navigate through menus or lists.
- التكبير والتصغير: (Where supported, e.g., in navigation apps) Adjust map zoom levels.
6.4. DAB Digital Radio
To use the integrated DAB digital radio:
- Ensure the DAB antenna is properly connected.
- From the main menu, select the 'DAB Radio' option.
- The device will automatically scan for available DAB stations.
- Select your desired station from the list.
6.5. راديو FM
For traditional FM radio reception:
- From the main menu, select the 'FM Radio' option.
- استخدم عناصر التحكم الموجودة على الشاشة للبحث عن المحطات أو لضبط التردد يدويًا.
6.6. خيارات إخراج الصوت
The TX-361 offers several ways to transmit audio to your vehicle's sound system:
- مكبر صوت متكامل: Audio will play directly from the monitor's built-in speaker.
- كابل AUX: Connect the provided 3.5mm AUX cable from the monitor's AUX output to your car's AUX input. Select 'AUX' as the input source on your car radio.
- إرسال FM: Select an unused FM frequency on the TX-361 and tune your car radio to the same frequency. Audio will be transmitted wirelessly to your car's speakers.
7. الصيانة
- تنظيف: استخدم قطعة قماش ناعمة وجافة لتنظيف الشاشة والجزء الخارجي من الجهاز. لا تستخدم المنظفات الكاشطة أو المذيبات.
- تخزين: في حالة تخزين الجهاز لفترة طويلة، افصله عن مصدر الطاقة وخزنه في مكان بارد وجاف.
- تحديثات البرامج: التحقق بشكل دوري من الشركة المصنعة website for any available firmware updates to ensure optimal performance.
8. استكشاف الأخطاء وإصلاحها
| مشكلة | الحل المحتمل |
|---|---|
| الجهاز لا يعمل. |
|
| لا يمكن الاتصال بـ CarPlay/Android Auto. |
|
| Poor DAB/FM radio reception. |
|
| لا يوجد إخراج صوتي. |
|
9. المواصفات
| ميزة | مواصفة |
|---|---|
| رقم الموديل | 5361 |
| عرض | شاشة تعمل باللمس بالسعة 7 بوصة |
| تكنولوجيا الاتصال | Wi-Fi (Dual-band 2.4 / 5 GHz), Bluetooth 5.0 |
| المميزات الخاصة | Wireless CarPlay & Android Auto, DAB Digital Radio, FM Radio, Touchscreen Display |
| نطاق تردد DAB | Band III: 174-240 MHz |
| مخرج الصوت | AUX, FM Transmission, Integrated Speaker |
| مزود الطاقة | 12V/24V via Cigarette Lighter |
| أبعاد المنتج (العمق × العرض × الارتفاع) | 18.8 سم عمق × 10.8 سم عرض × 3.5 سم ارتفاع |
| وزن العنصر | 0.58 رطل (حوالي 263 جرامًا) |
10. الضمان والدعم
Technaxx products are covered by a manufacturer's warranty. For detailed warranty information, please refer to the warranty card included with your product or visit the official Technaxx website. For technical support, troubleshooting assistance, or service inquiries, please contact Technaxx customer support through their official channels.
يمكنك غالبًا العثور على موارد إضافية، وأسئلة شائعة، ومعلومات الاتصال على Technaxx official webموقع.